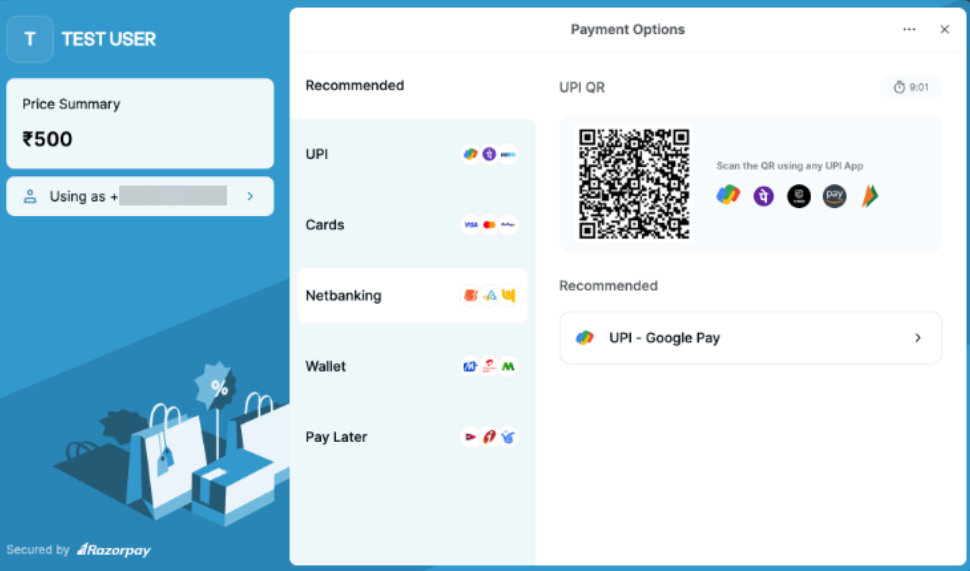
All available payments options in the payments tab
Within the Payments section of your system, you can create and send invoices, manage orders and transactions, add products, set up taxes, and integrate both PayPal and Stripe as merchant processors. Using these payment features will allow you to charge for products and services, to manage your business. You can save time and work more efficiently by collecting all payment-related aspects of your business in one convenient location
NOTE: You can also accept multiple currencies for products, invoices, and text-to-pay links, making it easier to cater to a global audience and enhance your payment flexibility. Be sure your payment processor supports the selected currencies for smooth transactions
For example, you can create and manage a product directly from this section, and it can be added to Funnels or used within Workflows. The products can also be added to an invoice. Within this section you can also view a list of all your orders and transactions, to help you track payments to your business.
Important note for Stripe Users:
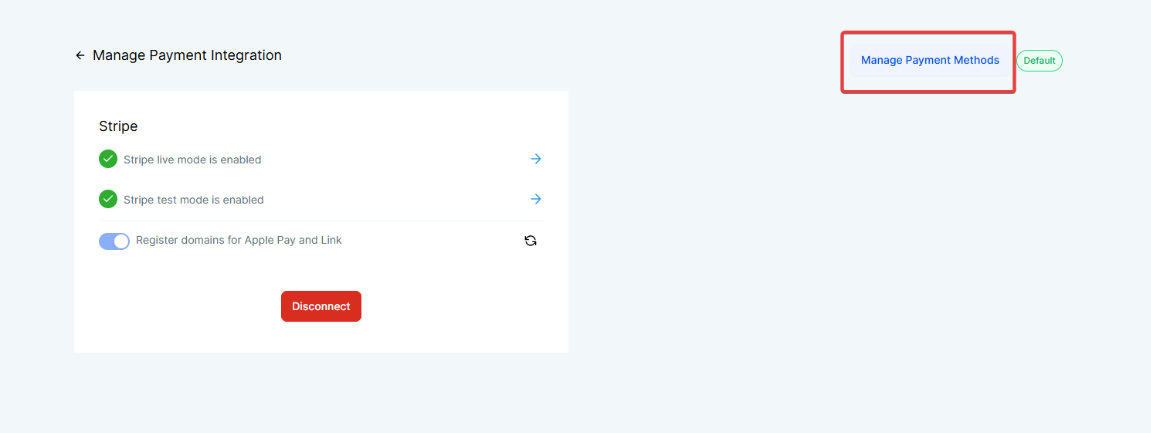
You can manage all your Stripe payment methods within Mastermind. You will not need to navigate over to Stripe anymore.
To locate the payment methods, navigate to Marketing & Sales > Payments > Integrations > Manage Payment Methods, where you can customize settings based on your business needs.
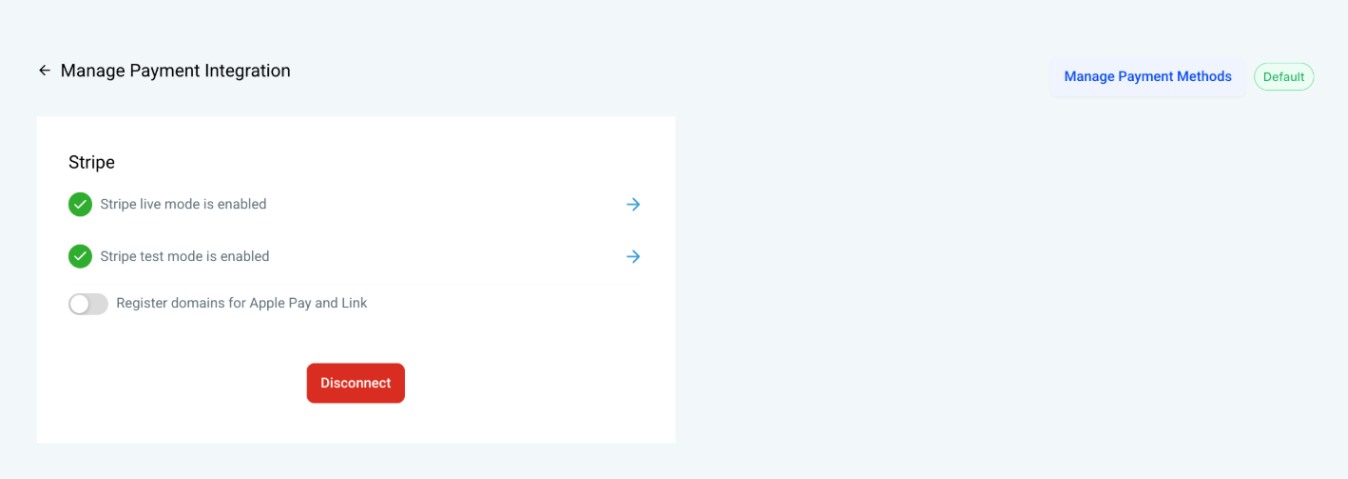
Please note that for subscription products, configurations require at least one subscription added in live mode before they become accessible.
Overview
Invoices & Estimates: prepare and send out customized invoices for payment
Documents & Contracts: This section contains all the documents and templates.
Orders: This tab provides a searchable, sortable list of all orders for your products and services, which can be exported via Excel.
Subscriptions: Keep track of customer subscriptions created via order forms
Payment Links: You can create a payment link for any specific product. Add a product, its details, and its price. Multiple payment links can be created for different products.
Transactions: this tab provides a searchable, sortable list of all transactions in your system, which can be exported via Excel.
Products: create products for the services/products you offer. You can then add them to funnel pages, invoices, and more.
Coupons: You can create coupon codes to offer discounts on products.
Settings: Add tax information, receipts, notifications, and shipping delivery details.
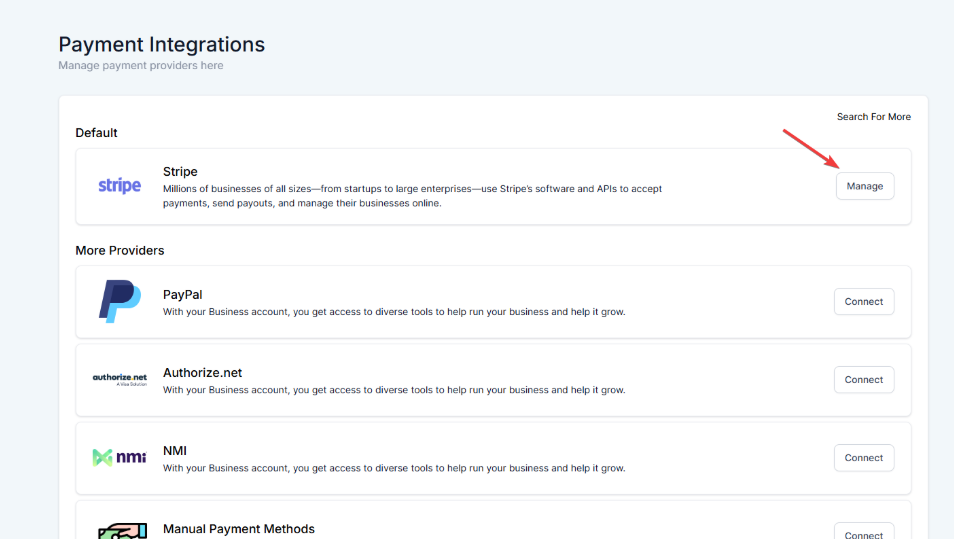
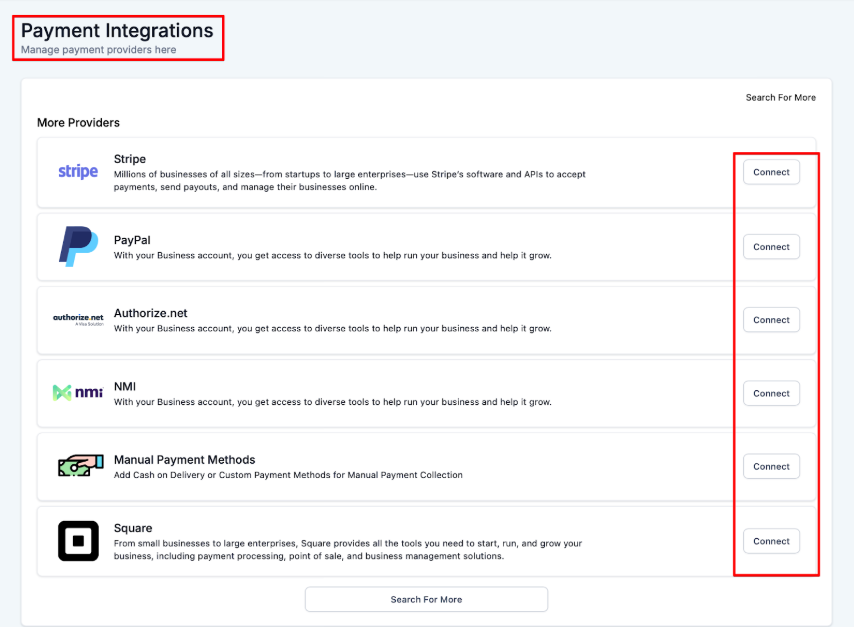
Integrations: connect PayPal, Authorize.net, NMI (Network Merchants Inc.), Manual Payment Methods, Square, and/or Stripe, which are merchant processing platforms that allow you to capture secure payments.
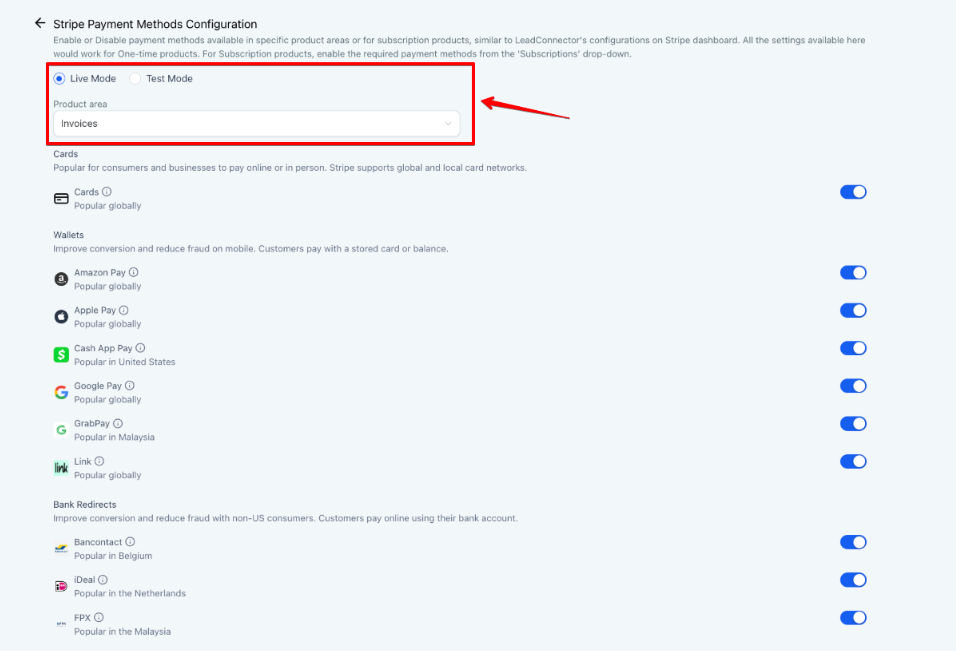
Payment Methods
The following payment methods are supported:
- Cards
- Apple Pay
- Google Pay
- ACH Direct Debit
- Affirm
- Klarna
- AfterPay
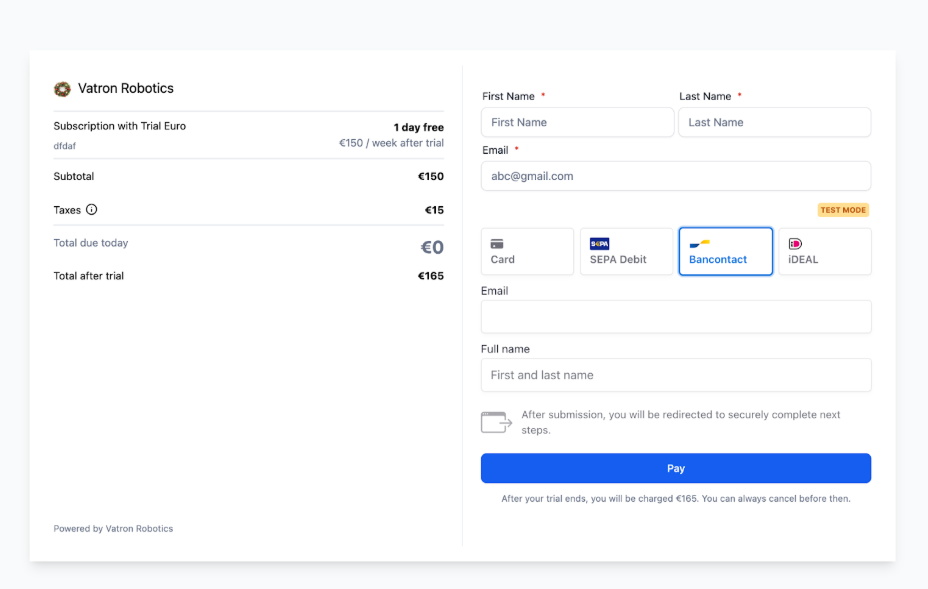
- Bancontact (Popular in Belgium)
- iDEAL (Popular in Netherlands)
- SEPA Direct Debit (Common in the European Union)
- Invoicing
- Estimates
- Tap to Pay
- Text2Pay (Payment Links)
You can manage these payment methods and enable them as needed based on your use case.
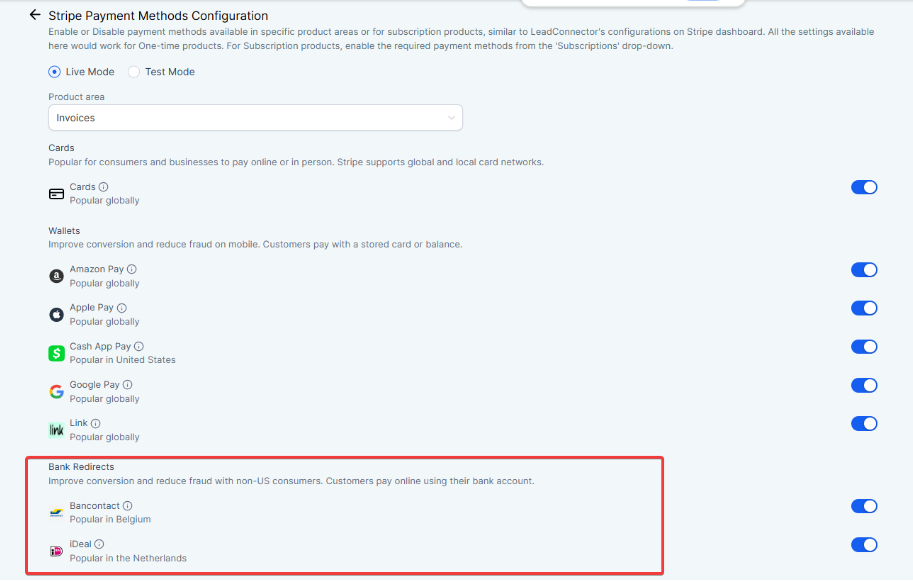
How to Enable Additional Payment Methods
iDEAL & Bancontact:
- Scroll down to the "Bank Redirect" section to enable iDEAL and Bancontact.
SEPA Direct Debit:
- SEPA Direct Debit can be found right under the “Bank Debits” section. Remember to Toggle on to move to the verification process.

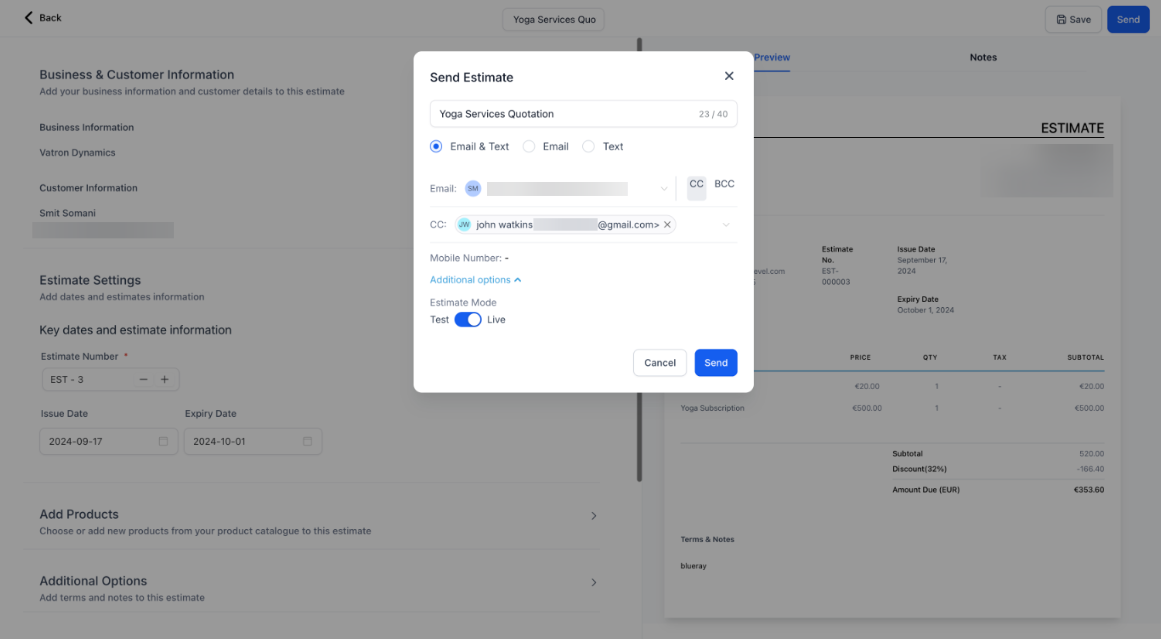
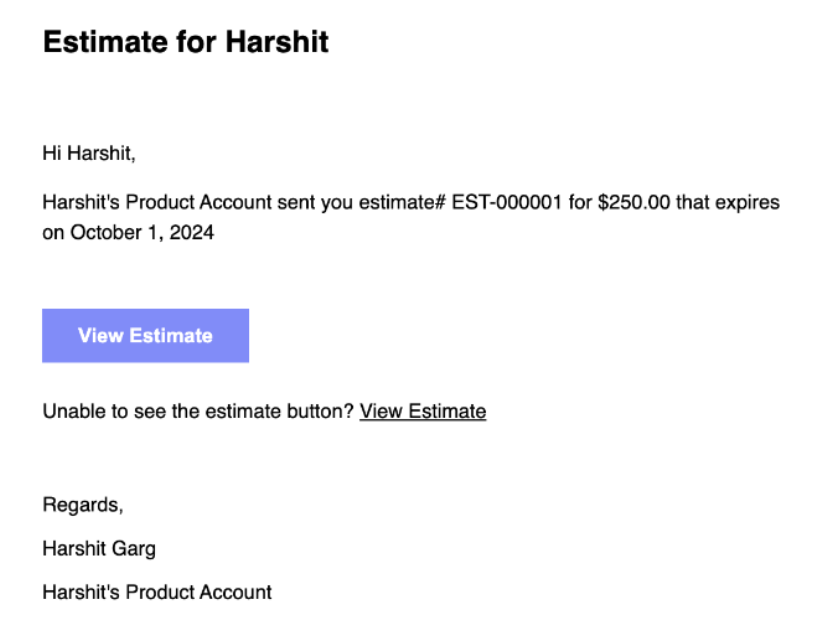
Estimates
- Navigate to Payments > Estimates to create a new estimate.
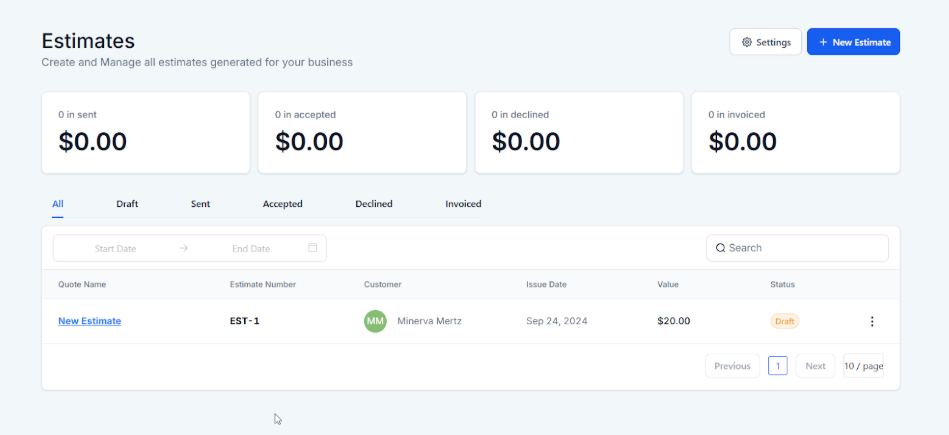
- Send it to clients via email or SMS. The client can accept or reject the estimate. If accepted, it can be converted into an invoice.
Tap to Pay
- Ensure your mobile app is updated and your Stripe account is integrated.
- Select “Tap to Pay” in the app and wait for it to connect.
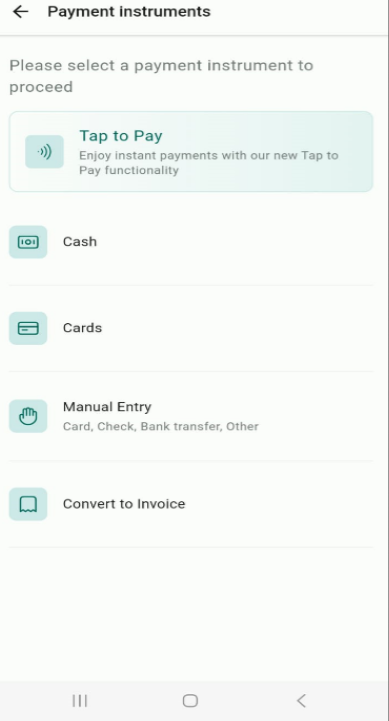
- Ask your customer to tap their payment method on your phone to complete the transaction.
Payment Links:
- Integrate Stripe with your account.
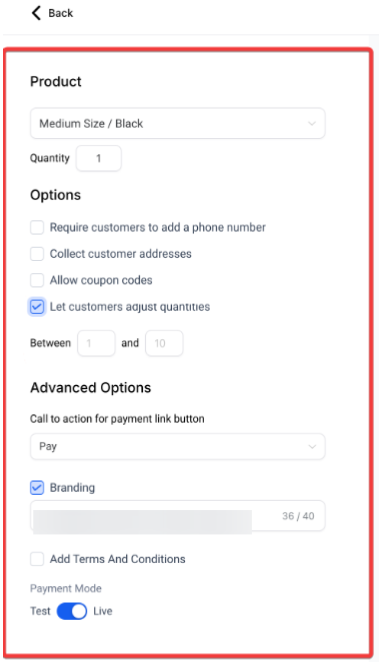
- Create a payment link for any product or service in the Payments section.
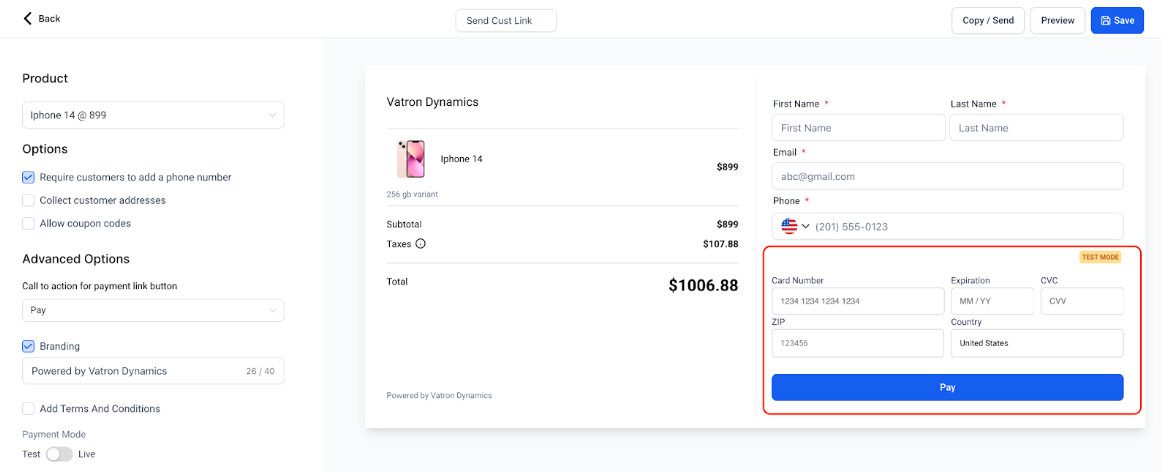
- Set pricing, billing frequency, and customer payment settings like quantity adjustments.
Text2Pay (Payment Links)
- Go to a conversation and click the payment icon.
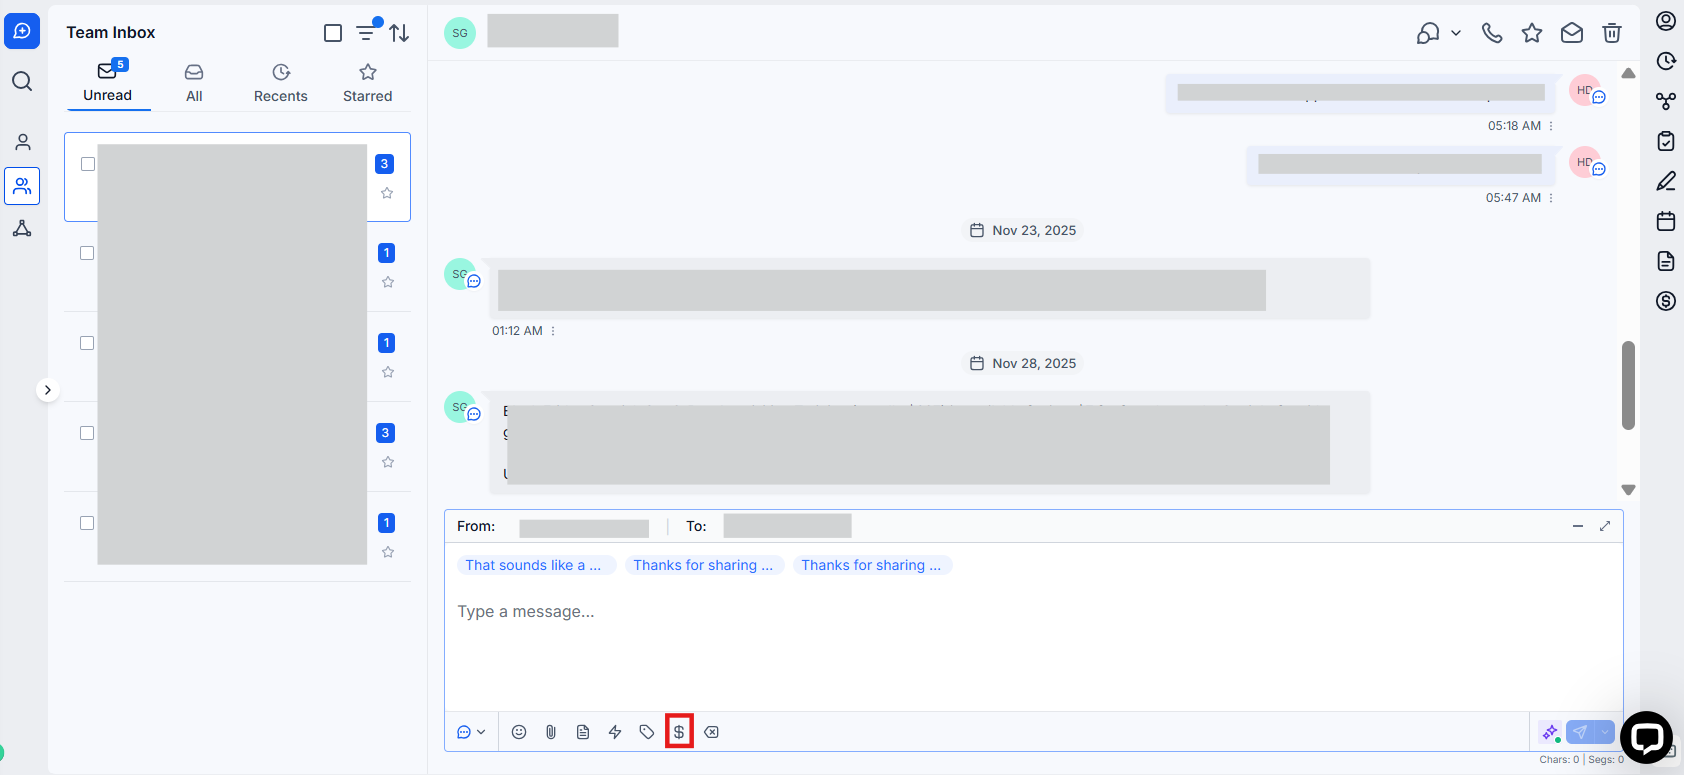
- Add the invoice name, price, and due date.
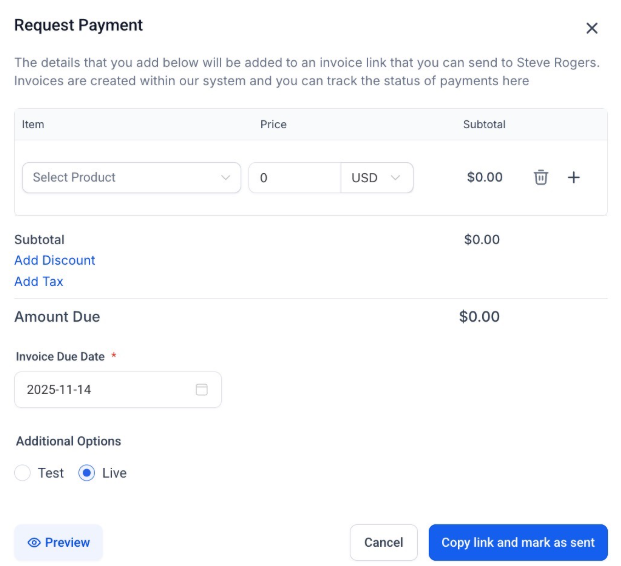
- Save, and a payment link will be generated in the conversation for the customer to pay directly.
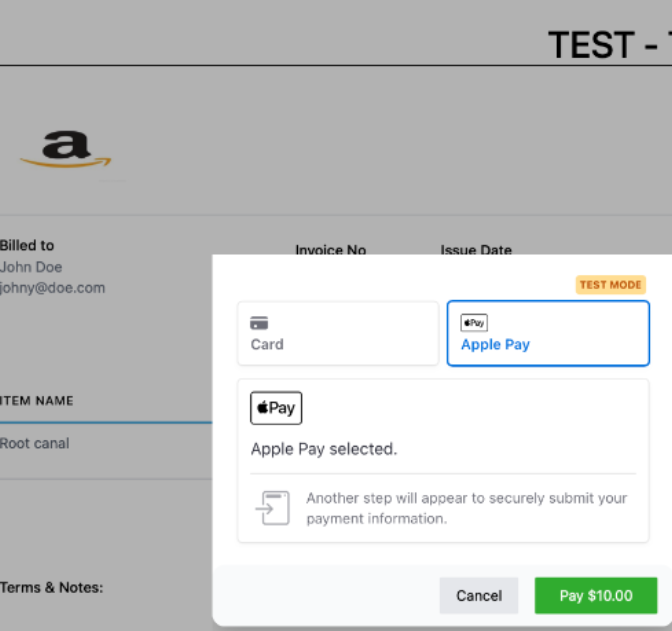
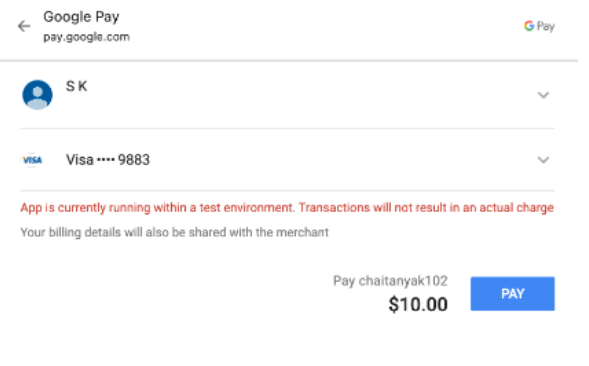
Apple Pay & Google Pay:
1- Connect Stripe: Ensure Stripe is integrated via Payments > Integrations and use Stripe Connect.
2- Enable Payments: Toggle to enable Apple Pay and Google Pay.
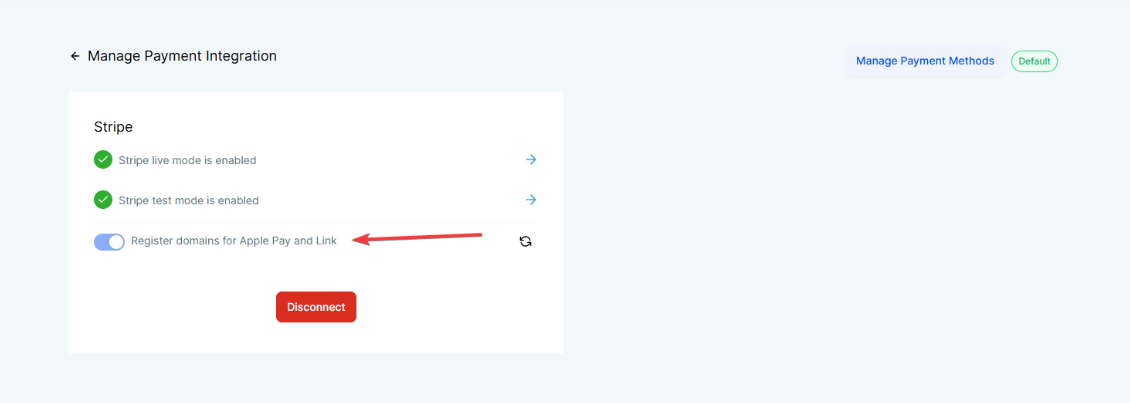
3- Apple Pay Registration: The platform automatically registers your domain for Apple Pay once Stripe is connected.
4- Payment Options: After setup, Apple Pay and Google Pay will appear alongside card payments on order forms, supporting recurring payments and upsells.
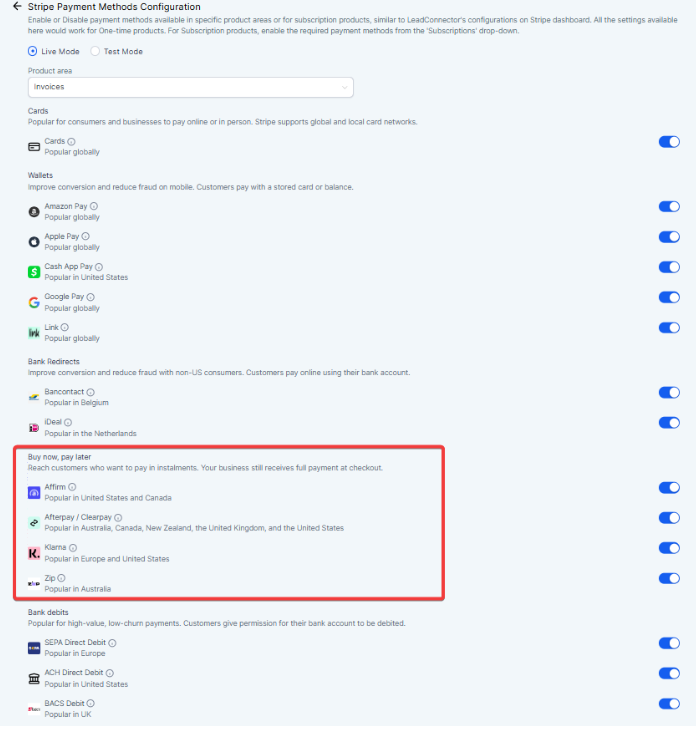
Using BNPL (Klarna/Afterpay) for Invoices:
1- Enable BNPL: Within Mastermind, go to Payments > Integrations > Stripe > Click on Mnagae.
Click on Manage Payment Methods
Scroll down to BNPL and enable Klarna/Afterpay.
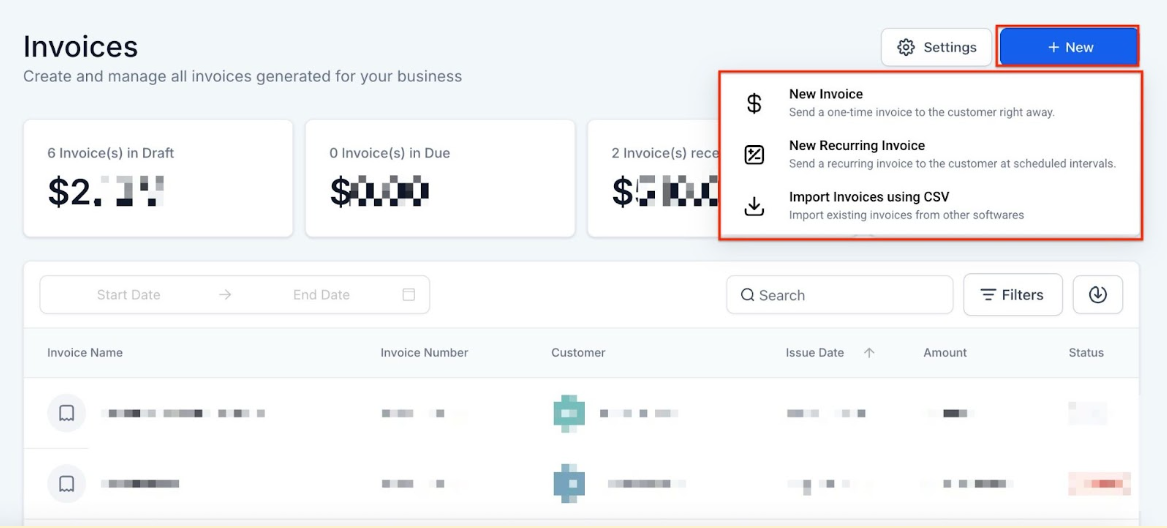
2- Create & Send Invoice: Create an invoice in Payments > Invoices & Estimates and send it to the customer.
3- Customer Payment: The customer opens the invoice, selects a BNPL option, and completes the payment.
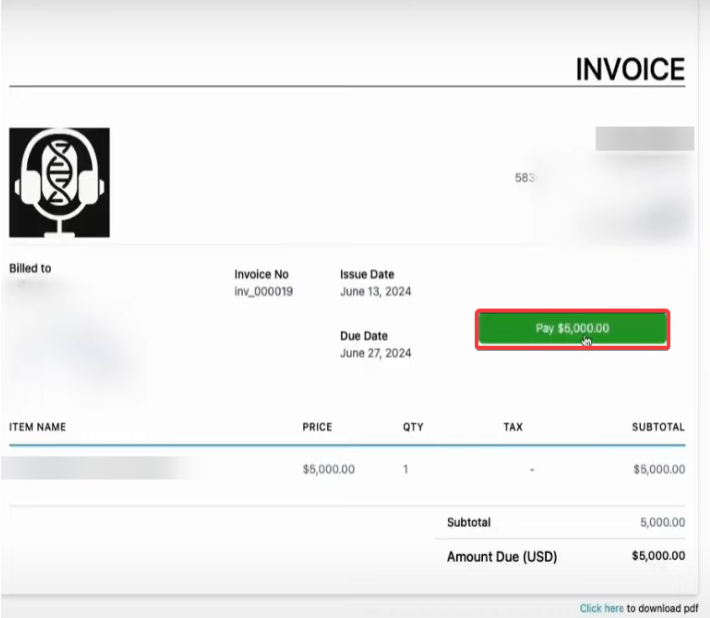
4- Payment Confirmation: The customer will see BNPL options like Klarna and Afterpay. After processing, payment is confirmed and recorded.

View Account
Go to Your Account to see the list of payment methods activated by Mastermind.
Step 1: Accessing the Payments Section
- Navigate to Payments on the Left
Step 2: Integrating PayPal/Stripe/Authorize.net/NMI/Square/Manual payment methods/Custom payment providers
- Navigate to Marketing & Sales > Payments> Integrations
- To integrate a PayPal account, add your Client ID and Secret ID from your PayPal account. Check out our “How to Integrate and Use PayPal” tutorial for step-by-step instructions on creating your PayPal account and setting up the Client ID and Secret ID.
- To integrate NMI, add your Gateway ID, Security Key, and Public Key for the account type you wish to use. Please see our article “Network Merchants Inc. Integration” For more information.
- To integrate Authorize.net add your Login ID, Transaction Key, and Signature Key. For more information, check out our article “Authorize.net Integration”
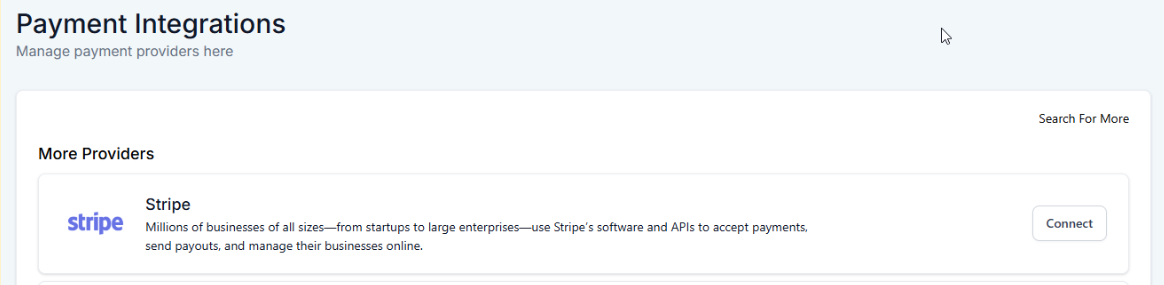
- To integrate a Stripe account, click “Connect with Stripe”.
- Log in to your Stripe account.
- To integrate Square, Click on the Square integration option and follow the prompts to enter your API keys. This will link your Square account to your Mastermind Platform. For more details, check out our article ‘Square Integration for Processing Payments’.
- Accept any permissions requested for LeadConnector.
- Click Save to confirm the integration.
- When Selecting Manual Payment Methods: Choose either 'Cash on Delivery' or create a custom payment method. Ensure that the manual payment method is enabled for either the order form or the e-commerce store. Click Save to apply the changes. For more details check out our article ‘Manual Payment Method in E-commerce Stores’
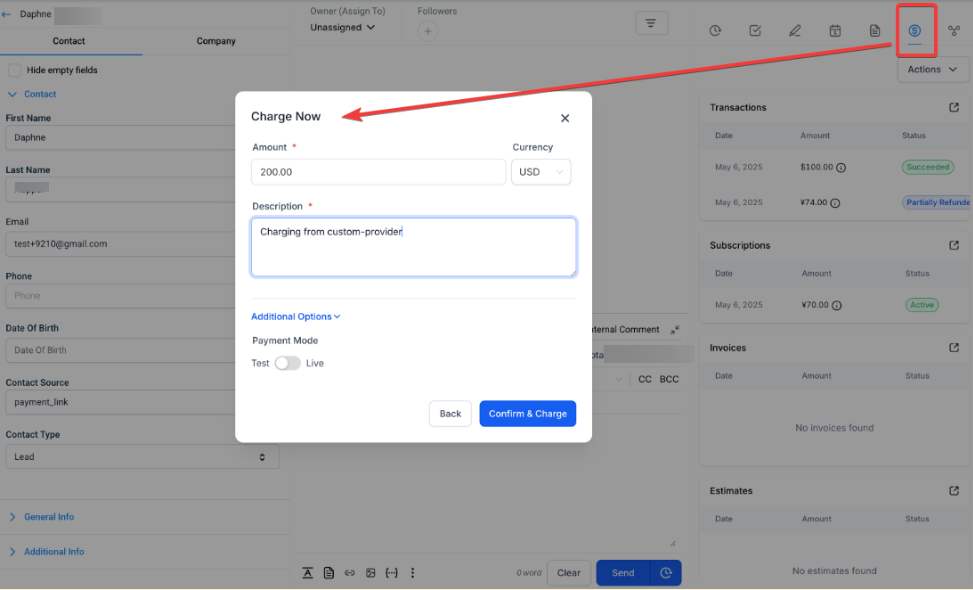
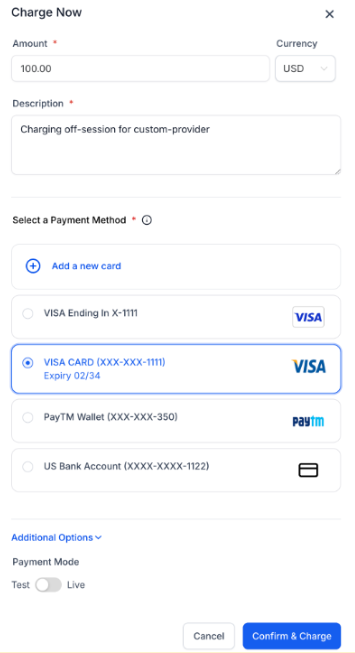
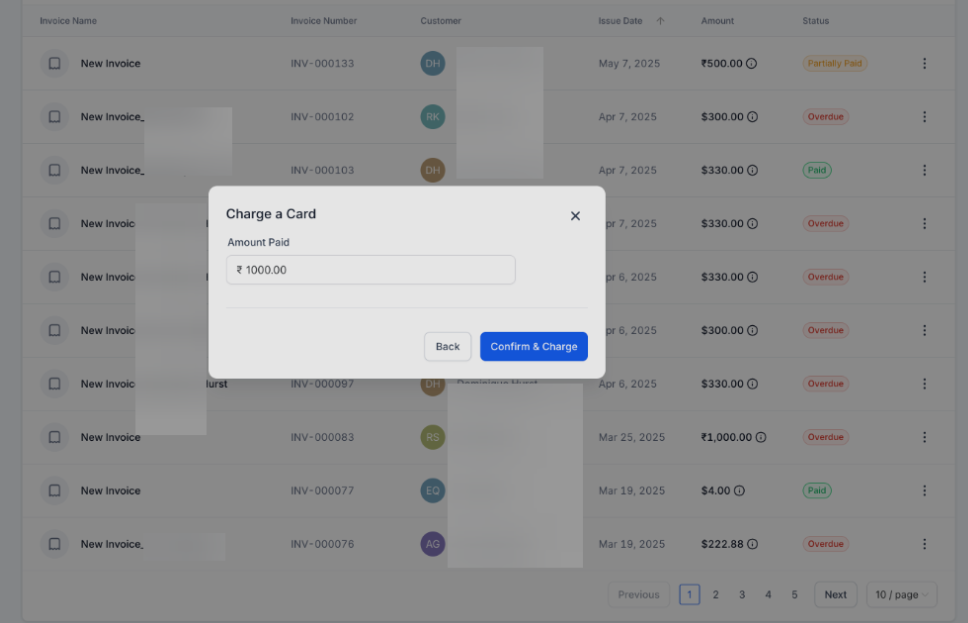
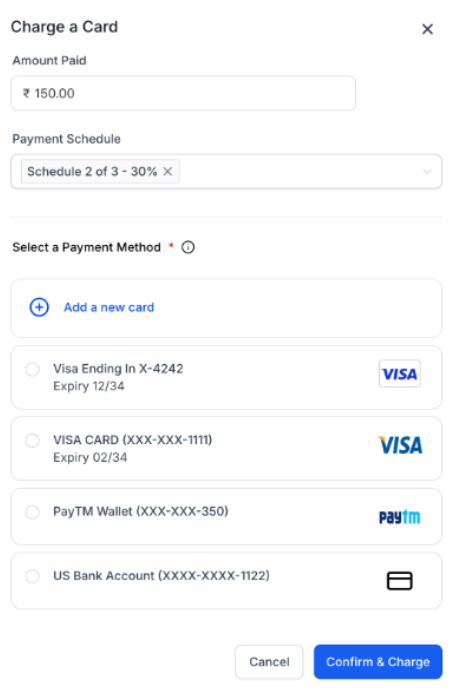
- Custom payment providers allow businesses to integrate their preferred payment systems, offering more flexibility in how transactions are processed. Businesses can enable customers to securely save their payment details for future use. Customers can also view their saved payment methods when making payments through "Charge Now" or "Record Payment" on invoices. Additionally, businesses can charge saved payment methods off-session, making it easier to recover missed or pending payments. To manage these features, navigate to Contacts > Contact Details > $ icon > Actions > Add Card on File or Charge Now.
- Or Payments > Invoices > Record Payment > Charge a Card.
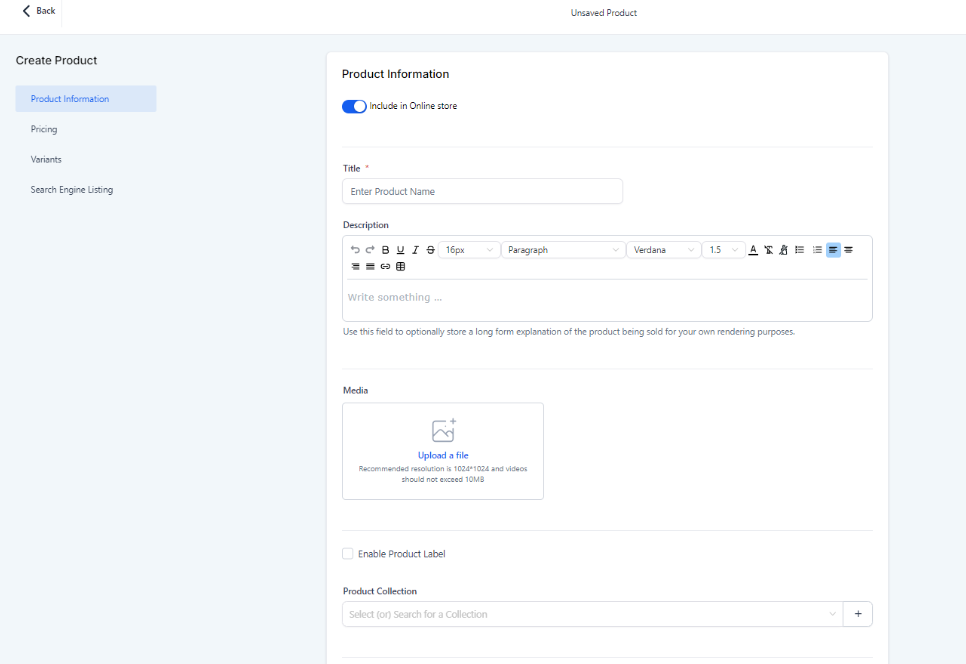
Step 3: Creating Products
- Navigate to Payments > Products
- Click + Add Product
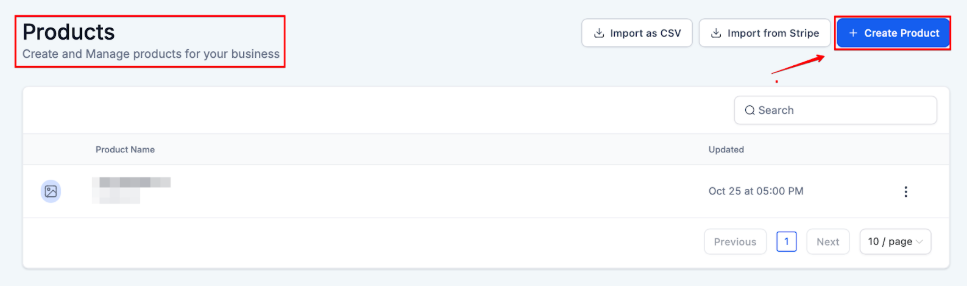
- Create a product and fill out all the requested information such as name, description, price, currency, and billing frequency.
- Click Create this Product to add the product to your system.
Note: Check out our other articles on specific features within the Payments section.
Payment Gateway Features
- Tap to Pay on all payment gateways: Tap to Pay is exclusively available on Stripe. Make sure your Stripe account is connected and integrated with the web app before using Tap to Pay on the mobile app.
- Payment links from all payment gateways: Payment links are supported on both Stripe and Authorize.net.
- Text to Pay on all payment gateways: This feature is available only on Stripe.
- Creating and managing invoices on gateways: Supported on all gateways except PayPal.
- Creating and managing estimates and invoices on gateways: Available on all gateways except PayPal.
- Apple Pay/Google Pay availability: These payment options are supported exclusively on Stripe.
FAQs
Question: What can I manage in the Payments section?
Answer: In the Payments section, you can create and send invoices, manage orders and transactions, add products, set up taxes, and integrate payment processors like PayPal and Stripe to handle payments for products and services.
Question: How do I enable multiple currencies for payment processing?
Answer: You can accept multiple currencies for products, invoices, and text-to-pay links. Make sure your payment processor supports the selected currencies for smooth transactions.
Question: Can I manage Stripe payment methods directly within my account?
Answer: Yes, Stripe payment methods can be managed within the system. You no longer need to navigate to Stripe separately. To manage them, go to Payments > Integrations > Manage Payment Methods.
Question: What is the purpose of the Payment Links feature?
Answer: Payment Links allow you to create a payment link for any product or service. You can set pricing, billing frequency, and customer payment settings. These links can be shared for easy payment collection.
Question: How do I create and manage products in the Payments section?
Answer: To create a product, go to Payments > Products, click "Add Product," and enter details such as name, description, price, and currency. Once created, products can be added to funnels, invoices, and more.
Question: How do I use Tap to Pay with my mobile app?
Answer: Ensure your mobile app is updated and your Stripe account is integrated. Select “Tap to Pay” in the app and have your customer tap their payment method on your phone to complete the transaction.
Question: Can I create and send estimates to clients?
Answer: Yes, you can create estimates under Payments > Estimates, and send them to clients via email or SMS. If the estimate is accepted, it can be converted into an invoice.
Question: Which payment methods are supported for invoices and payments?
Answer: Supported payment methods include cards, Apple Pay, Google Pay, ACH Direct Debit, BNPL options (Klarna, AfterPay), and more. You can enable these methods based on your business needs.
Question: How can I enable BNPL (Buy Now, Pay Later) options like Klarna and AfterPay for invoices?
Answer: To enable BNPL options, go to Payments > Integrations > Stripe, click on "Manage Payment Methods," and toggle the BNPL options (Klarna/AfterPay) on. After that, you can create and send invoices with these payment options available for your customers.
Question: When do subscription products become accessible for configuration?
Answer: Subscription products require at least one subscription to be added in live mode before their configurations become accessible.