Setting Up WhatsApp - 101
This article provides a complete guide to setting up and managing WhatsApp Business integration through Mastermind. The goal is to help businesses streamline communication, verify their phone numbers, and ensure compliance with WhatsApp’s rules and requirements. With proper setup, businesses can benefit from efficient messaging, automation, and customer engagement at scale.
Key Features & Benefits
- Direct Customer Communication: Connect with customers instantly on a globally recognized messaging platform.
- Business Verification: Establish trust by displaying your verified business name.
- Automation Support: Utilize template messages and workflows for faster responses.
- Multi-User Access: Enable teams to manage conversations collectively.
- Integration Flexibility: Option to connect via new numbers or link existing WhatsApp Business accounts.
- Scalable Communication: Manage high volumes of conversations with structured categories and compliance controls.
Step-by-Step Setup
Method 1: Register a New WhatsApp Business Number
Step 1: Purchase a Phone Number
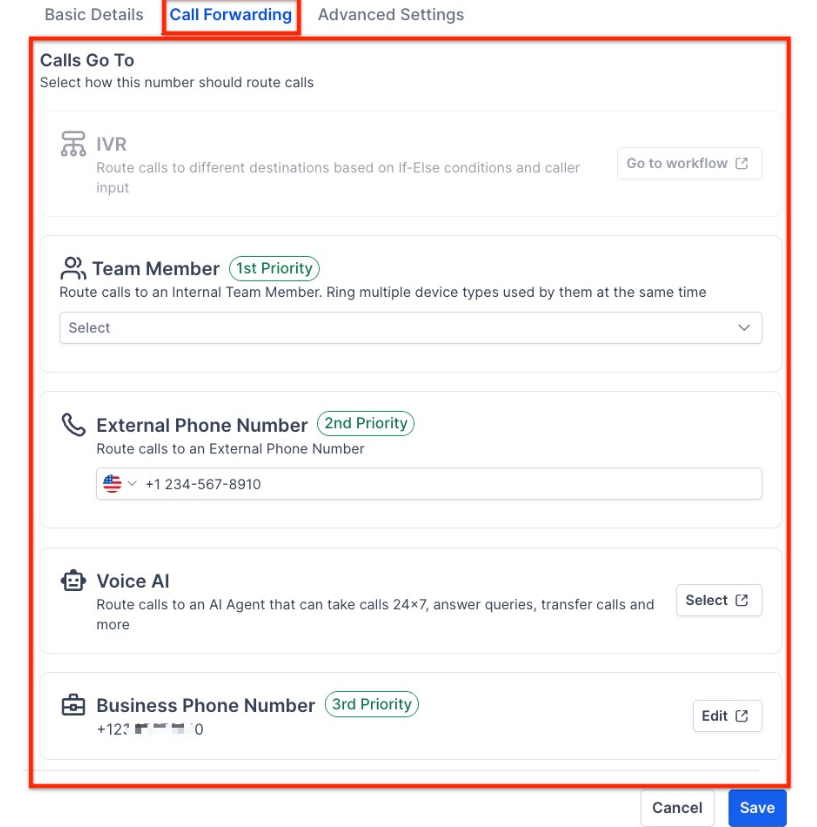
- Acquire a business phone number through the Hub and forward calls to your main contact number. You will need to navigate to Settings > Phone Numbers. For any existing phone number, you can also edit the 3-dot button and edit the configuration.
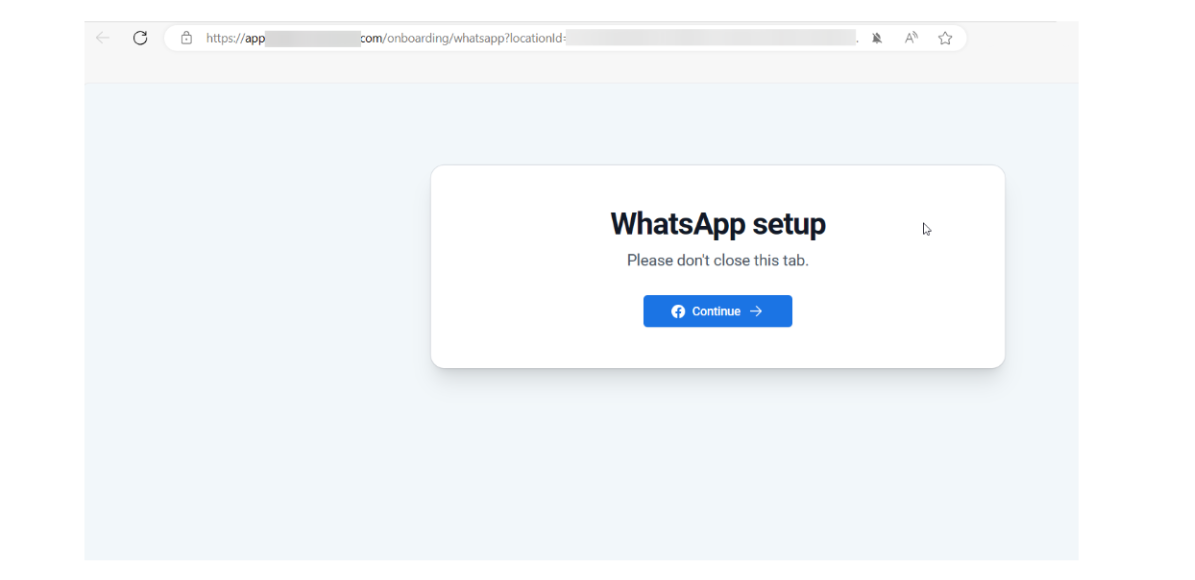
Step 2: Start the Sign-up Process
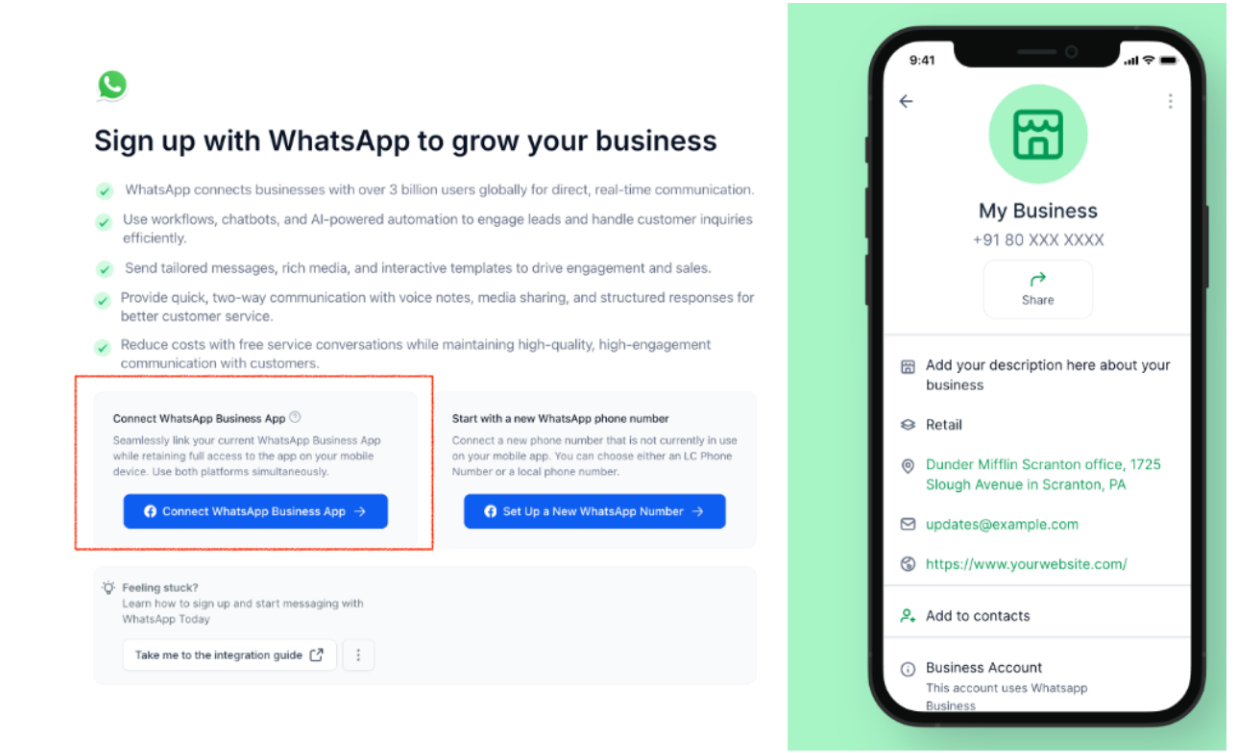
Navigate to Settings > WhatsApp > Set Up a New WhatsApp Number
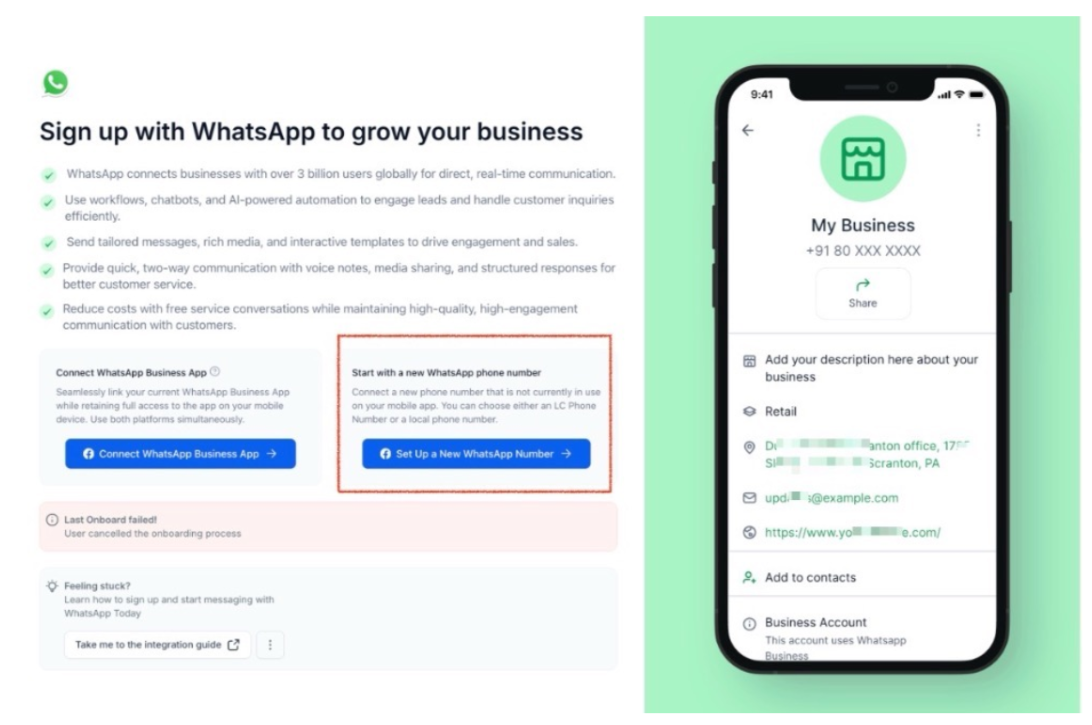
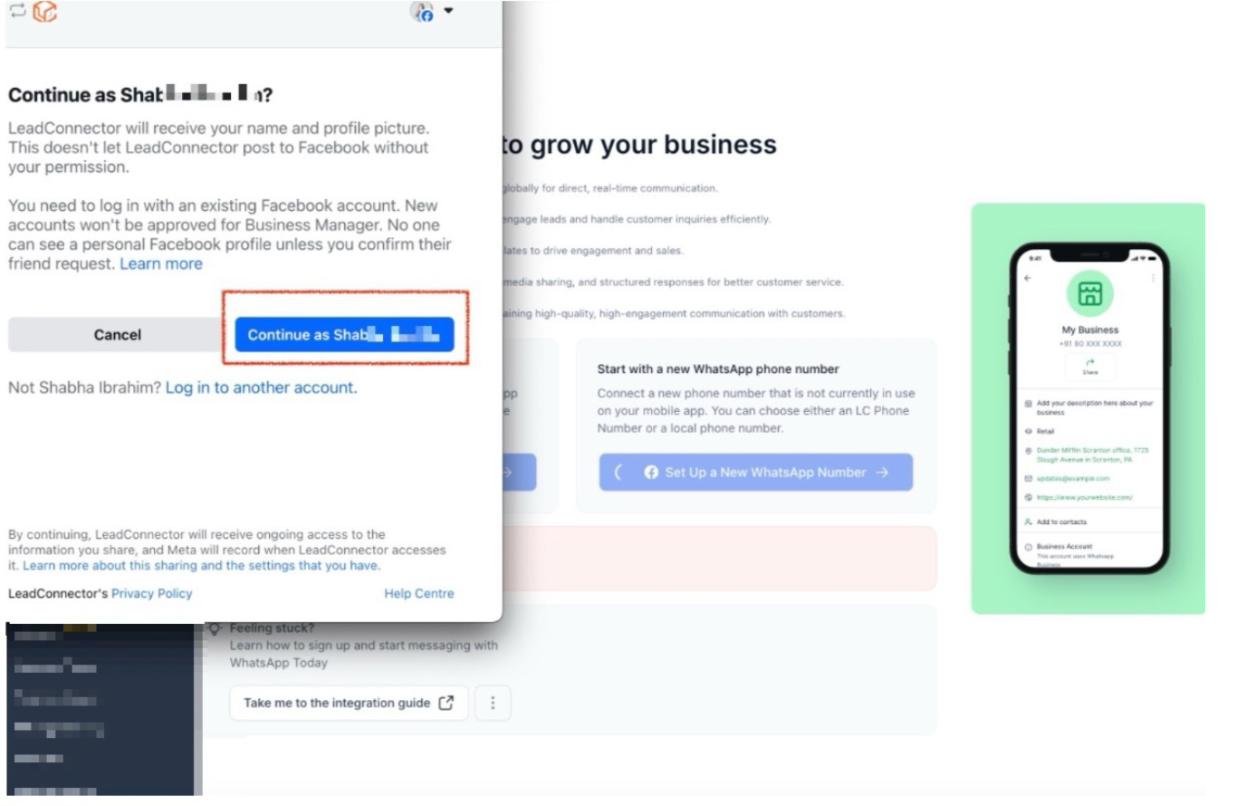
Select Continue with your Facebook account.
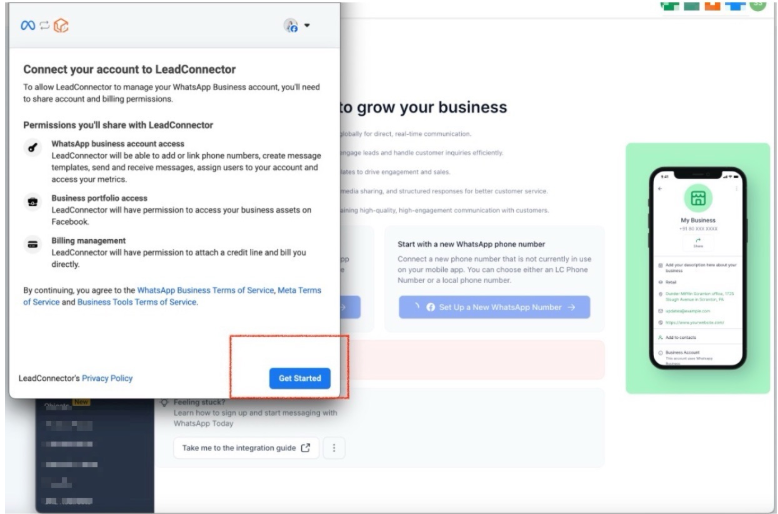
Tap Get Started
Enter your business details and click Next.
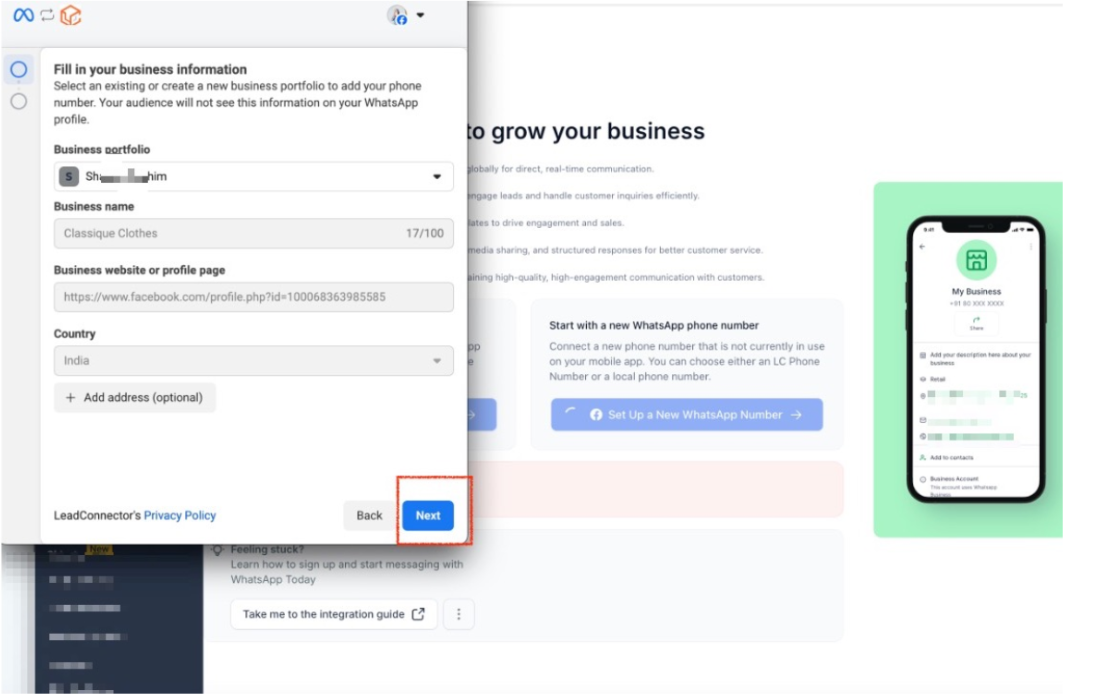
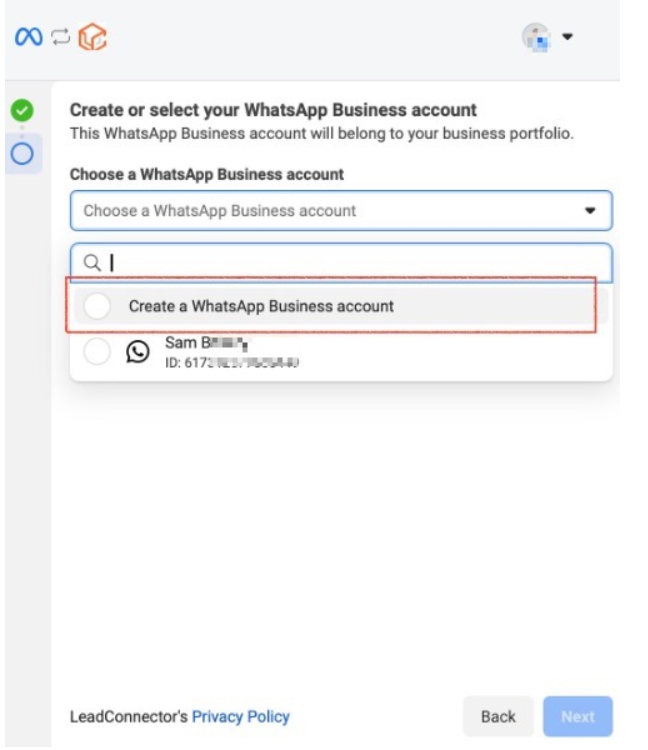
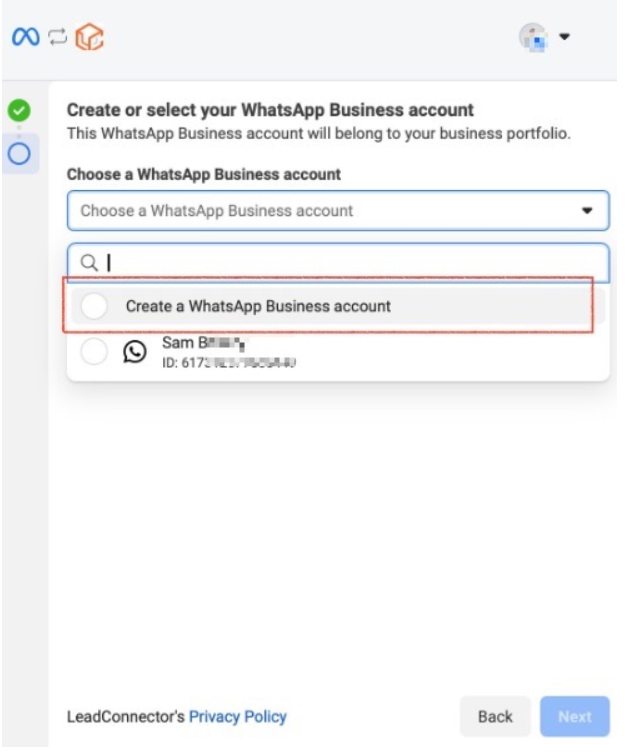
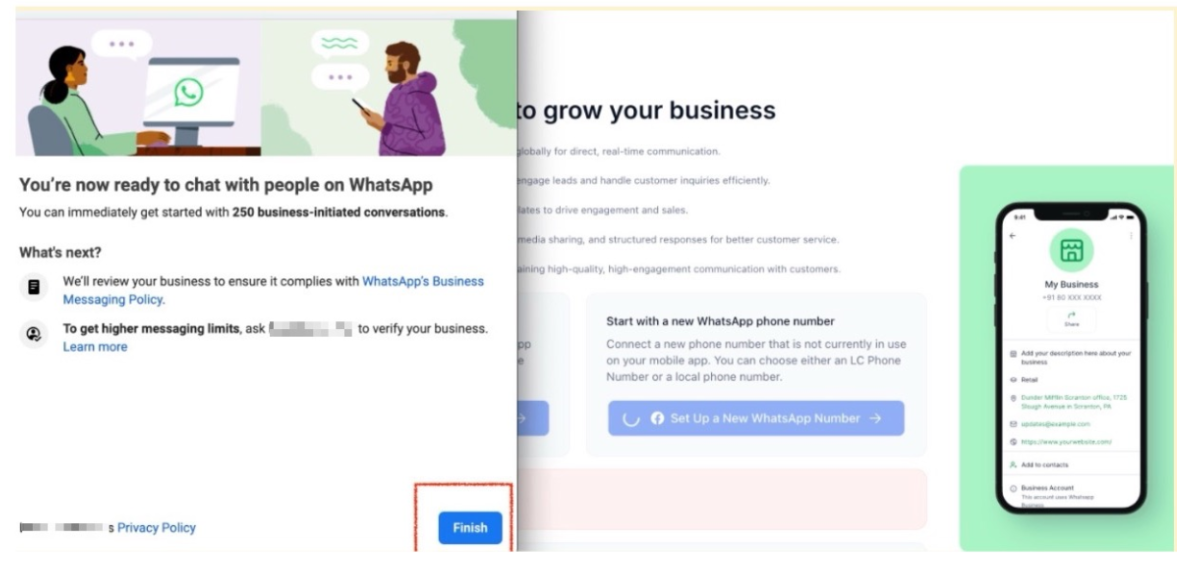
Choose Create WhatsApp Business Account, confirm your selection, and click Next
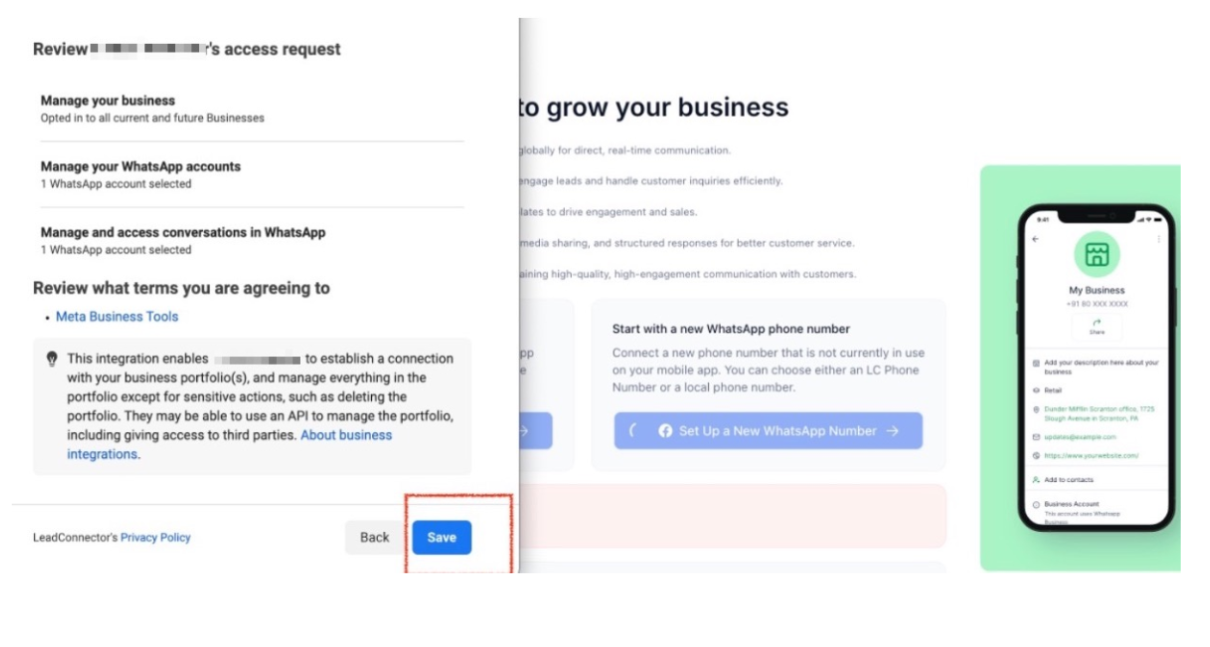
Finally, select Save and tap Finish. Your WhatsApp Business Account is now successfully integrated!
Phone Number Verification
Step 3: Add & Verify Your Number
- Select Add Phone Number and follow the verification process.
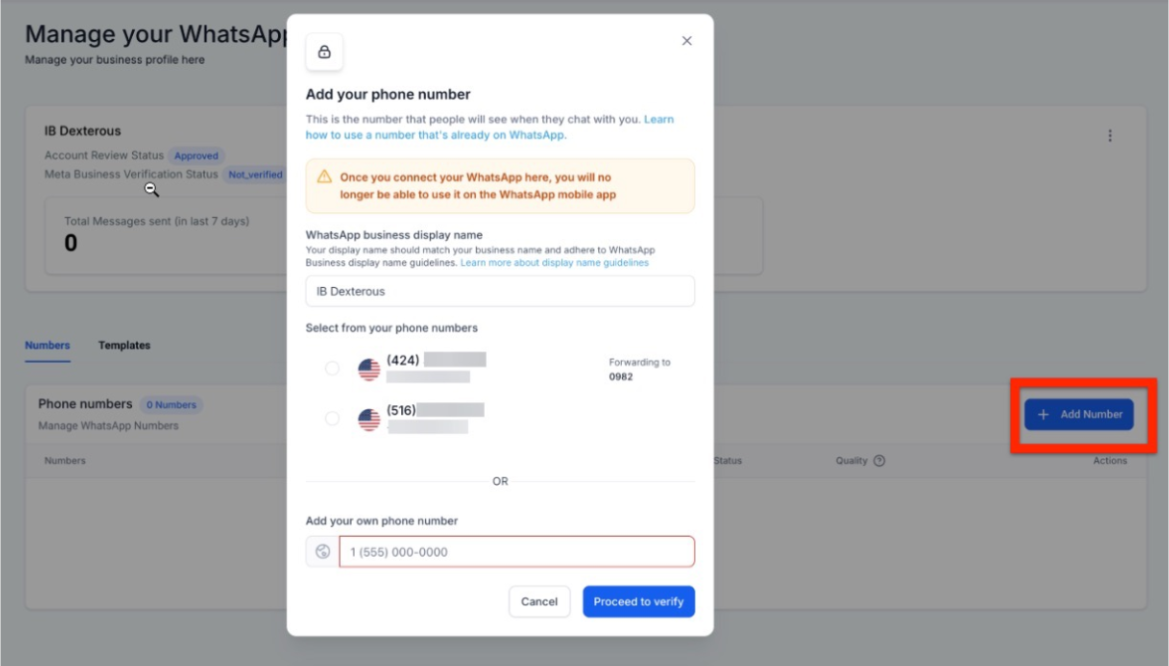
Step 4: Choose a Verification Method
- SMS: Receive an OTP via text and enter it in Conversations.
- Phone Call: Get a call on your forwarded number with the OTP.
S
Step 5: Enter OTP
- Enter the 6-digit code.
Step 6: Verification Complete
- Your number is now active and ready for use.
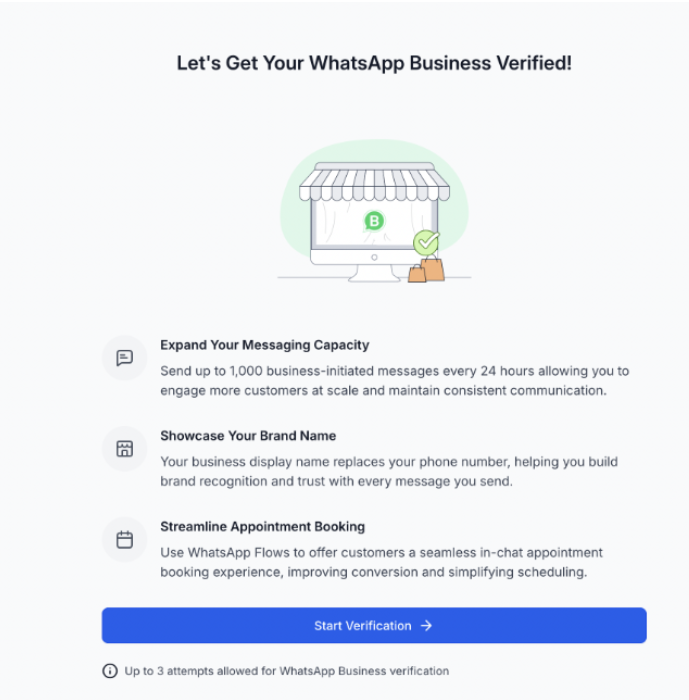
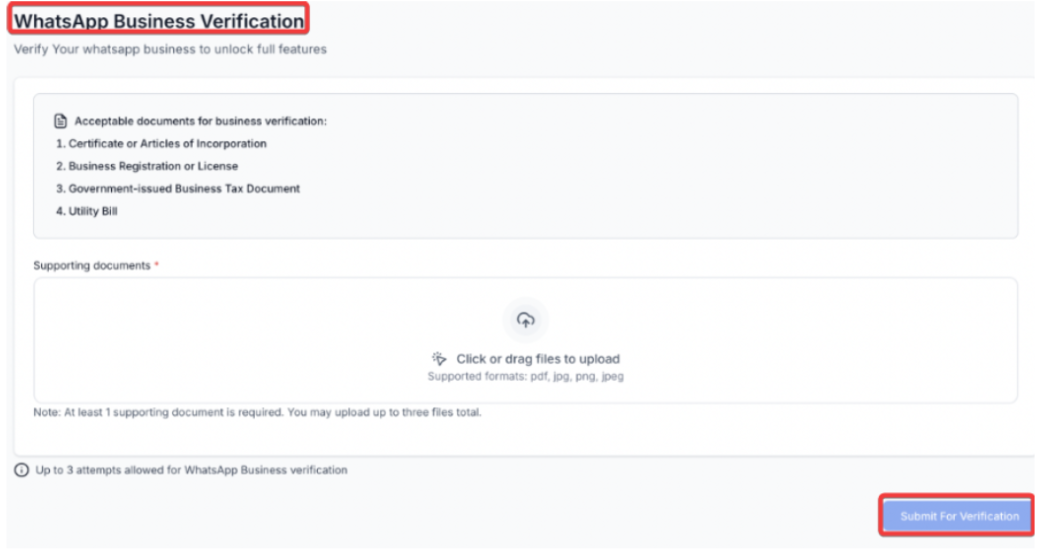
How to Use WhatsApp In-App Business Verification
1- Navigate to:
Settings → WhatsApp → Business Verification
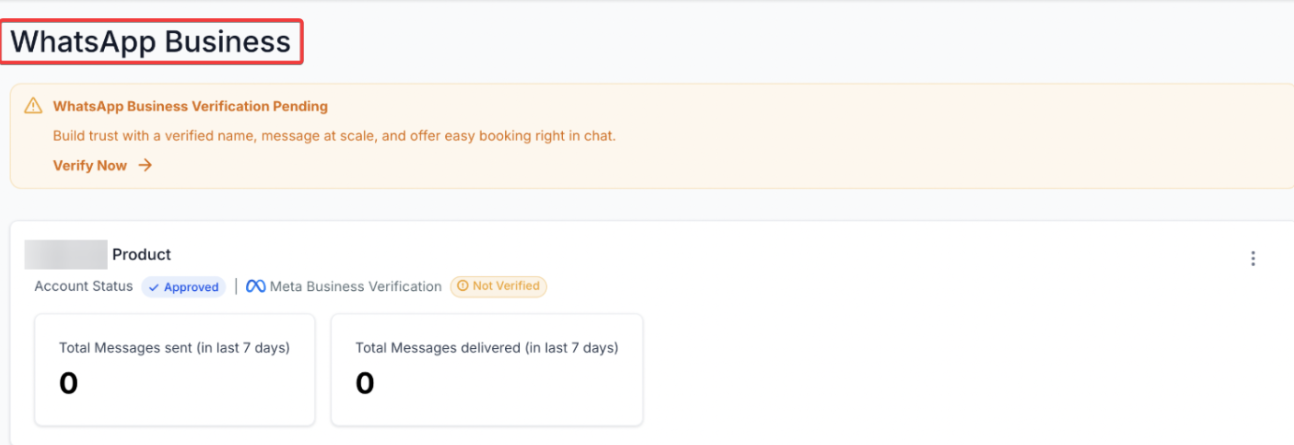
2- Click:
Start Verification
3- Select:
Choose the business you want to verify in your sub-account.
4- Upload Documents:
Typically required:
- Legal business name
- Proof of address
- Business registration documents
5- Submit for Review:
Submissions are securely sent to Meta via official API connections.
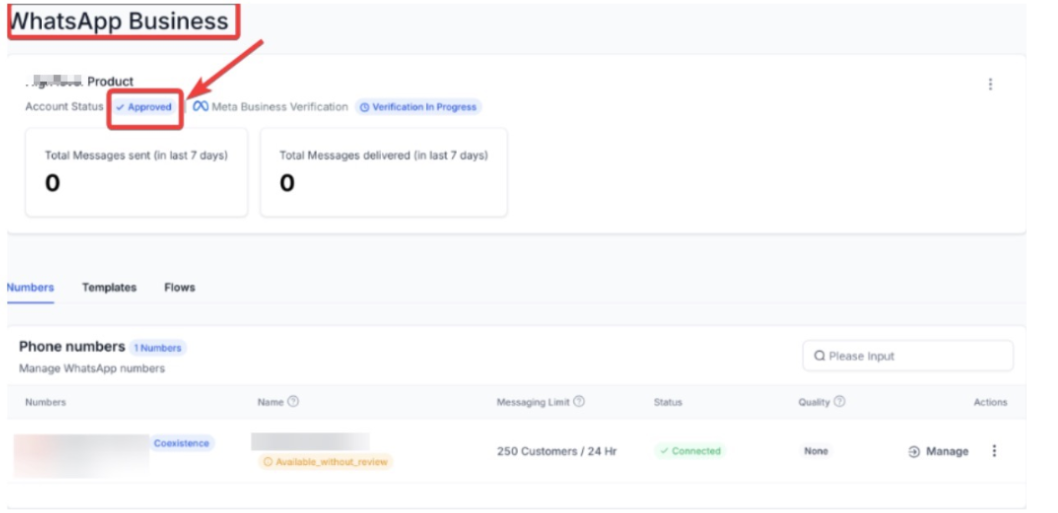
6- Track Status:
View status in real-time:
- Pending
- Approved
- Rejected (with reason shown)
Restrictions for Sign-Up
- New Number Requirement: A fresh number must be used for registration. Active numbers on WhatsApp cannot be reused.
-
Unsupported Regions: Numbers with codes from Australia, Japan, Nigeria,
Philippines, Russia, South Korea, South Africa, Turkey, EU/EEA, and the UK cannot be onboarded.
Before we start:
Important Update: WhatsApp Marketing Templates Pause in the U.S. (April 1, 2025)
Starting April 1, 2025, Meta will pause the ability to send WhatsApp marketing template messages to U.S. numbers. However, utility and authentication templates, along with responses within the 24-hour customer service window, will still be allowed. This change does not affect marketing messages in other countries.
What’s Changing & How to Prepare
Meta is temporarily pausing marketing templates in the U.S. to focus on WhatsApp’s long-term growth. While marketing messages won’t be delivered, businesses can still engage with customers using Utility Templates and Click-to-WhatsApp Ads.
What You Should Do Next
- Create Utility Templates: Transition essential messages to utility templates to avoid disruptions.
- Use Click-to-WhatsApp Ads: Engage customers through ads that trigger WhatsApp conversations.
- Maximize the 24-Hour Service Window: Ensure real-time responses to customer inquiries.
Permitted WhatsApp Business Activities
- Utility Conversations: Order updates, appointment confirmations
- Authentication Messages: OTPs, account verifications
- Service Conversations: Responses within the 24-hour window
- Click-to-WhatsApp Ads: Drive interactions via ads
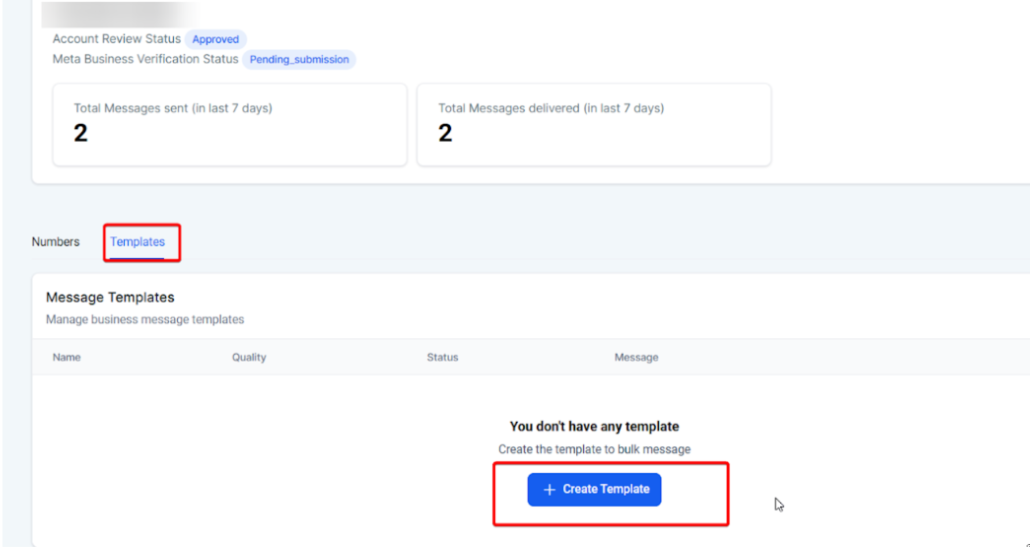
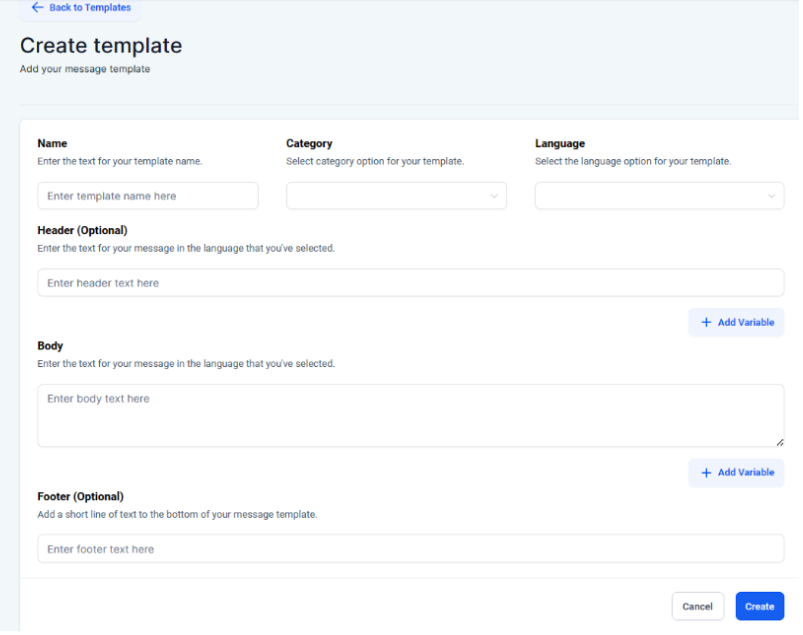
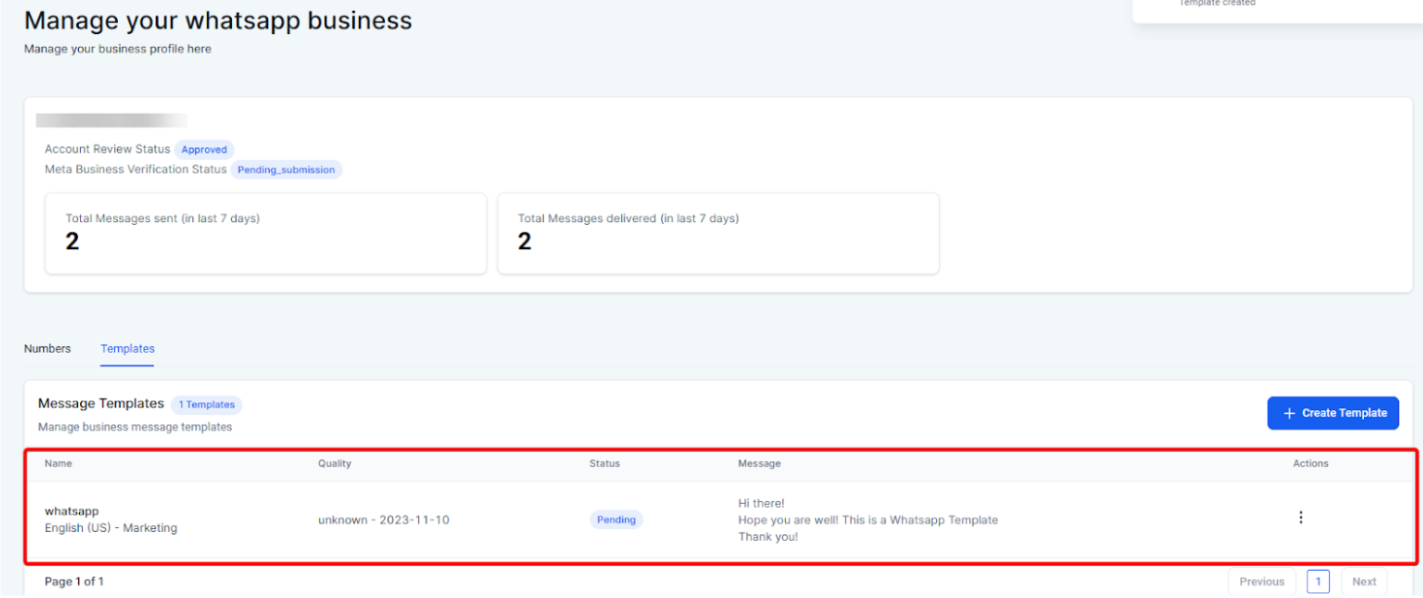
WhatsApp Template
This allows businesses to create and manage WhatsApp message templates in Mastermind for sending pre-approved messages. The main benefit is improved consistency and compliance, as all templates require approval before use. To get started, create a template, submit it for approval, and use it once approved.
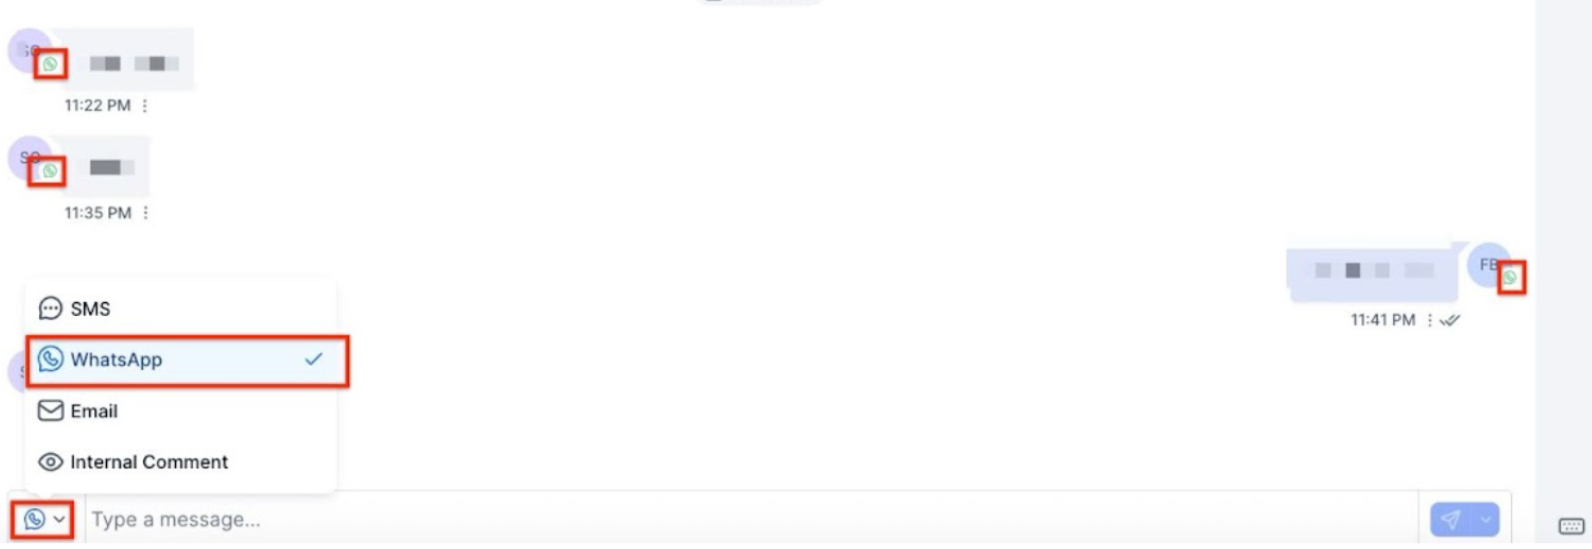
One-on-one messages will be enabled
Once an account is established on the platform and WhatsApp Business is verified, the Mastermind will allow one-on-one messaging through the Conversations feature. This facilitates personal communication with each customer.
Message Status Tracking
The Mastermind will display delivery and read statuses for all messages within Conversations, ensuring that communication is tracked and managed effectively
WhatsApp Business Account Integration
The WhatsApp Business Profile Management feature includes:
- Profile Picture Upload/Change: Easily update your business profile picture.
- Business Category: Define your business type clearly.
- Business Description: Provide an overview of your business to inform customers.
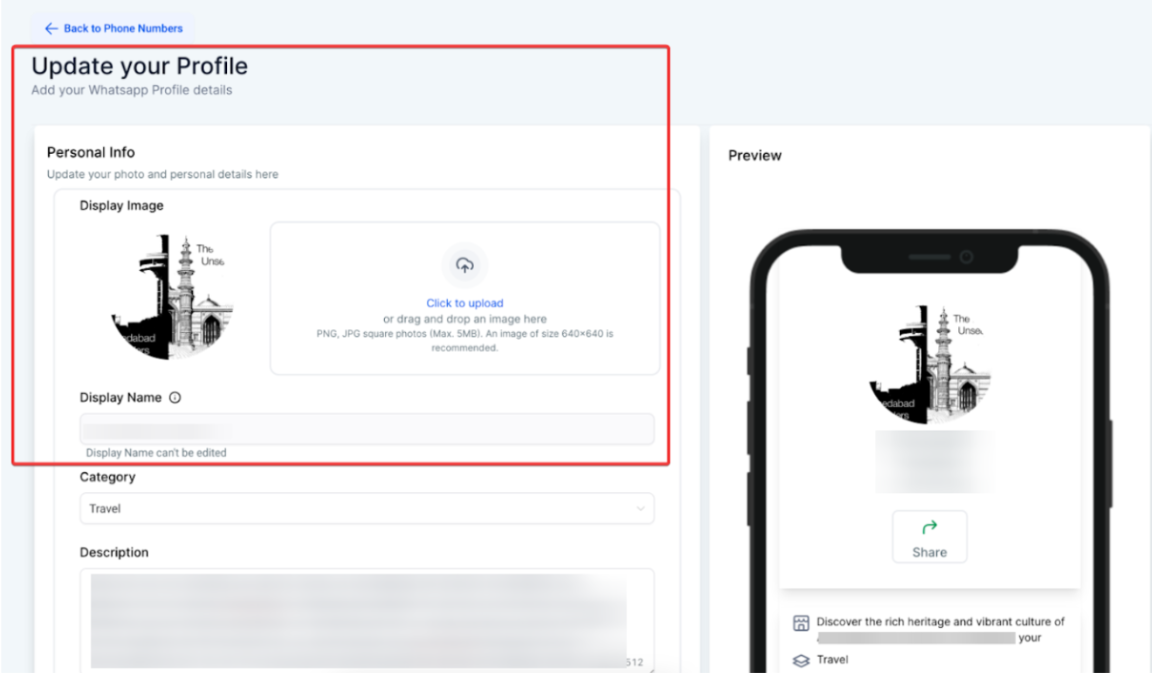
- Business Address: Ensure customers know where to find you.
- Email Address: Add your contact email for customer inquiries.
- Website: Link to your website for more information.
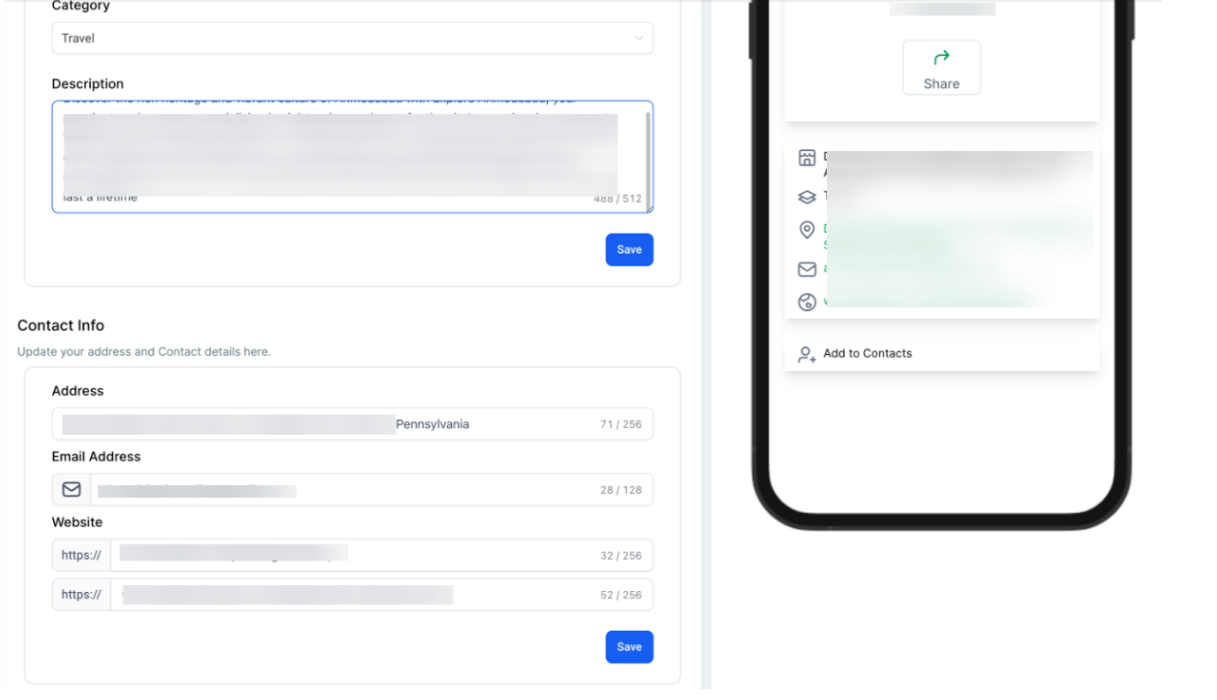
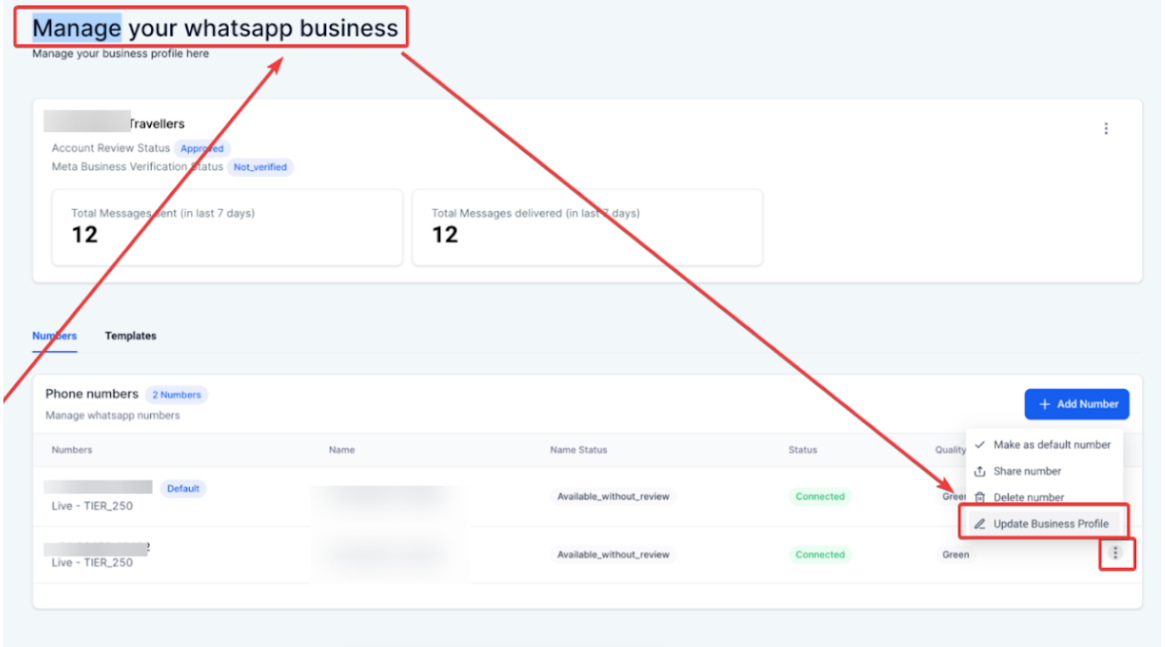
To update your business profile, go to Settings > WhatsApp > Numbers, click on the three dots under Actions, and select Update Business Profile.
A banner has been added to facilitate the seamless connection of your WhatsApp business account.
Method 2: Connect an Existing WhatsApp Business App
- Link your current WhatsApp Business account with Mastermind for coexistence.
- Import contacts and chat history (up to six months).
- Continue using the app while benefiting from the platform.
Linking WhatsApp Business App to a Facebook Page
- Open the WhatsApp Business app.
- Go to Settings > Business Tools > Facebook & Instagram.
- Log into your Facebook account.
- Select the page to connect and confirm.
- A WhatsApp button will now appear on your page for direct customer contact.
Schedule Send
WhatsApp Schedule Send feature empowers businesses to enhance their communication strategies by scheduling messages for future delivery. Whether using template messages or free-form texts, this feature allows businesses to plan their outreach at times that best suit their customers, ensuring timely and effective communication.
How to Use: To schedule a message,
- Navigate to Conversations.
- Select the contact.
- Choose WhatsApp.
- Pick the desired template.
- Click the scheduling button.
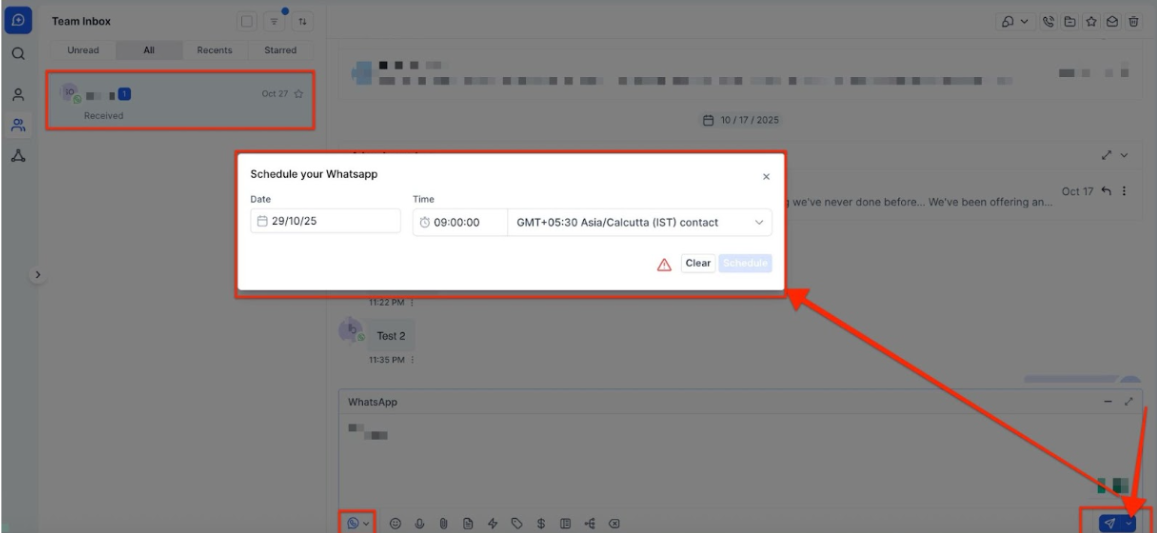
Set the preferred date and time, and confirm the schedule.
Note that free-form messages can be scheduled up to 24 hours from the last inbound message received.
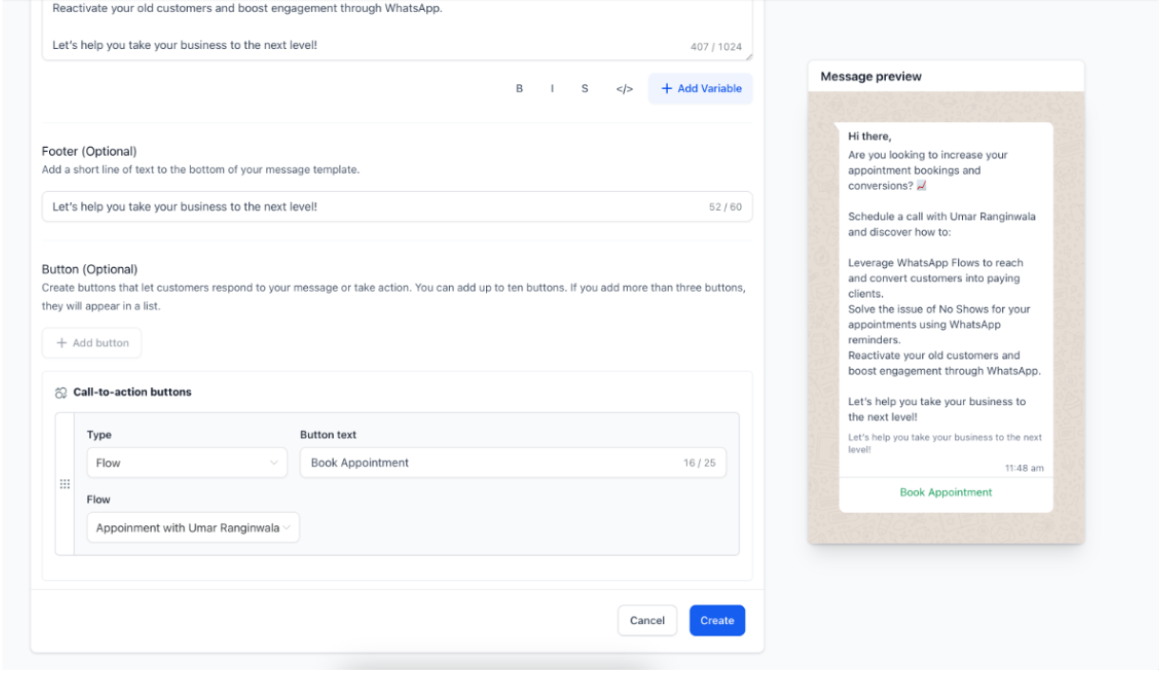
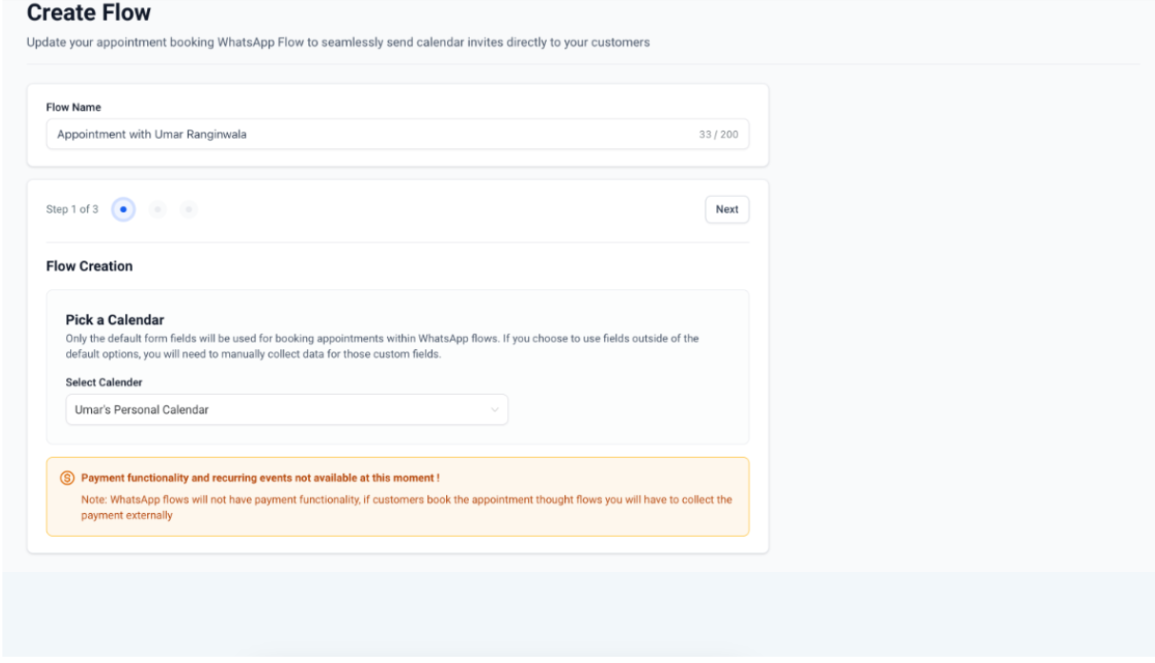
WhatsApp Flows: In-App Appointment Booking
The In-App Appointment Booking feature in WhatsApp Flows allows businesses to manage the entire appointment scheduling process within WhatsApp. It streamlines the process by keeping interactions in the app, using pre-filled customer information and real-time calendar integration for a quicker, more personalized booking experience.
Note: This feature does not support payments or recurring events, and only default form fields are available for bookings.
For more details and step by step guide, please review our article “WhatsApp Flows: In-app Appointment Booking”
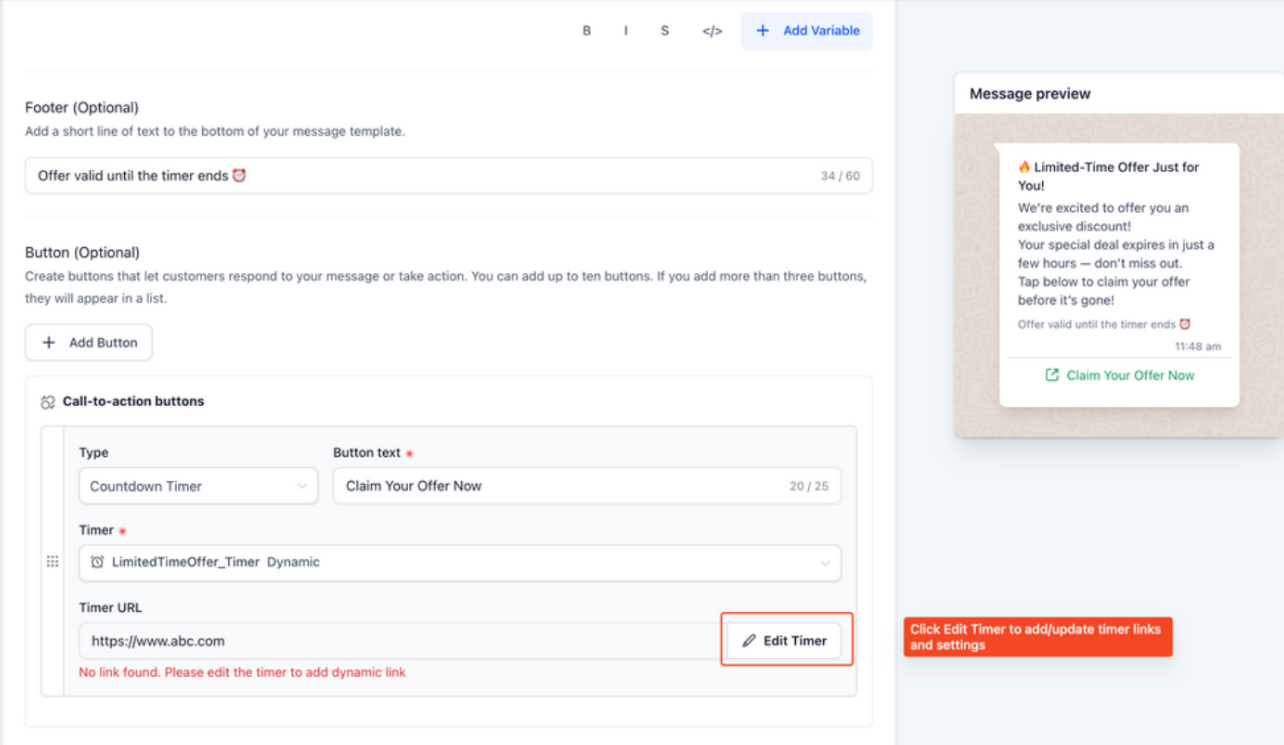
Countdown Timers in WhatsApp Messages
Countdown Timers allow you to add time-sensitive offers within WhatsApp messages, helping create urgency and boost engagement. This feature lets users attach fixed, recurring, or dynamic timers to buttons within message templates, so recipients experience real-time countdowns that guide them to active or expired offers.
How to Use:
- To use Countdown Timers, enable the feature within your settings, and create a WhatsApp message template.
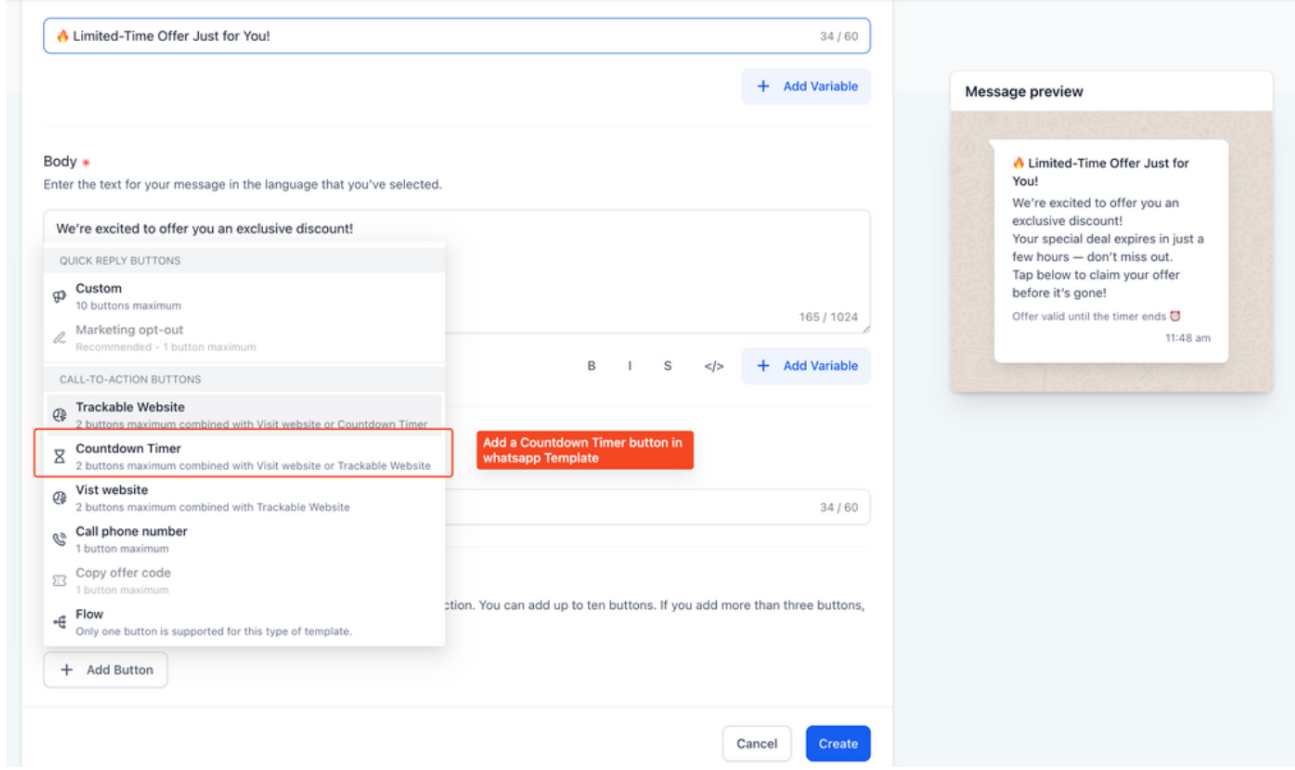
- Add a button linked to your preferred timer type fixed, recurring, or dynamic.
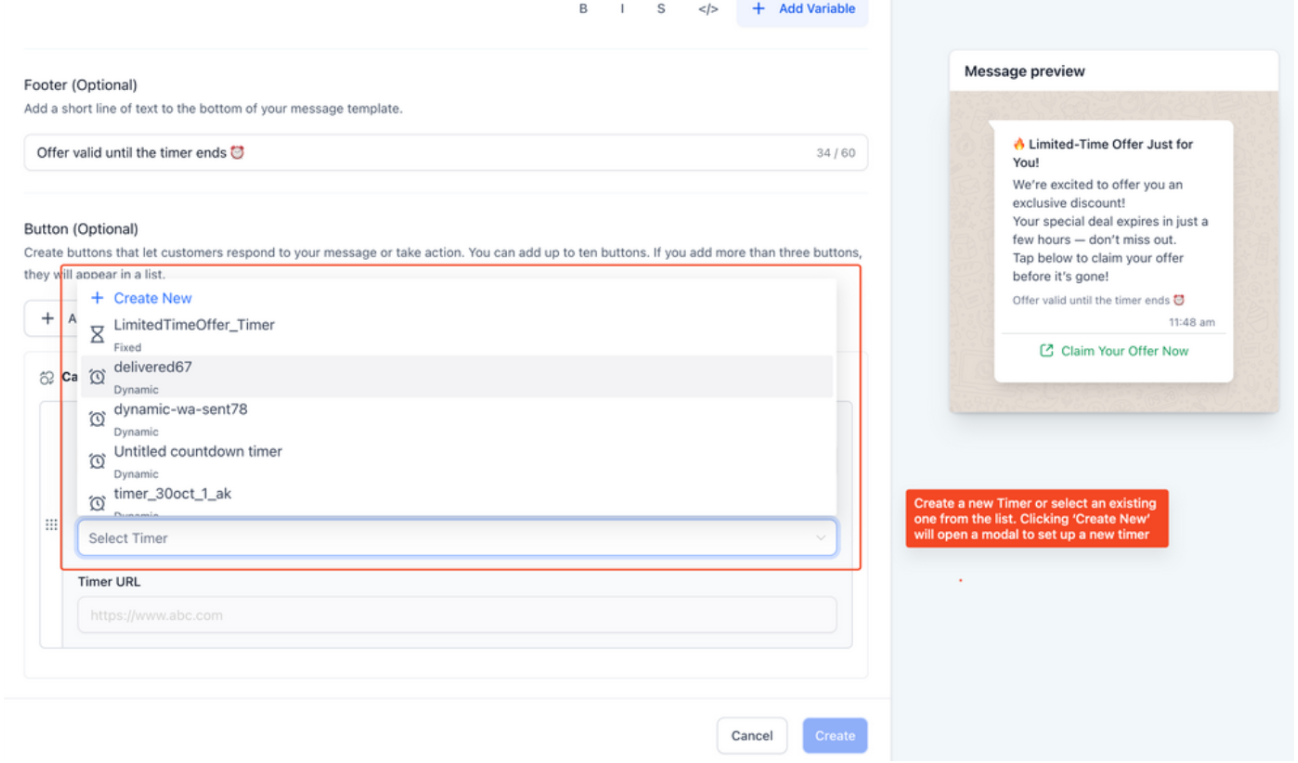
- You can edit and customize timers as needed before saving your template.
FAQs
Question: Can I change my WhatsApp Business number after verification?
Answer: No. Once verified, the number is tied to the platform and cannot be swapped without a full reconfiguration.
Question: What happens if the OTP is not received?
Answer: Ensure correct formatting of the number, check network connectivity, and retry. You may also switch to phone call verification.
Question: Can I use the WhatsApp Business App and Platform together with the same number?
Answer: No. A number can only exist on one: either the App or the Platform.
Question: Why is my business name not visible to customers?
Answer: You must verify your business on Meta to display your name instead of the number.
Question: What are the benefits of using the Business Platform over the App?
Answer: The platform provides automation, template messaging, multiple user access, and integration, making it more scalable for business operations.
Question: What should I do if my WhatsApp Business profile isn't updating after making changes?
Answer: If your WhatsApp Business profile isn't updating, ensure that you've followed the proper steps to update your business profile through the platform. Go to Settings > WhatsApp > Numbers, click on the three dots under Actions, and select Update Business Profile. If issues persist, check your network connectivity or try logging out and back into your account.
Question: Can I schedule a free-form (non-template) message to a customer at any time?
Answer: No. While you can schedule messages, free-form messages can only be scheduled for delivery within 24 hours of the last inbound message received from the customer.
Question: Can I send attachments like PDFs or Images through these templates?
Answer: Absolutely. When creating your template in Mastermind, you can include media headers. This allows you to automate the sending of brochures, invoices, or images to your leads.