How to Sort and Filter Products in Ecommerce Site Builder
In the fast-paced world of e-commerce, providing a seamless shopping experience is crucial for retaining customers and boosting sales. The ability to sort and filter products directly within the site builder. This article will guide you through the setup process for these features.
Setting Up Product Sorting and Filtering
The option to sort and filter products within the product list element streamlines how customers interact with your online store. Here’s a step-by-step guide on how to enable these features:
1. Accessing the Product List Element:
- Navigate to the site builder by going to Marketing & Sales > Funnels & Pages and locate the product list element on the left-hand side when adding elements to your E-commerce store.

2. Enabling Sorting and Filtering:
- To activate these features, simply toggle on the sorting and filtering options. You can customize the sorting to include options such as best-selling products and other criteria, which will be visible in the preview mode

3. Saving and Previewing:
- After enabling the desired features, click 'Save.' Then, preview your store to see how the sorting and filtering options will look live on your site.
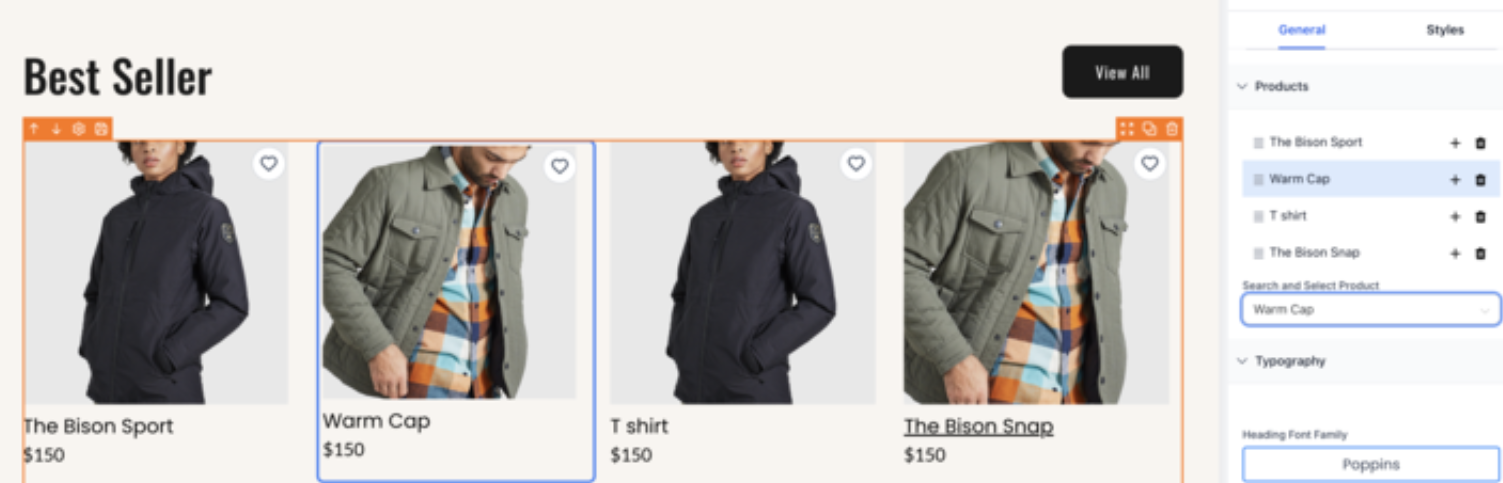
Selection Micro-Interaction for Product & Collection Elements
Micro-Interaction interacts with Product and Collection elements in the builder, allowing for faster and more intuitive selection and configuration directly on the canvas.
How to Use:
- Double-click an unmapped item on the canvas to open the selection drawer and assign a product or collection.
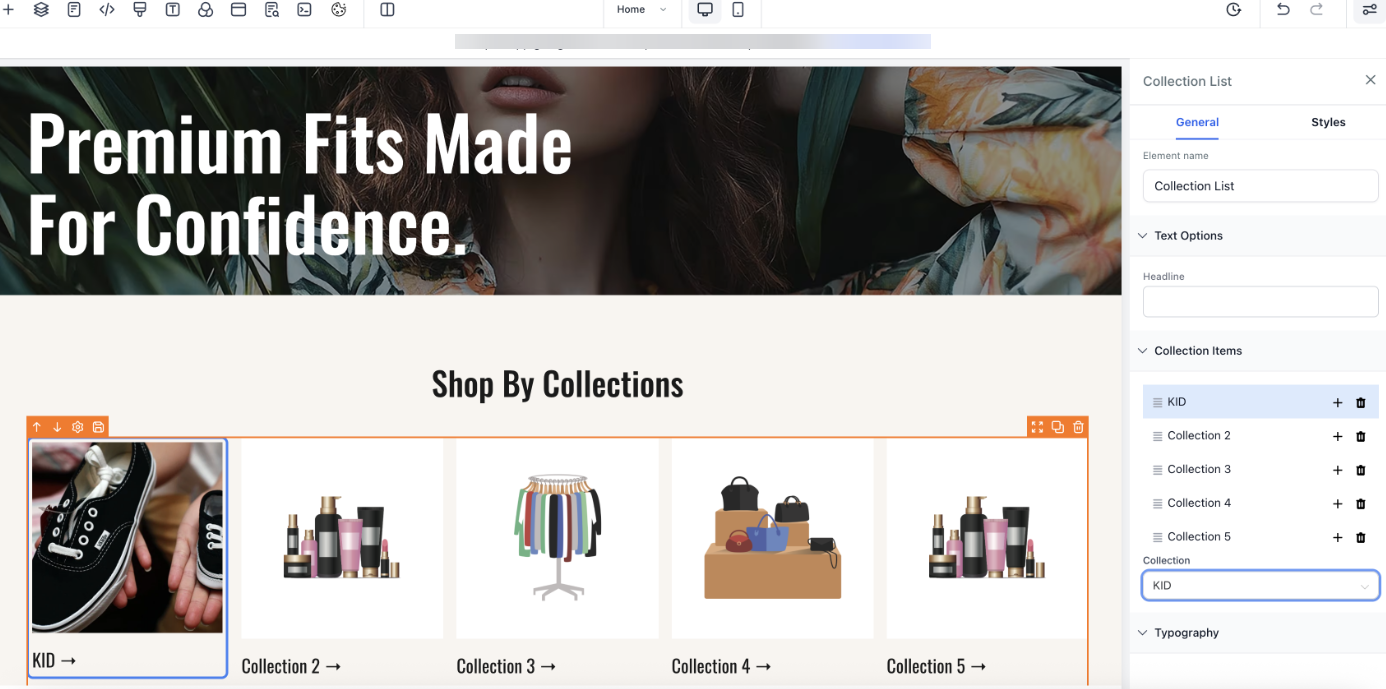
2. Double-click a mapped item to highlight it for easy identification and configuration.
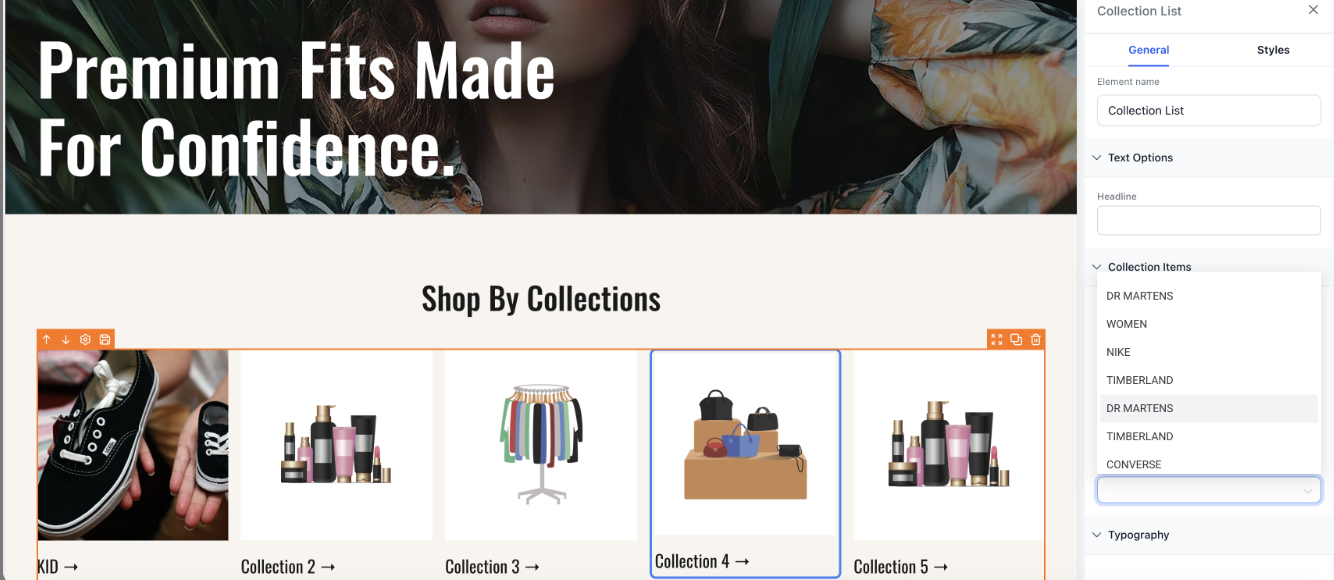
3. Any changes made are automatically synced with the sidebar drawer.
Exploring the Features
Default Sorting for Product List Page in E-Commerce Stores:
The default sorting option allows store owners to set the preferred display order for products on collection and category pages. This feature helps enhance user experience by ensuring products appear in a preferred order when customers land on these pages.
By using this feature, store owners can control the sorting of products by various options like price, date, or alphabetical order. To apply, simply navigate to the Product List Page settings, choose your preferred sorting option, and save the changes. If no sorting is selected, the default option "Date, New to Old" will be used.

Sorting Options:
- Date Sorting: Arrange products from oldest to newest or vice versa.
- Alphabetical Sorting: Organize products alphabetically from A to Z or Z to A.
- Price Sorting: Sort products by price from low to high or high to low.

Filtering Options:
- Availability: Filter products based on availability status such as 'In Stock' or 'Out of Stock.'
- Price Range: Set a price range to display products that fall within specified monetary values. For instance, filtering products priced between $15 and $25 will hide items outside this range.
- Combination Filters: Apply multiple filters simultaneously, like combining 'In Stock' with a price range filter.

Layout Options:
- Store owners can adjust the number of columns on the Product List page to customize the product display.
- Access the Store Builder, select the Product List element, and navigate to Layout Options under General Settings.
- Set the desired number of columns (minimum 1, maximum 5), save changes, and publish.

Display Priority Option:
Store owners can control the order in which products appear on the Product List Page by assigning a "Display Priority" value to each product. Lower numbers indicate higher priority, ensuring that key products appear first. When multiple products have the same priority, they are sorted alphabetically.

The "Featured" sorting option reflects these priority values and is set as the default for new stores.

Product order updates are applied immediately, and out-of-stock products always appear at the end of the list.
Sorting settings:

Note
- Default Settings: By default, no filters are applied when the page loads. Customers will need to manually select their preferred filters.
- Product List Page Only: These sorting and filtering options are exclusive to the product list page. Ensure that this page is set up to leverage these features for optimal results.
FAQs
Question: What sorting options are available for the Product List?
Answer: You can sort products by date (oldest to newest or vice versa), alphabetically (A to Z or Z to A), and price (low to high or high to low).
Question: Can I apply multiple filters at the same time?
Answer: Yes, combination filters are supported, allowing you to apply multiple criteria, such as 'In Stock' and a specific price range.
Question: Where can I enable sorting and filtering?
Answer: Navigate to the site builder, select the Product List element, and toggle the sorting and filtering options under the settings.
Question: Do these features apply to all pages?
Answer: No, sorting and filtering options are exclusive to the Product List page.
Question: Are any filters applied by default?
Answer: No, filters are not applied by default. Customers must manually select their preferred filters.
Question: How many columns can I set in Layout options?
Answer: You can select between 1 and 5 columns.
Question: Is the Custom Column Layout feature available for other elements?
Answer: Currently, it is specific to the Product List element.
Question: How does the "Display Priority" value affect the order of my products?
Answer: The Display Priority value allows you to manually control product order. Products with lower numbers are given higher priority and appear first. If multiple products share the same priority value, they are then sorted alphabetically. Additionally, the "Featured" sorting option uses these values to determine the display order.
Question: What is the "Selection Micro-Interaction" and how does it help me build my store?
Answer: This feature allows for faster configuration directly on the canvas. You can double-click an unmapped item to immediately open the selection drawer and assign a product, or double-click a mapped item to highlight it for quick editing. Any changes you make on the canvas sync automatically with the sidebar.