How to Create and Manage Online Courses
Creating and managing online courses is easy with the tools available in Mastermind. This guide will show you how to design your courses, organize content, and track learner progress efficiently.
Step-by-Step Guide to Creating Your Course
-
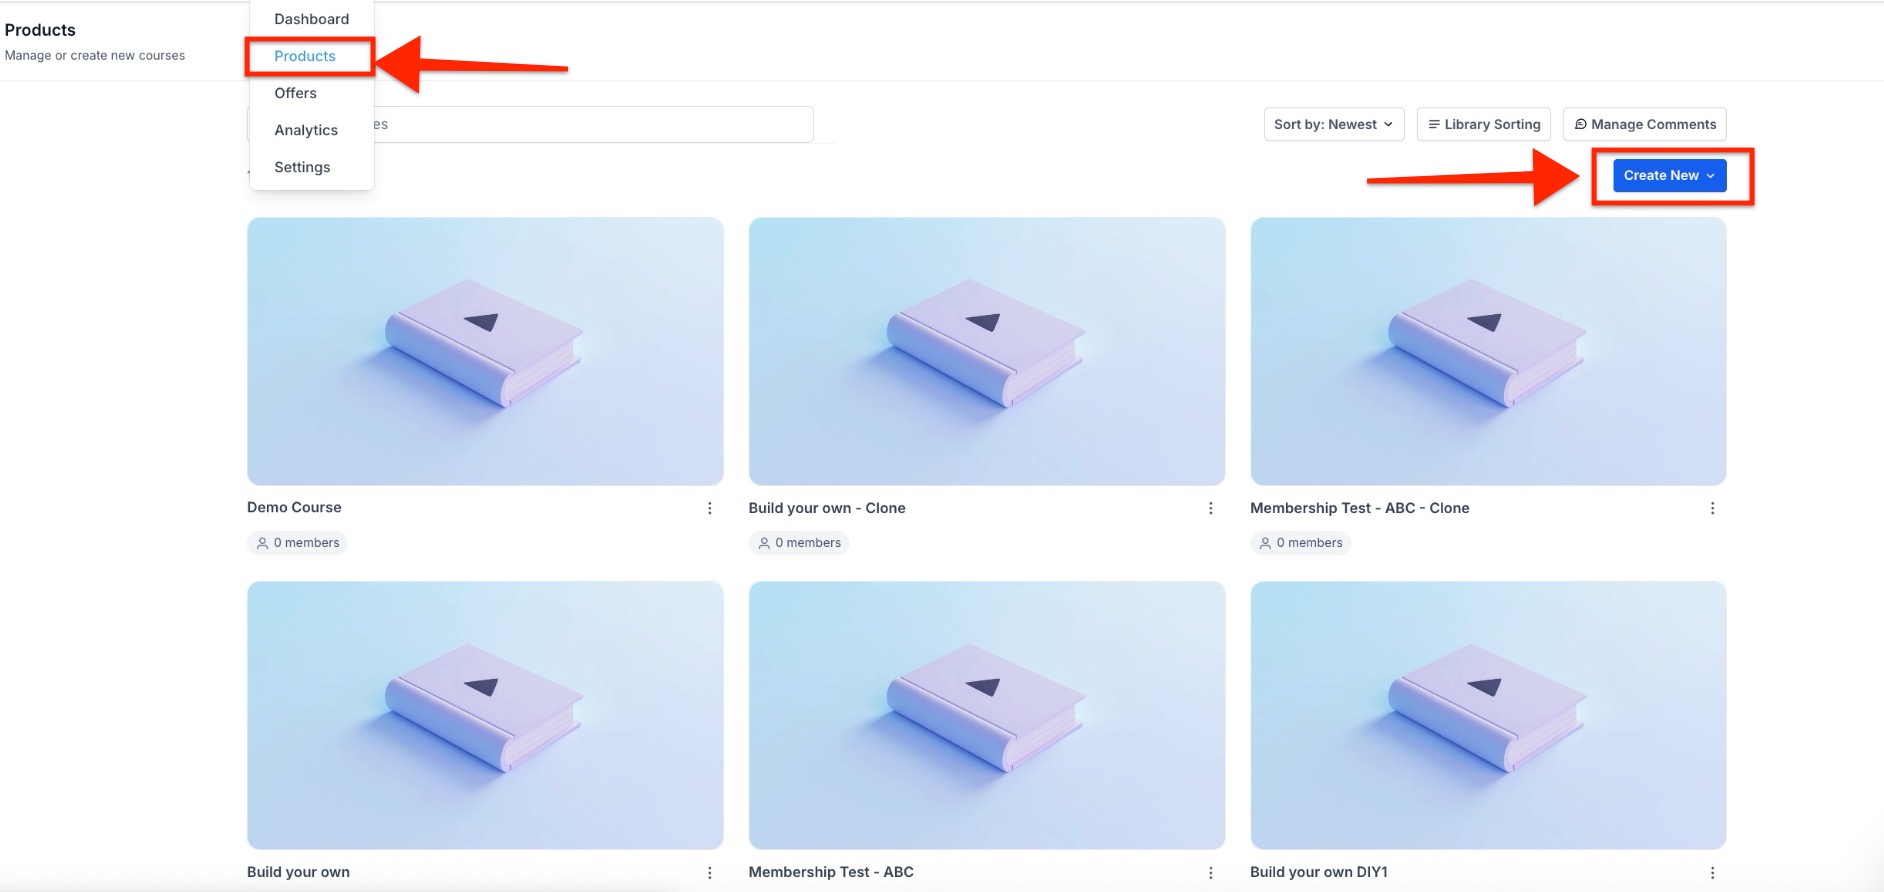
Go to Your Products on the left and click Courses at the top.
2. Create a New Course
- Navigate to Products within the course tab and click Create Product to start a new course.
- You will have the option to either:
- Start from Scratch: Create a fully customized course.
- Import from Kajabi: Import courses from Kajabi directly.
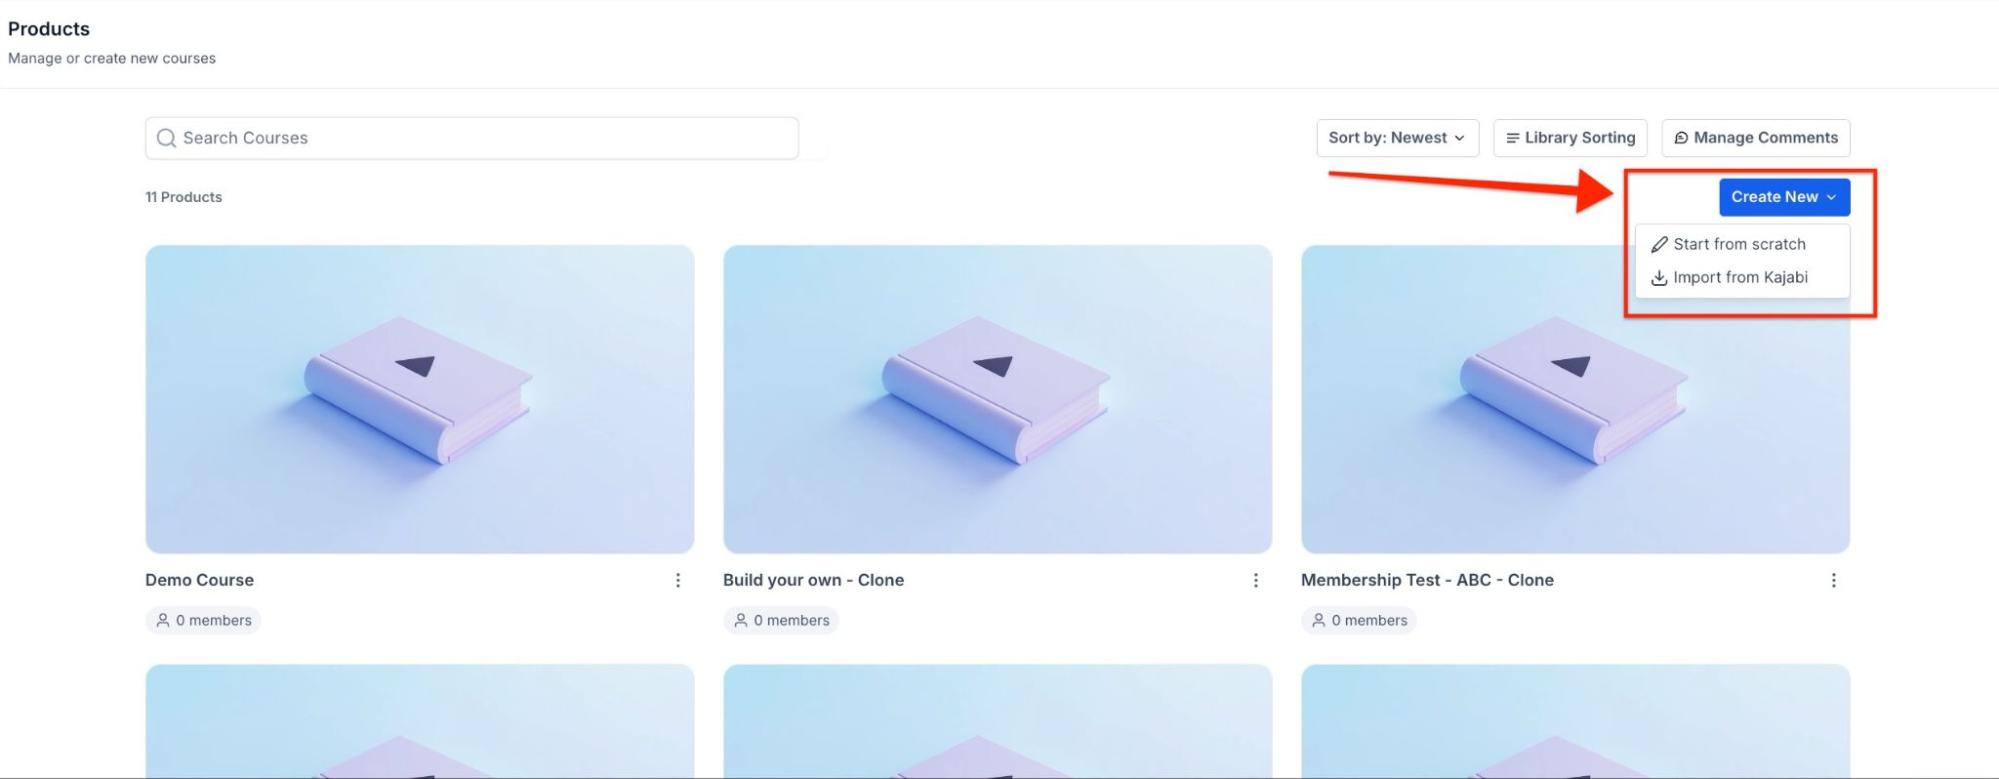
- For this tutorial, we will start from scratch.
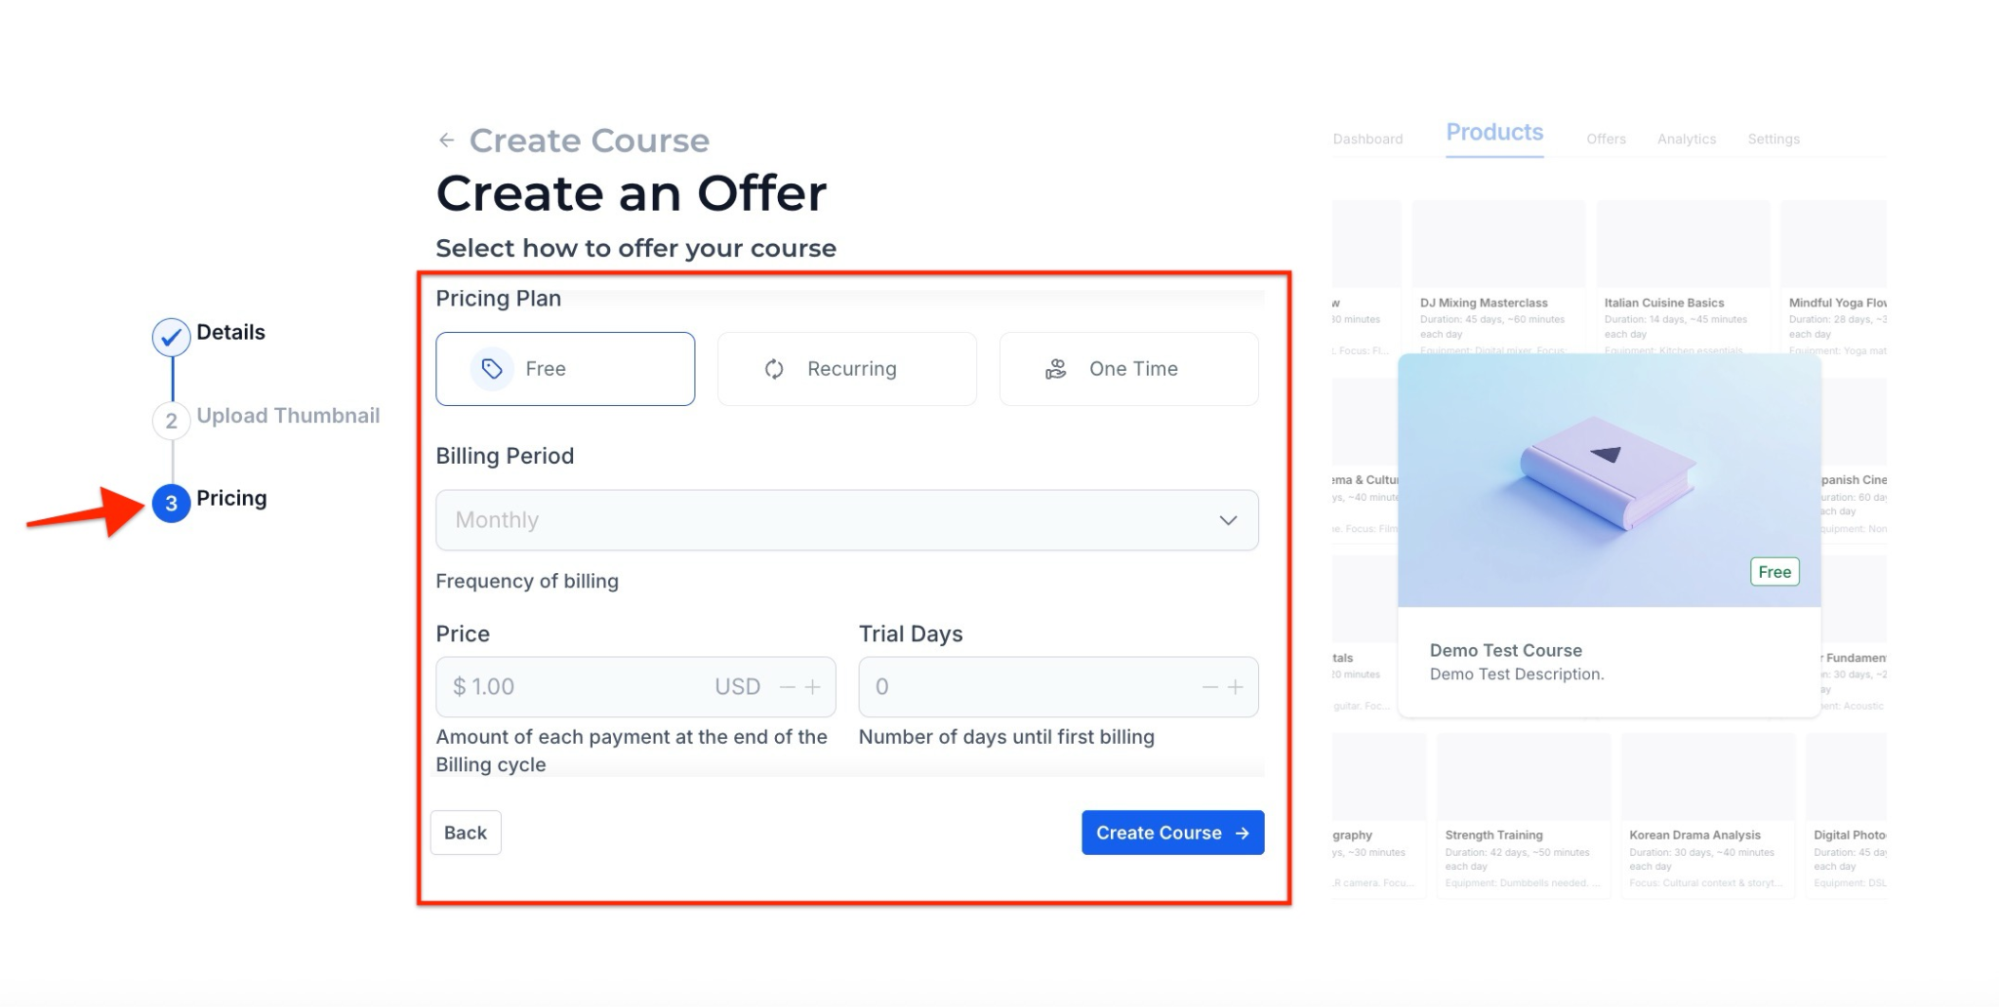
3. Add Details, Thumbnail, and Set Pricing to the Course
- In the Details section:
- Course Title
- Course Description
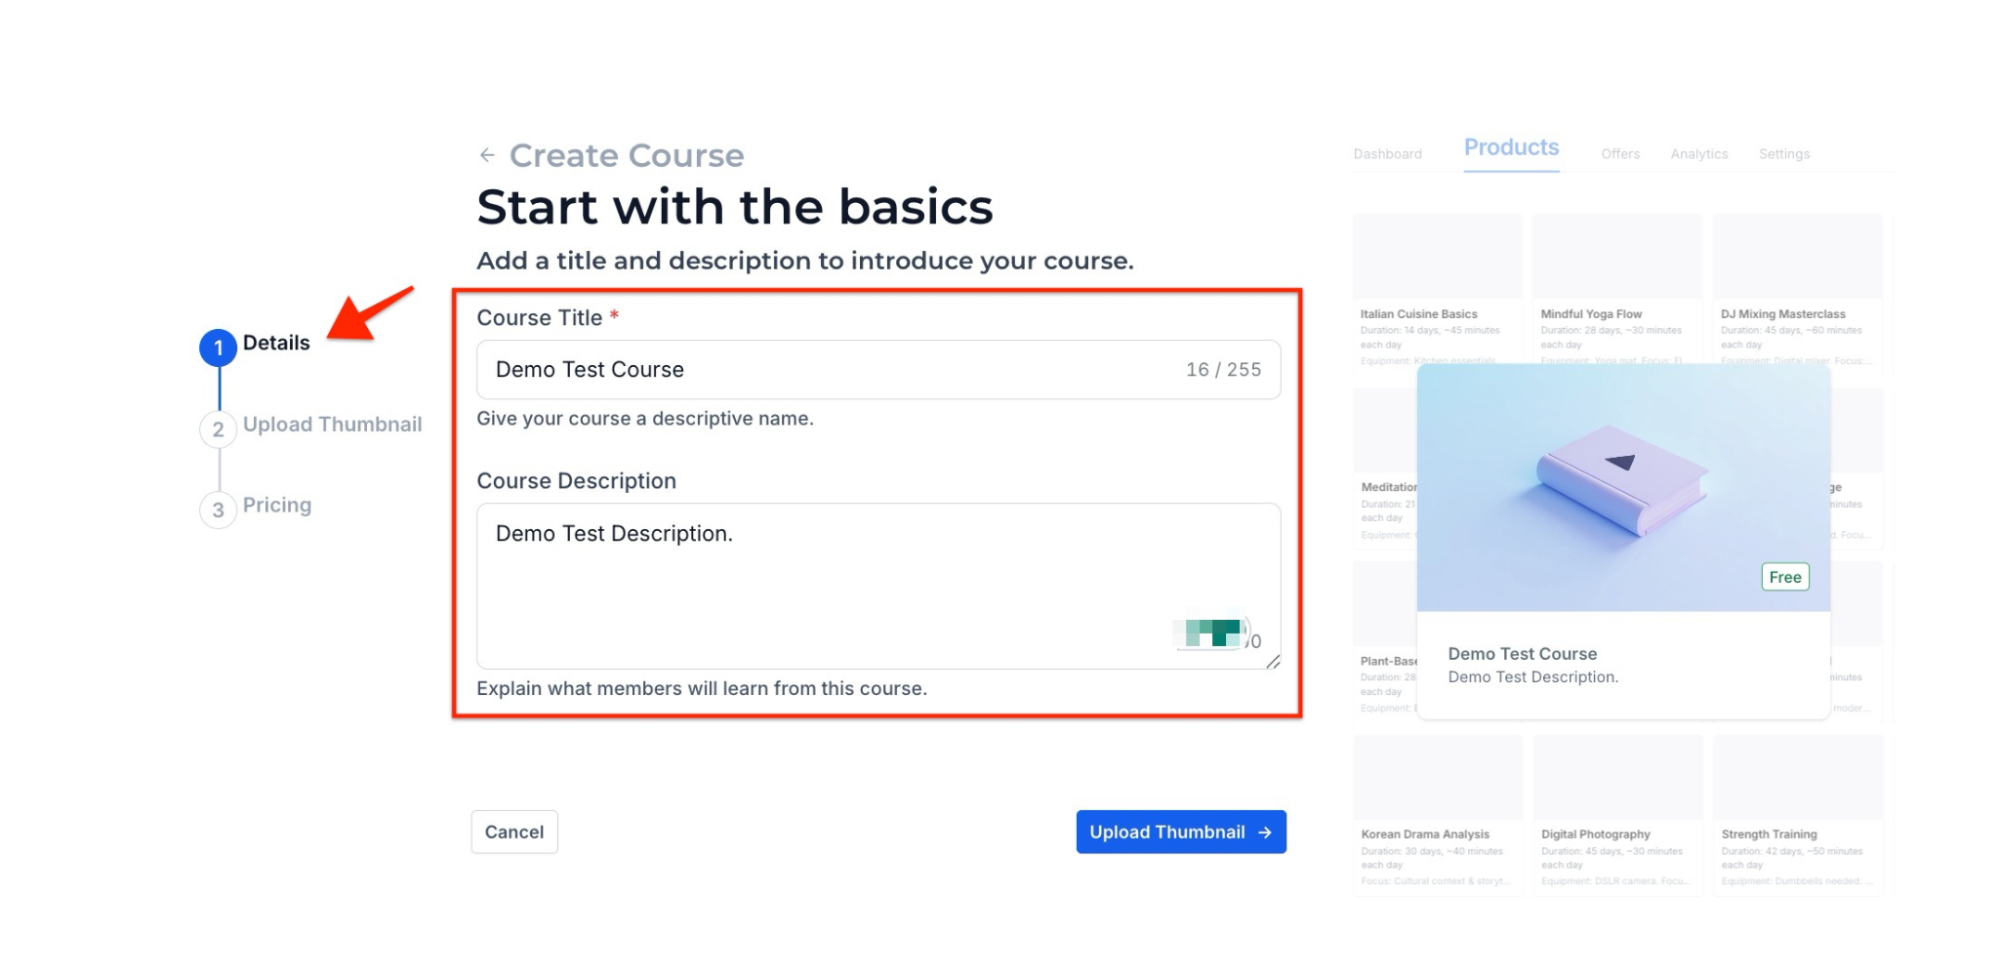
- Then click ‘Upload Thumbnail’, and in that section:
- Upload Course Thumbnail

- Then move to the Pricing section
- Choose the Pricing Plan: Free or Recurring or One Time
-
For Recurring, choose Billing Period: daily, weekly, monthly or yearly.
Note: Trial Days are only applicable to Recurring Pricing
- Set ‘Price Text Override’
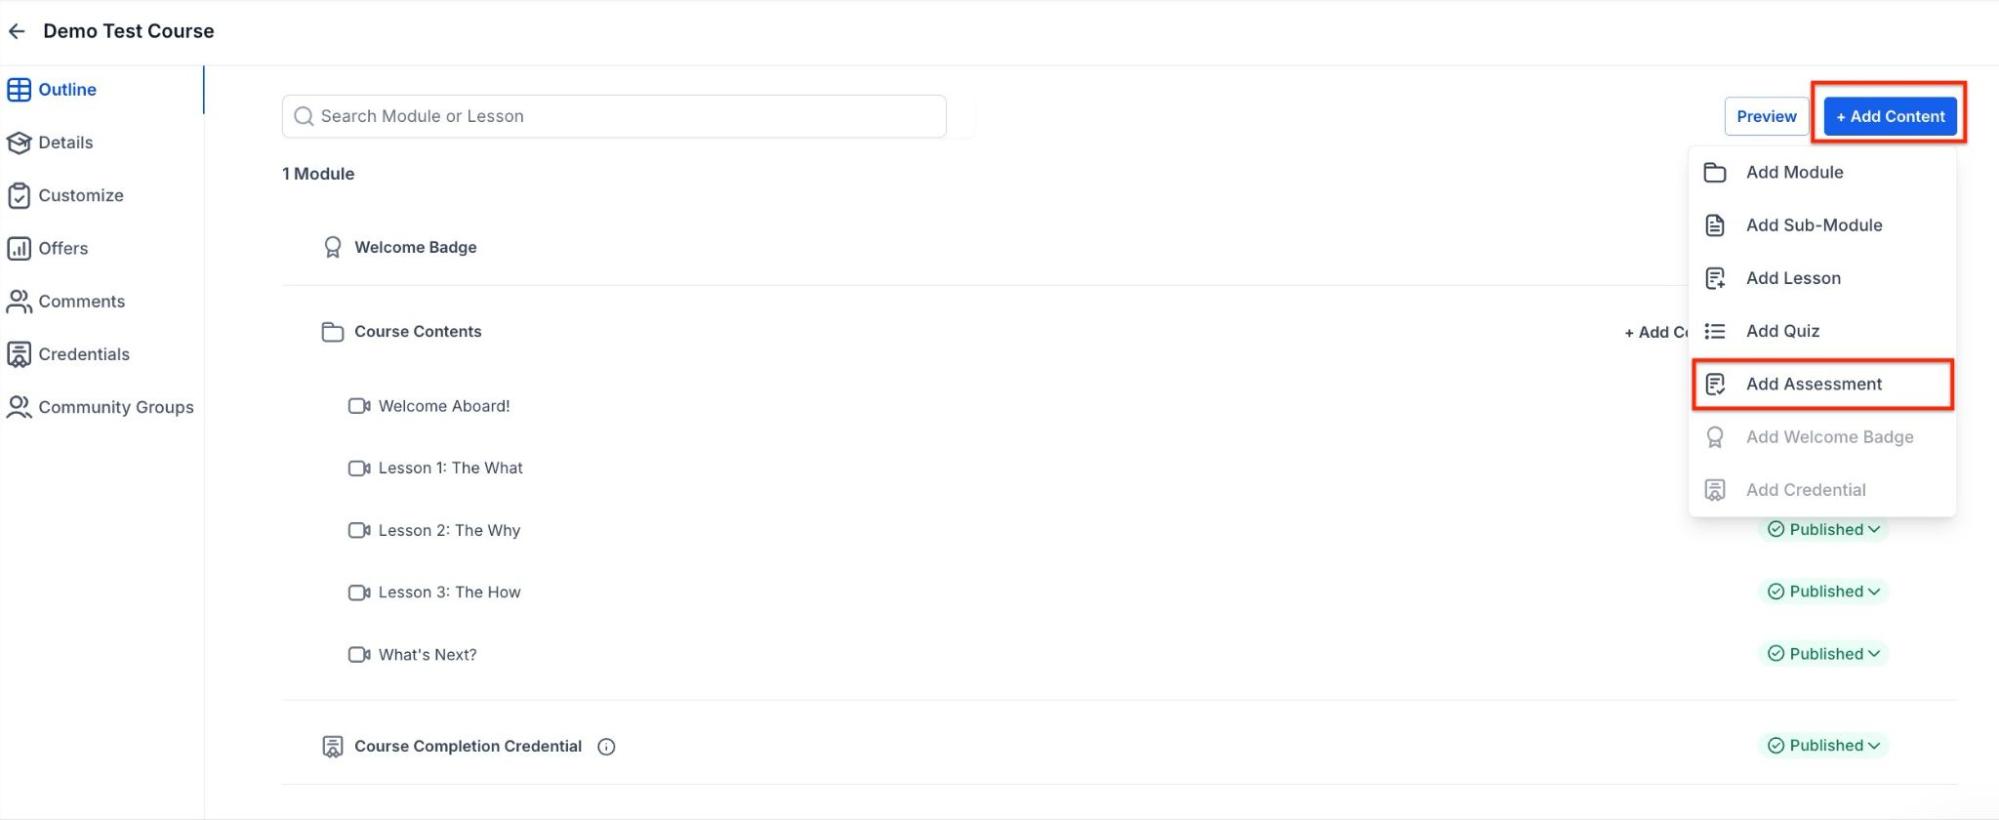
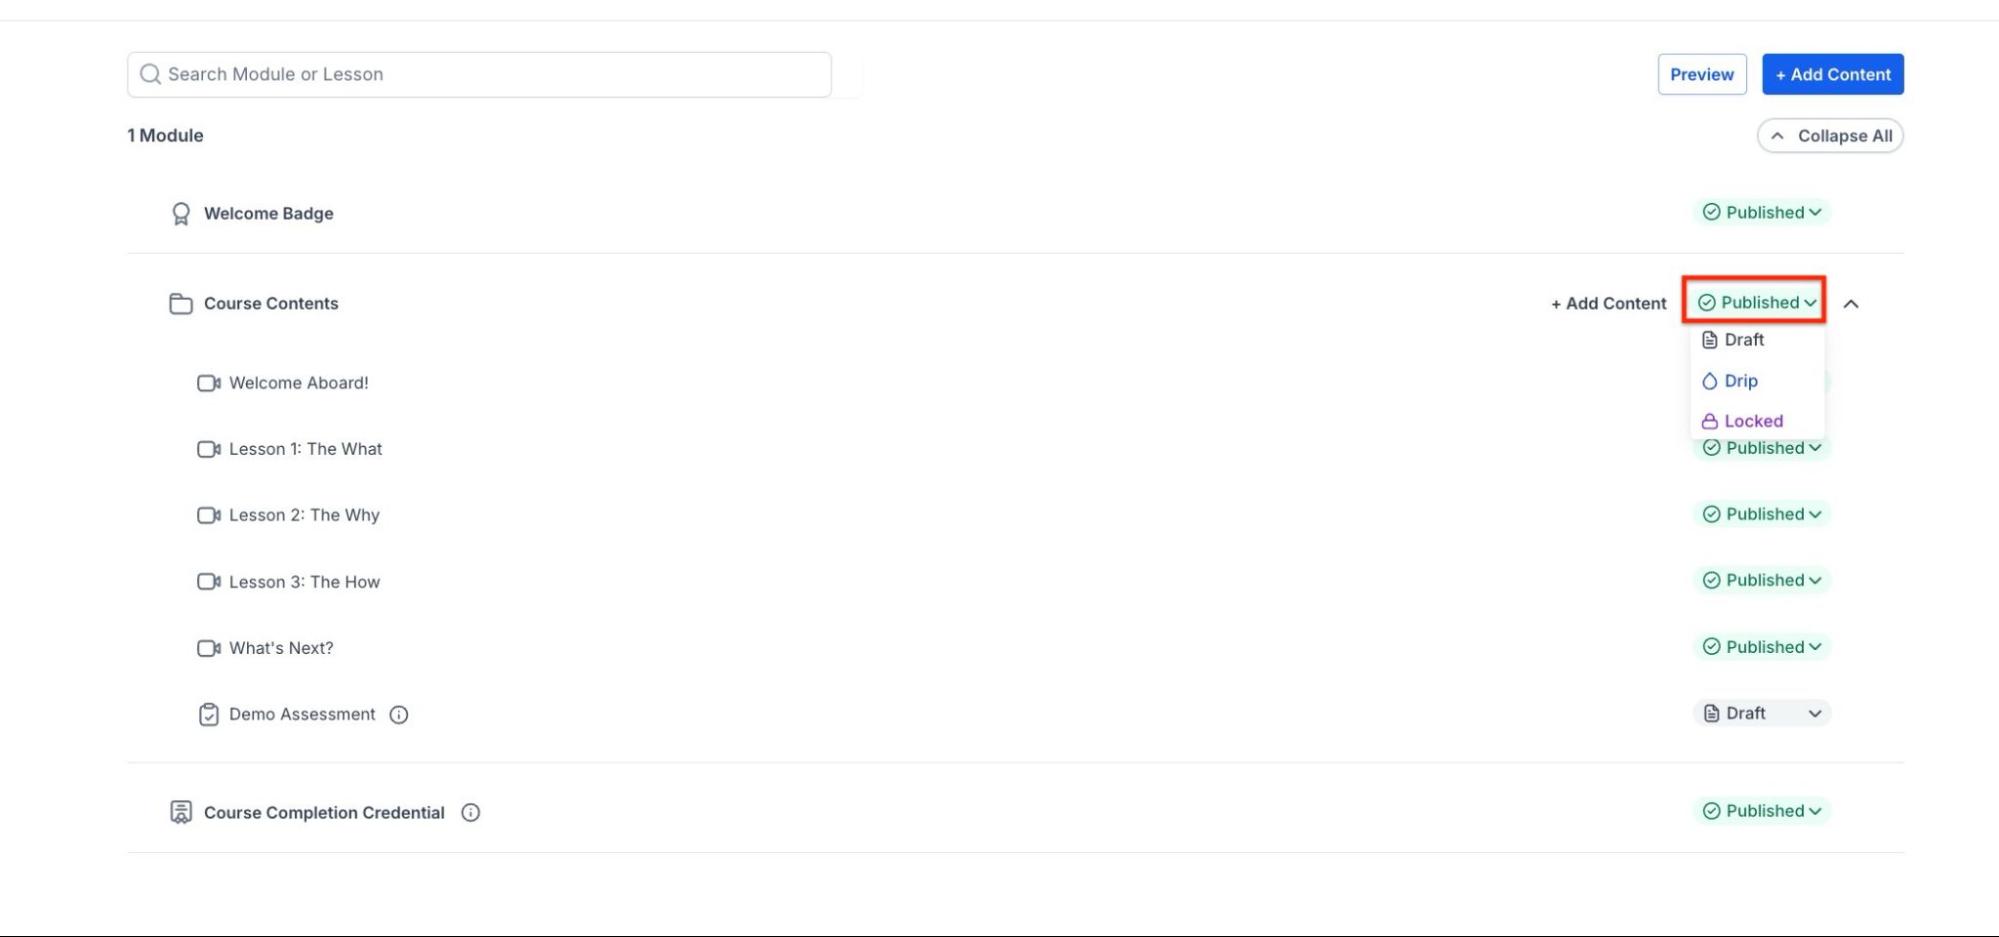
4. Set Up Your Course Structure
- After selecting your course type, you’ll land on the course content section.
- Add new lessons, categories, and assessments (like quizzes).
- To add a new lesson, click Add Lesson.
- To add sub-modules, click Add Sub-Modules and organize your lessons accordingly.
- You can also add an Assignment or a Credential.
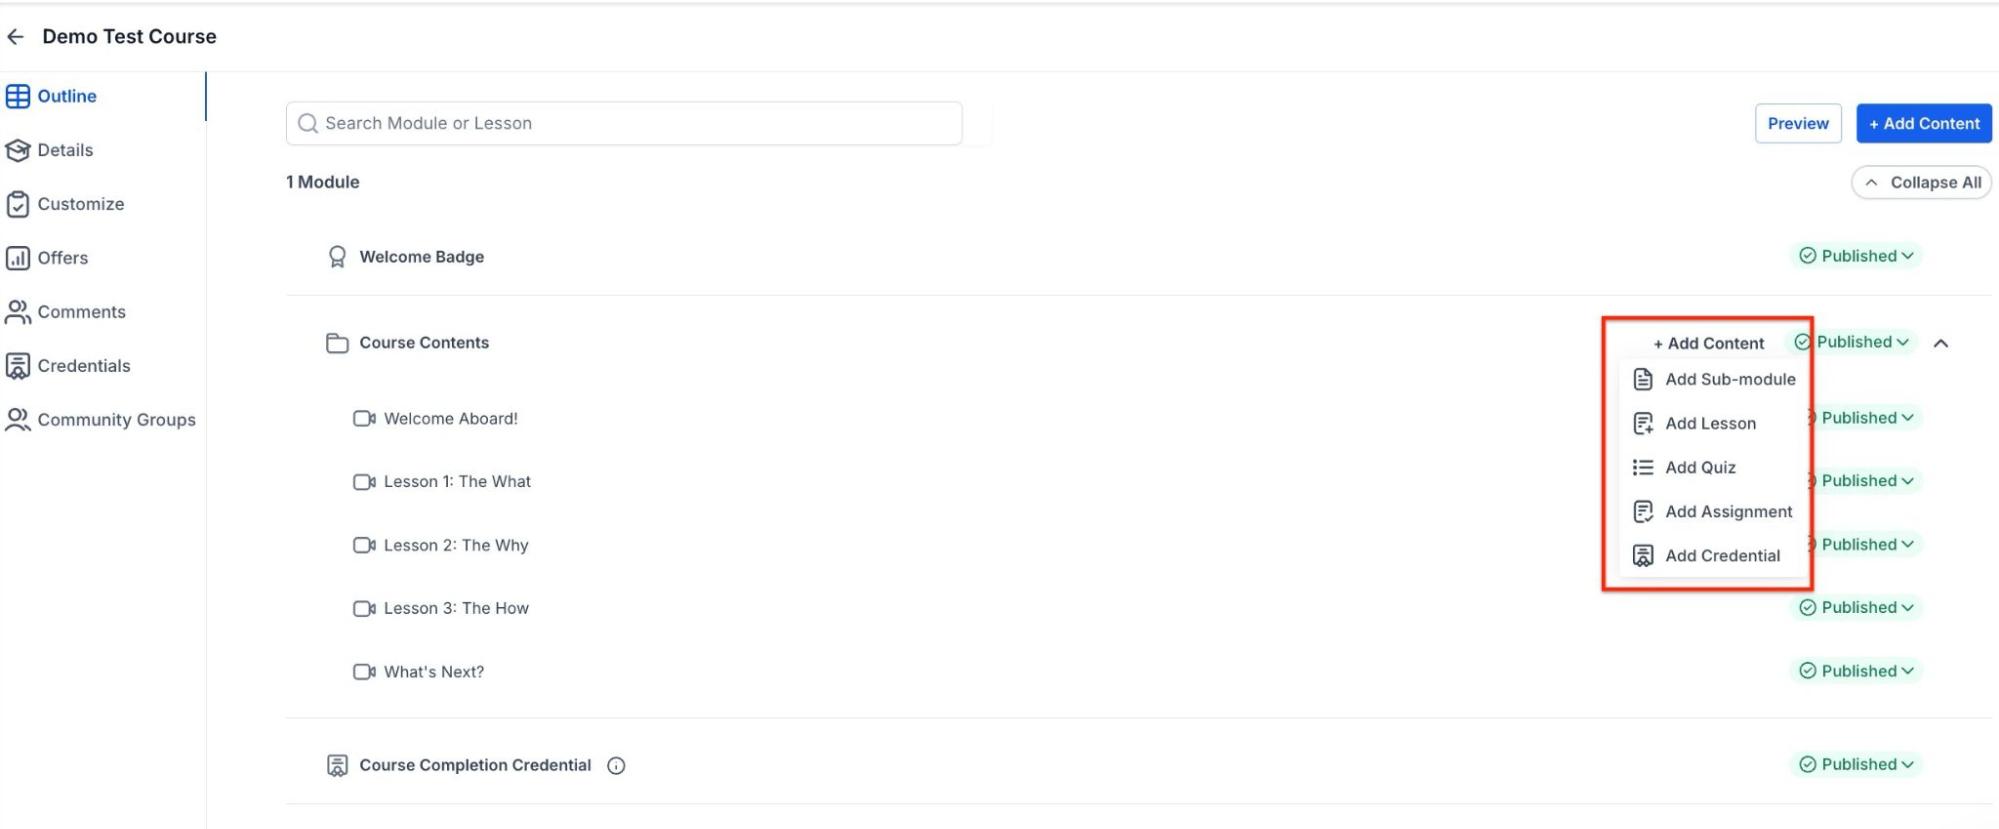
-
Drag and drop lessons to rearrange them as needed.
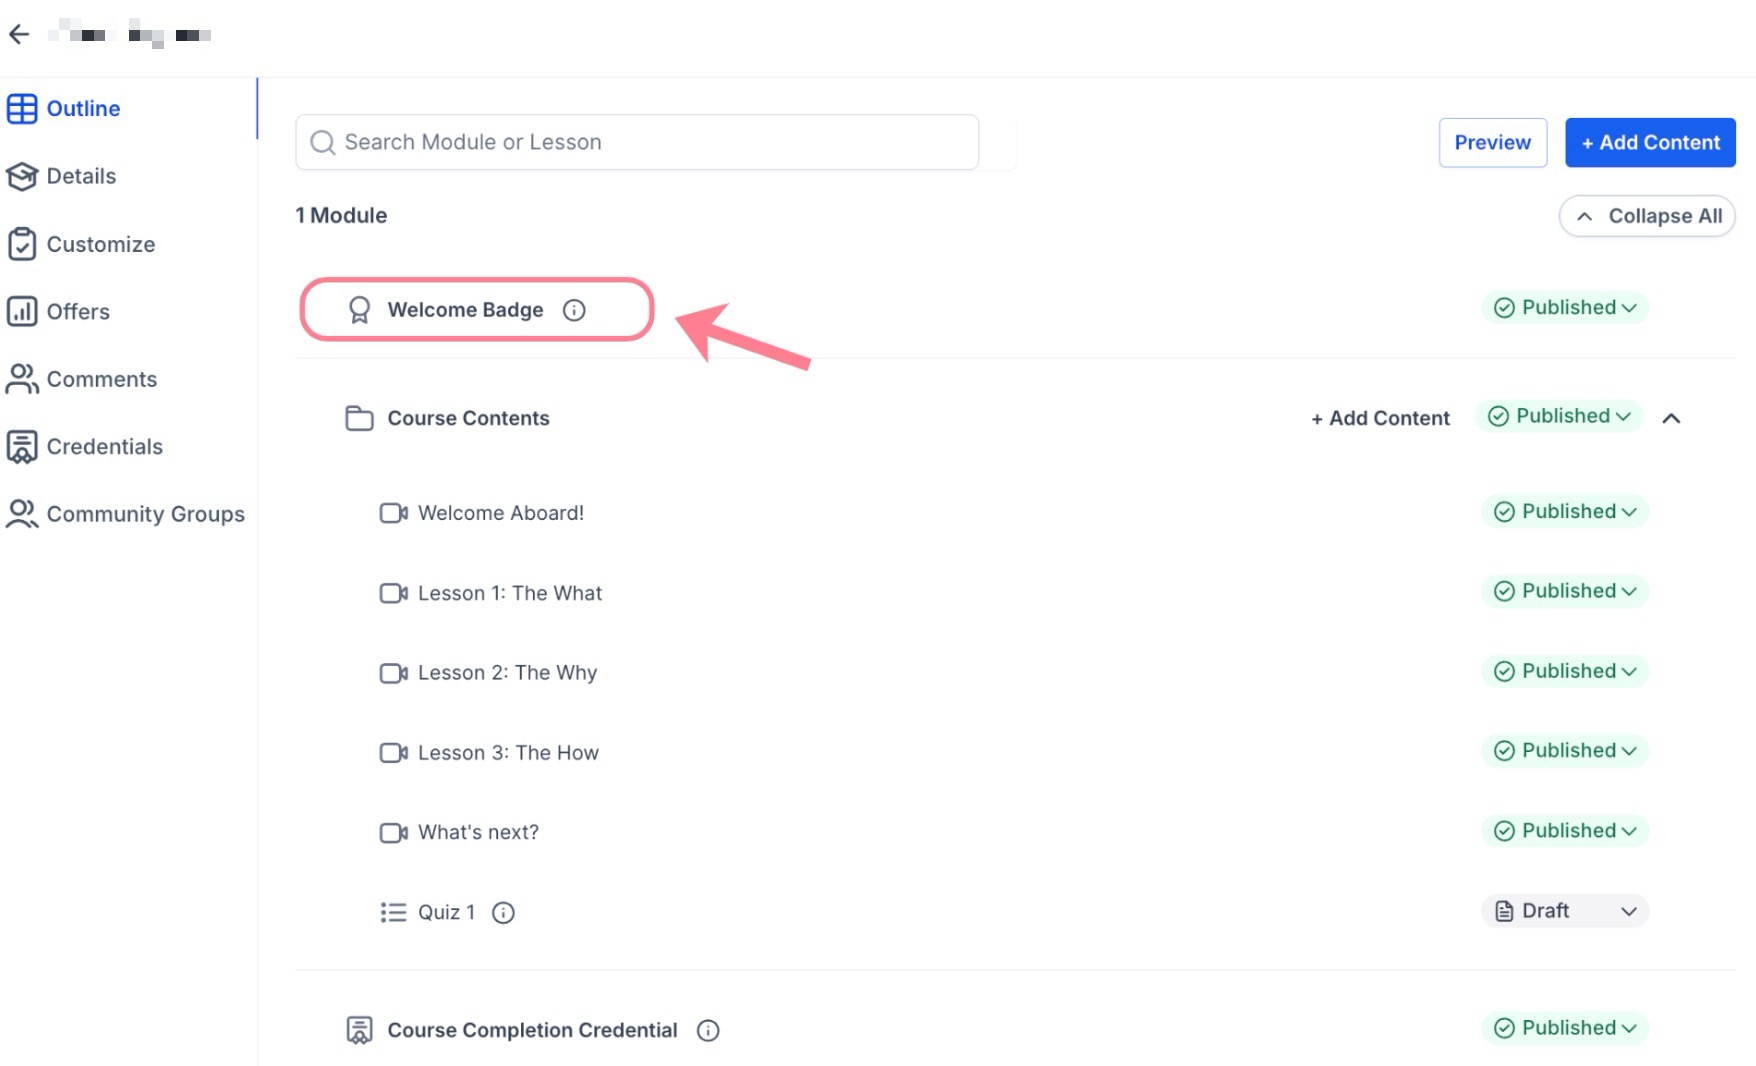
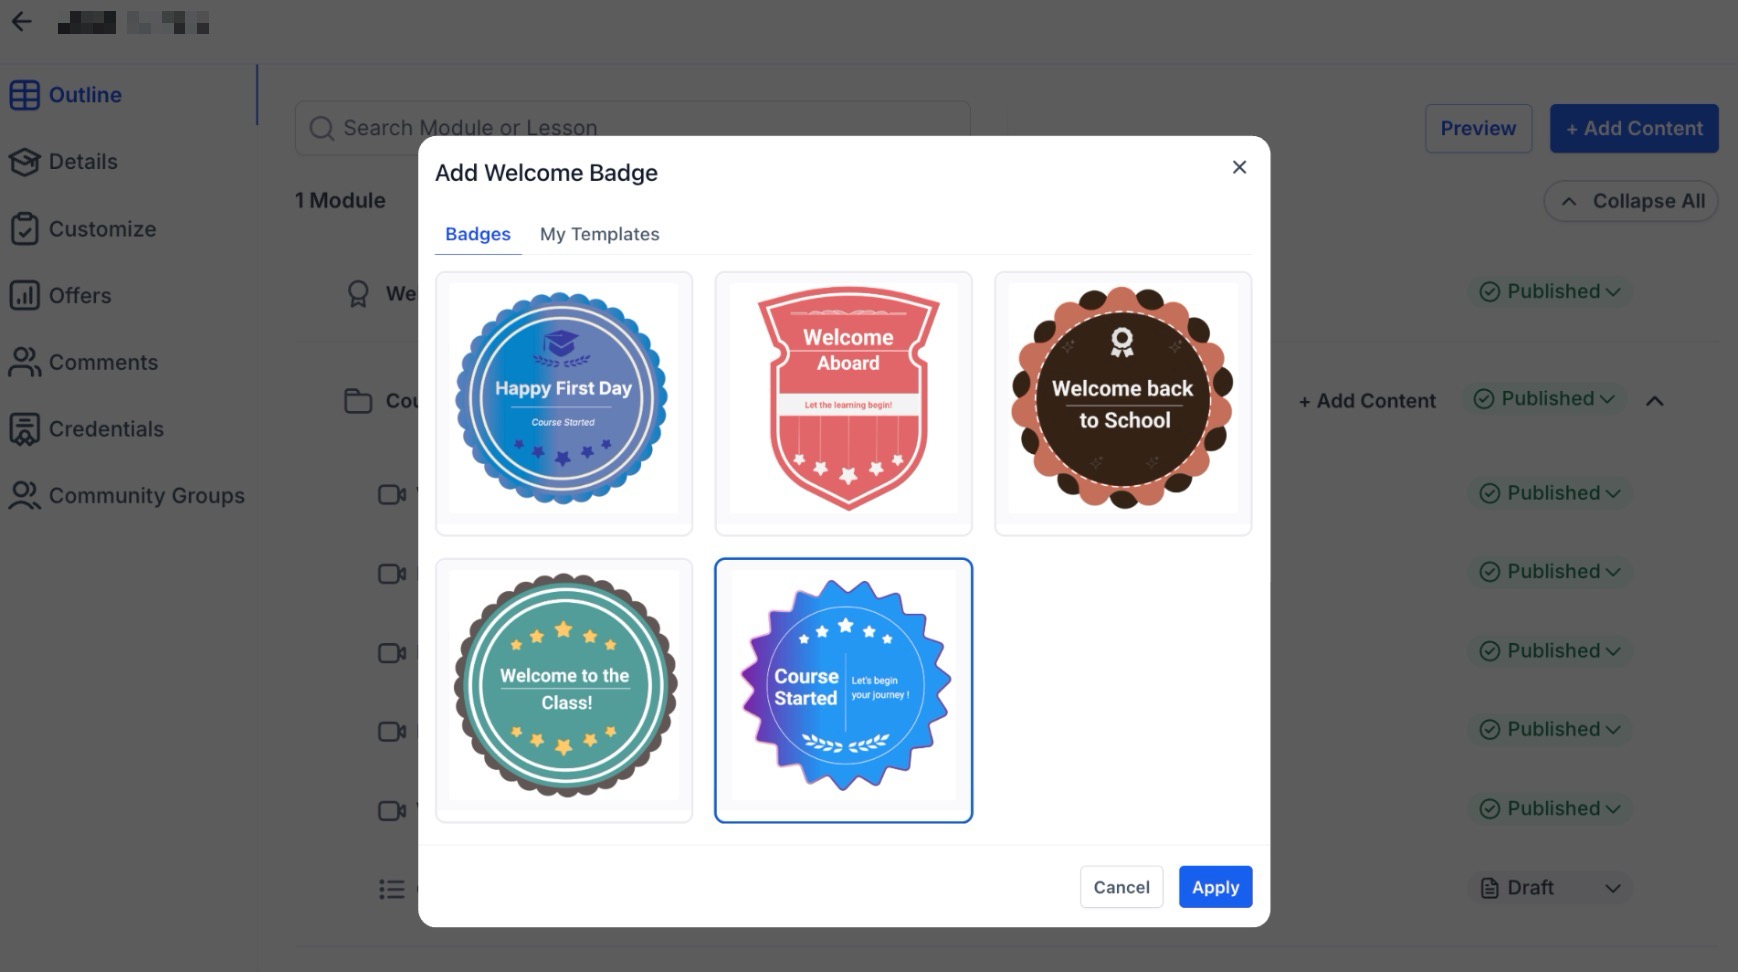
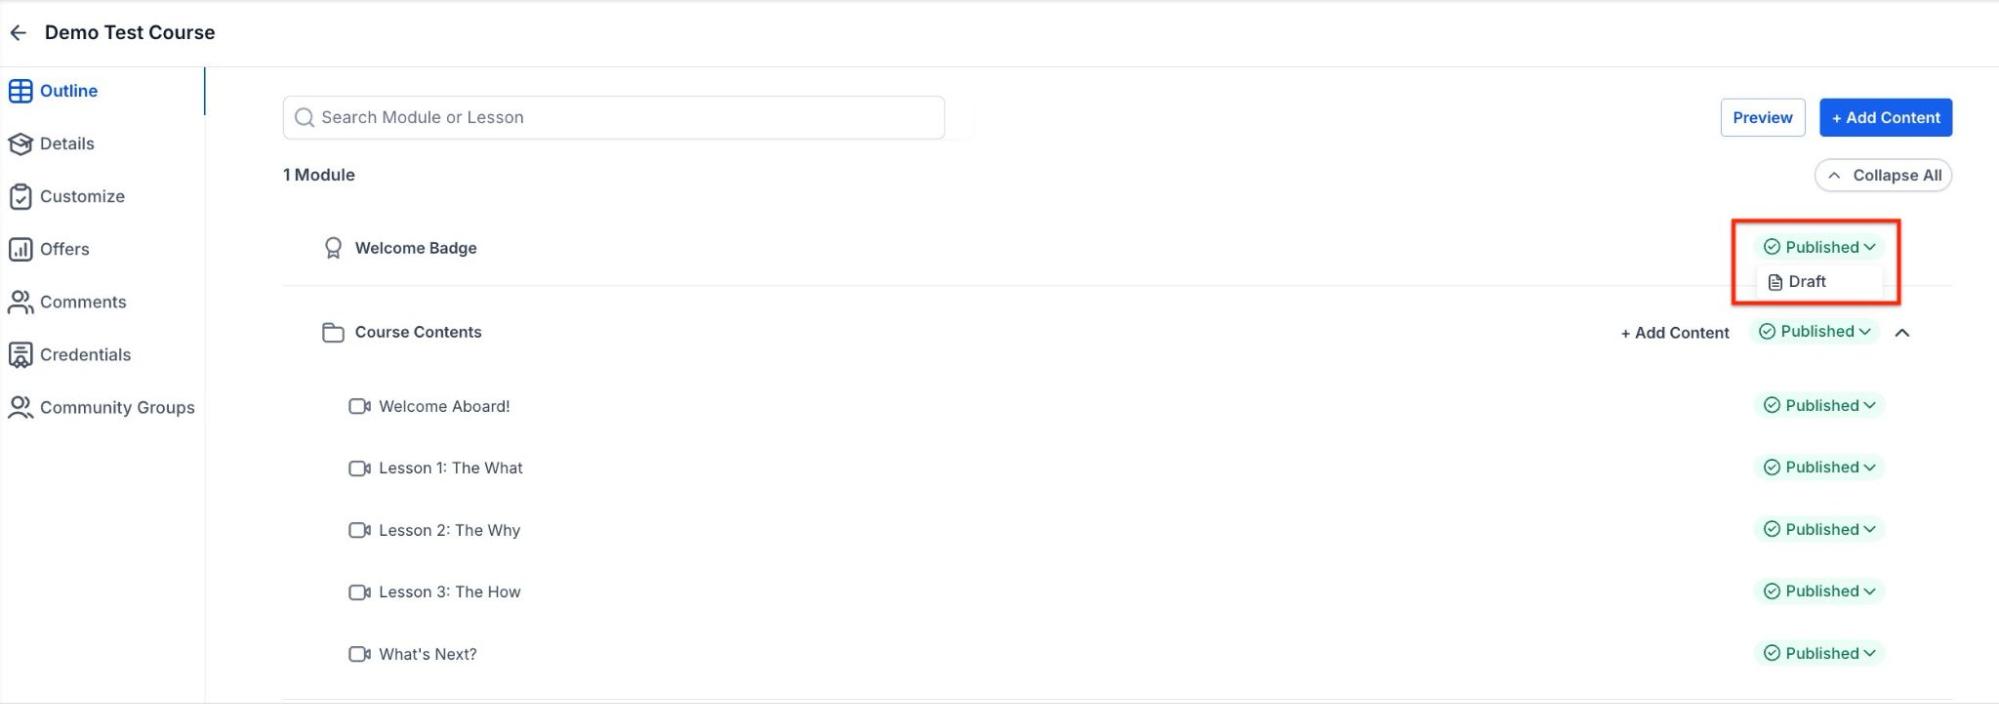
Automatic Welcome Badges: To ensure learners feel recognized from the moment they join, every new course includes a pre-attached Welcome Badge.
- Instant Issuance: The badge is automatically sent to the learner as soon as they enroll for the first time.
- Curated Templates: You can choose from five specific templates designed for course enrollments. To keep your workflow focused, only these five templates are visible in the Welcome Badge section.
- Full Control: While this feature is enabled by default to increase engagement, creators can disable it at any time by simply switching the badge status to Draft.
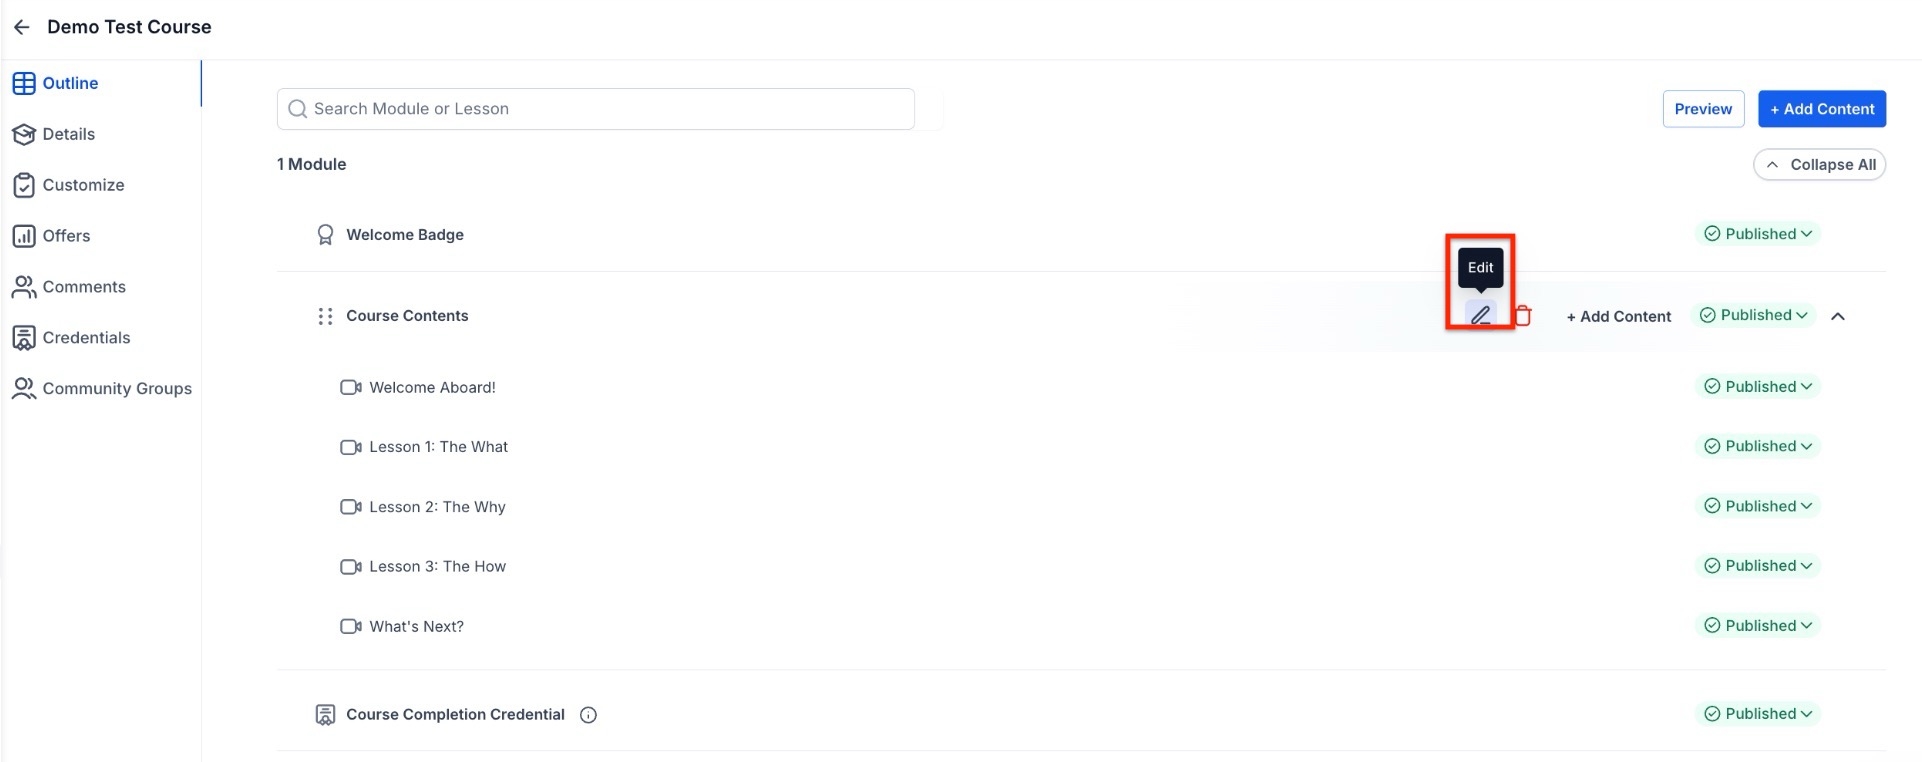
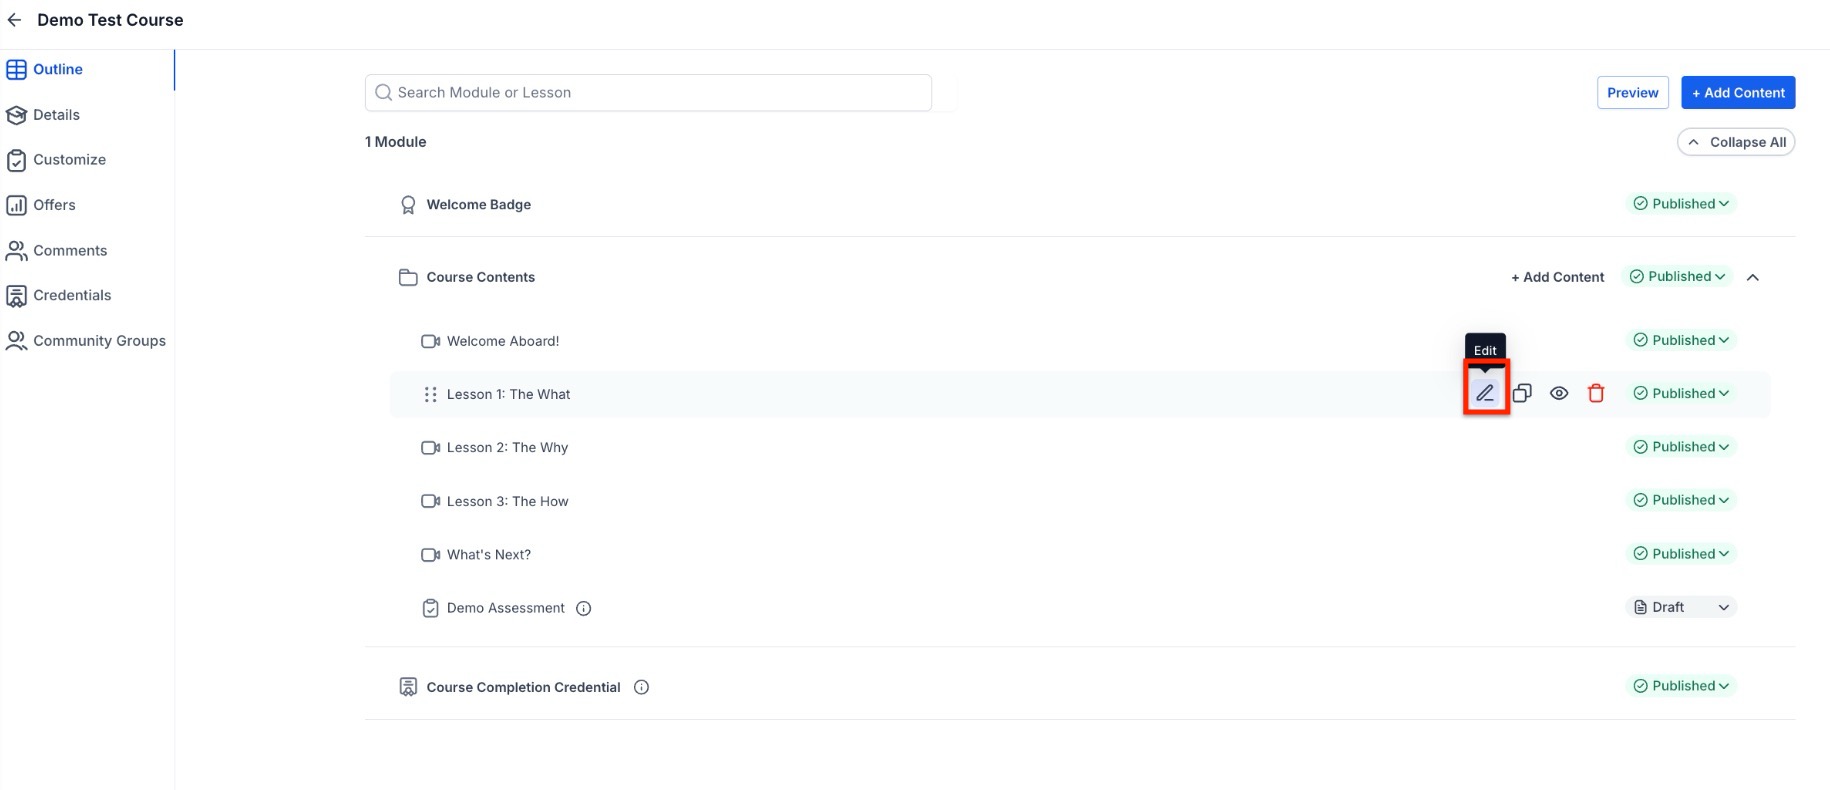
5. Editing Your Course Content
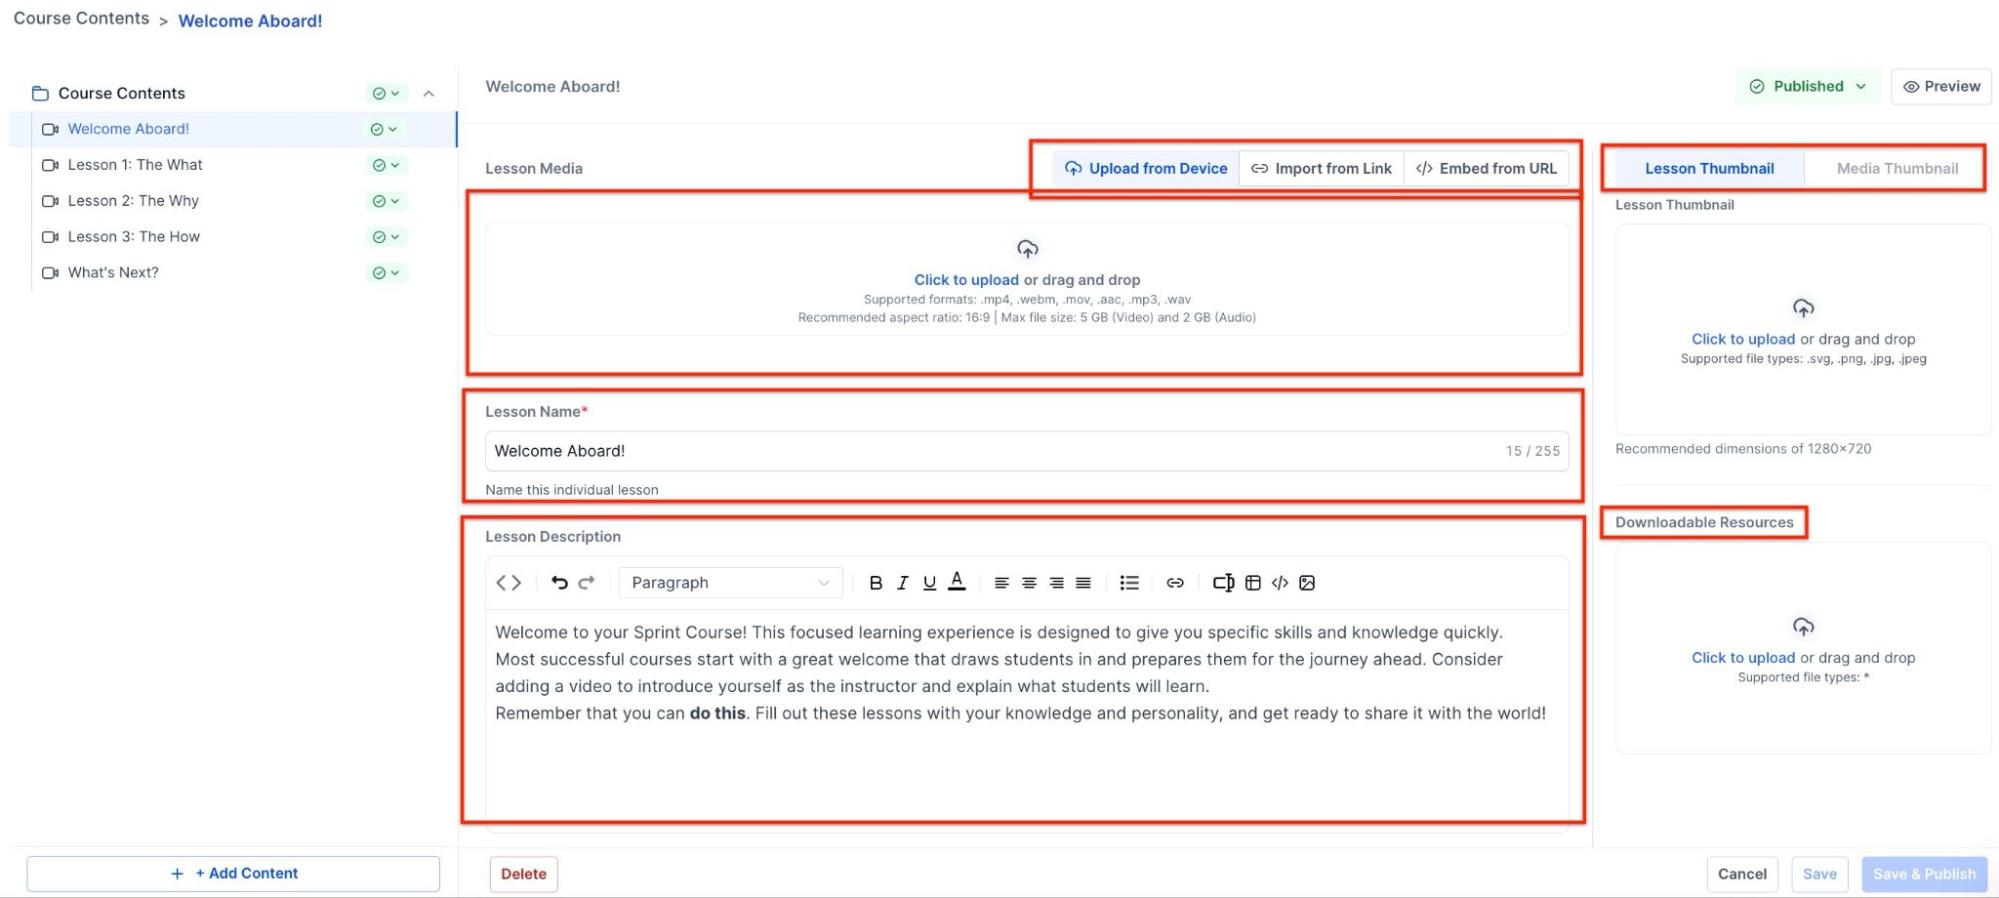
- Click on a pencil button to edit. Here, you can:
- Edit Title and Description, and Upload Media

- You can also edit a lesson while editing that, you can upload a video media: either directly upload from the device, or use the media URL, or embed from the link.
- You can also choose media and lesson thumbnail, and upload downloadable resources, e.g., PDF.
- You can edit the lesson name and description as well.
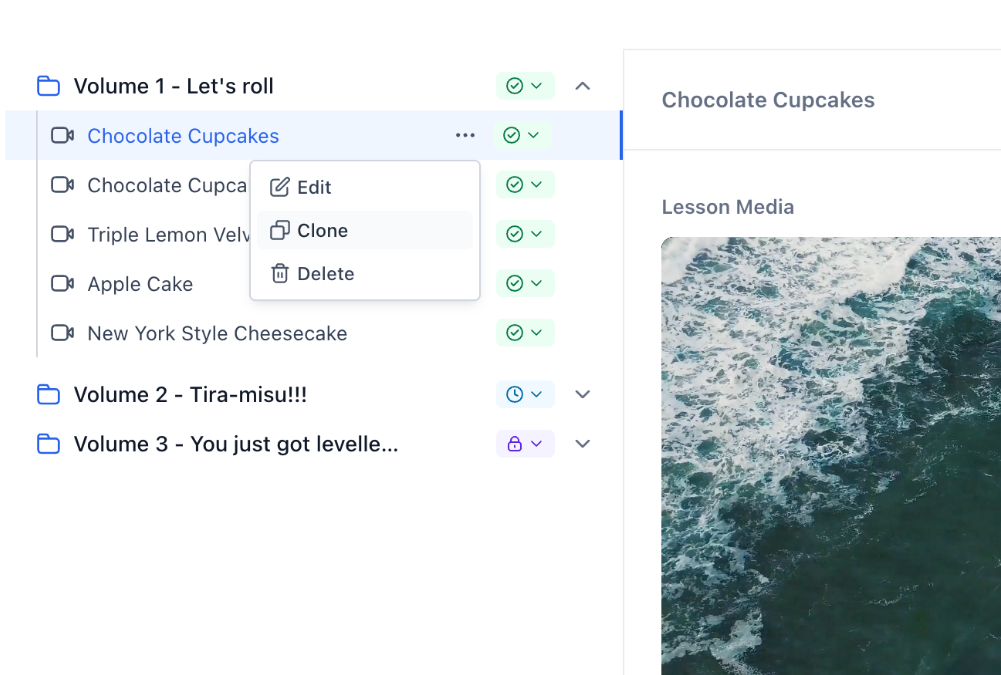
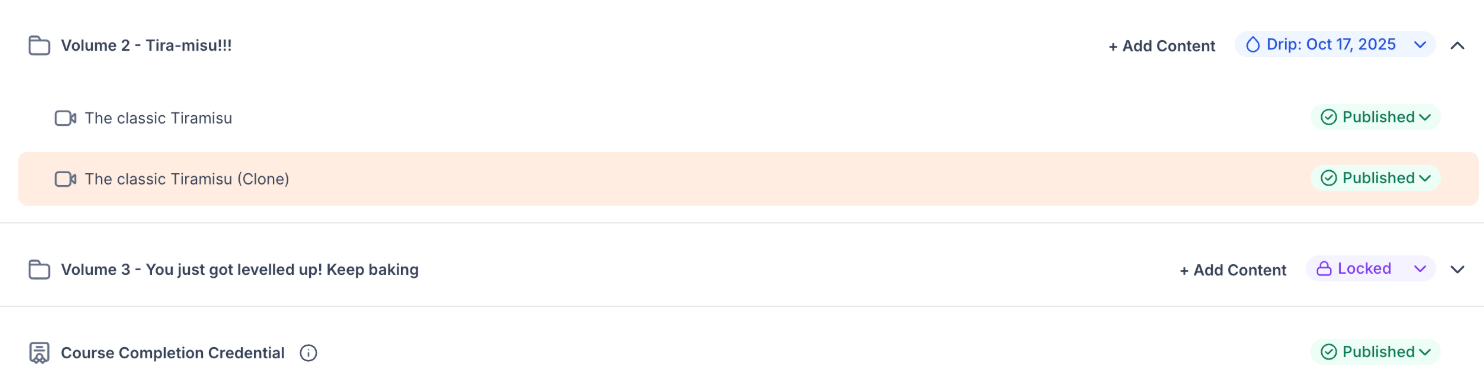
6. Cloning of Content within a Course
Content Cloning saves you time by letting you duplicate your work instantly. It’s perfect for when you need to use the same basic layout or structure for multiple lessons in your course.
How to Use:
- Open Course Builder: Navigate to your course outline within Mastermind in Membership > Courses > Products.
- Locate Item: Find the Lesson, Quiz, or Assignment you want to copy.
- Click Clone: Select the Clone option from the item row or sidebar.
- Wait for Progress: A modal will appear; cloning usually completes in 1–2 seconds.
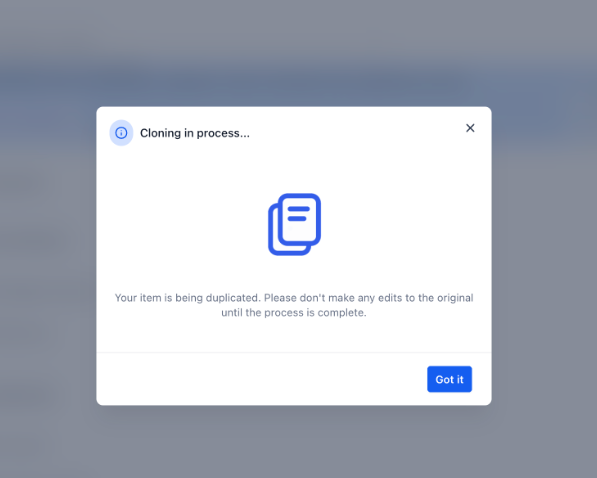
- Customize Duplicate: Your new, identical item will appear next to the original, ready for customization.
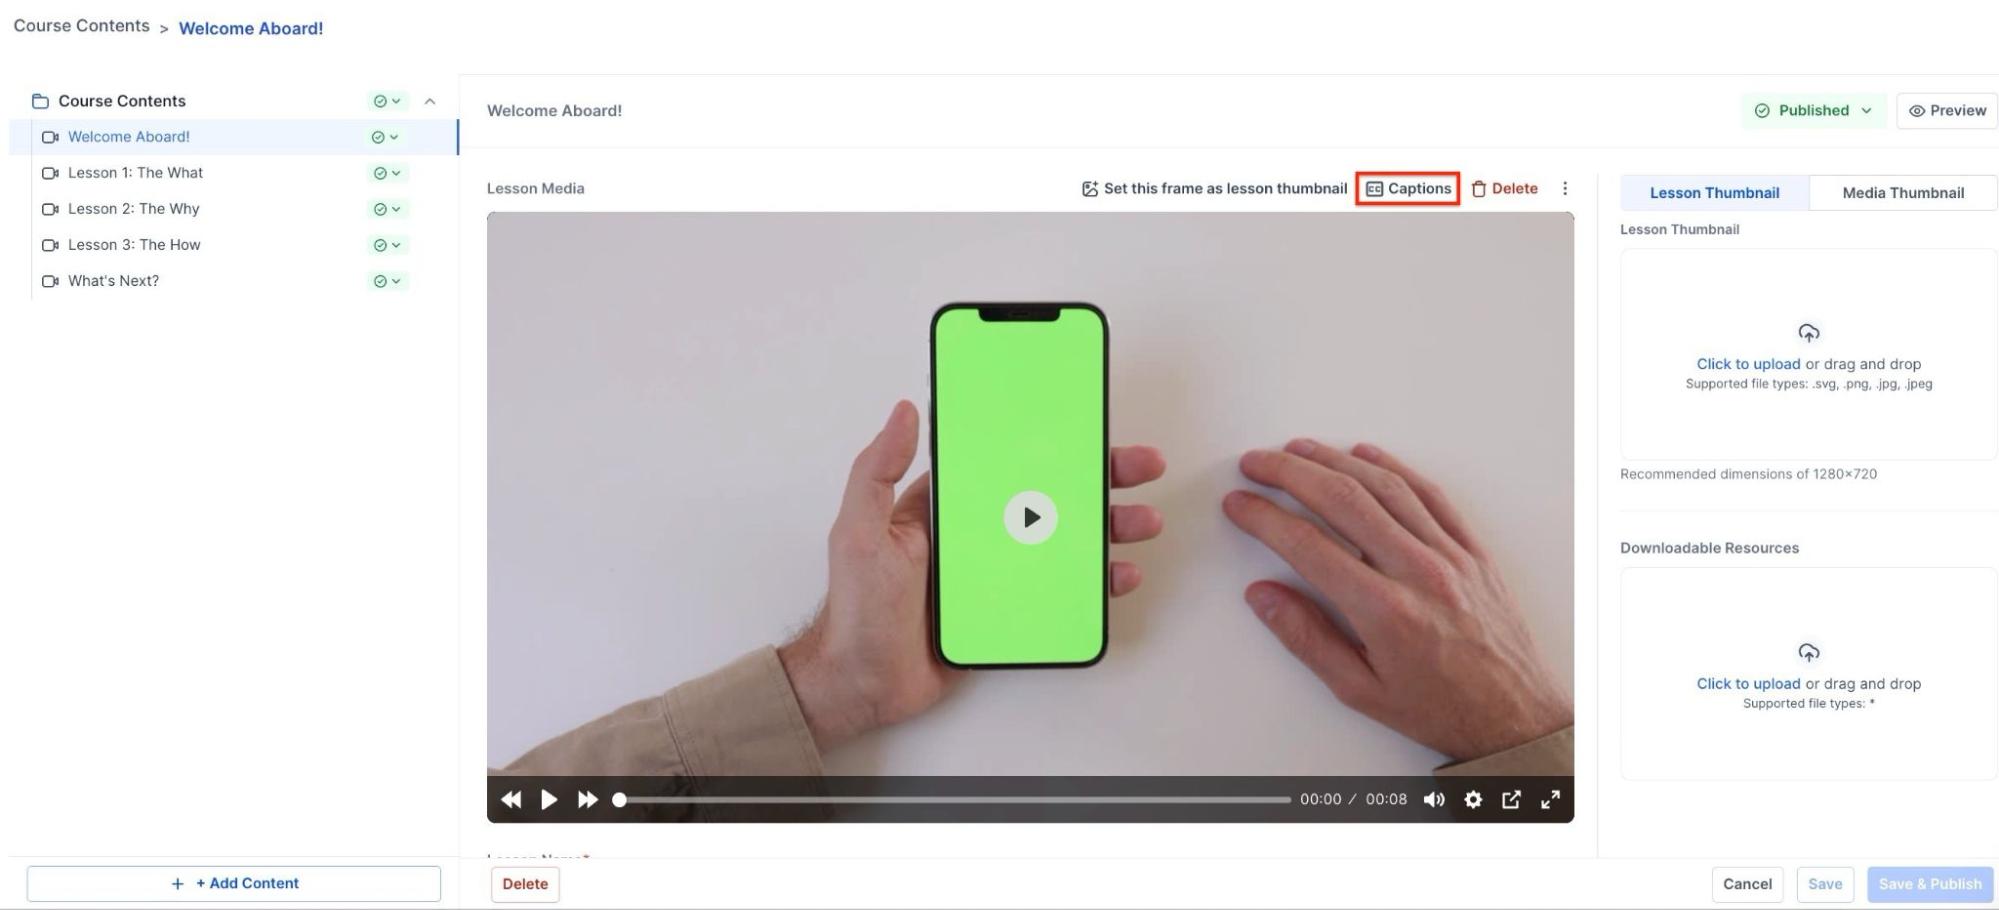
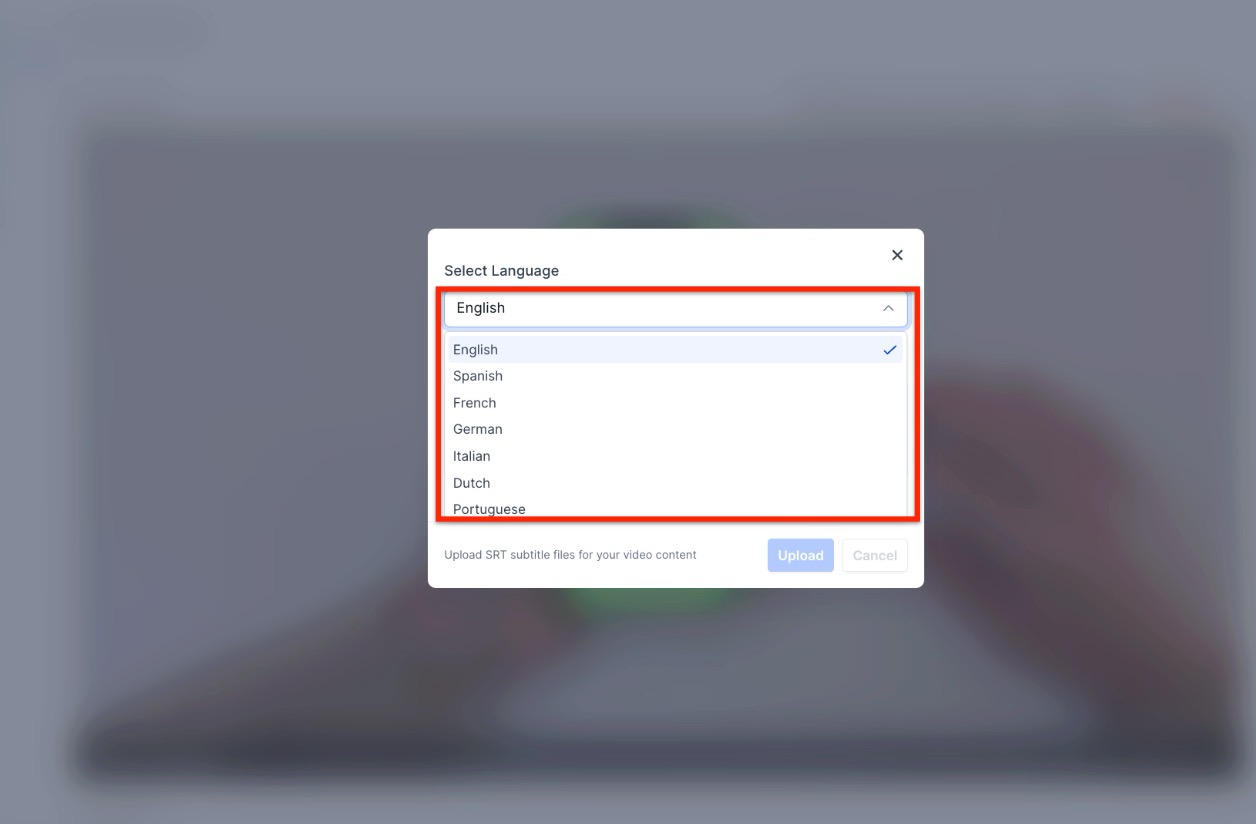
7. Adding Subtitles to videos:
- You can also add subtitles to your video lesson by clicking on ‘Captions.’
- You can also add subtitles to your video lesson by clicking on ‘Captions.’
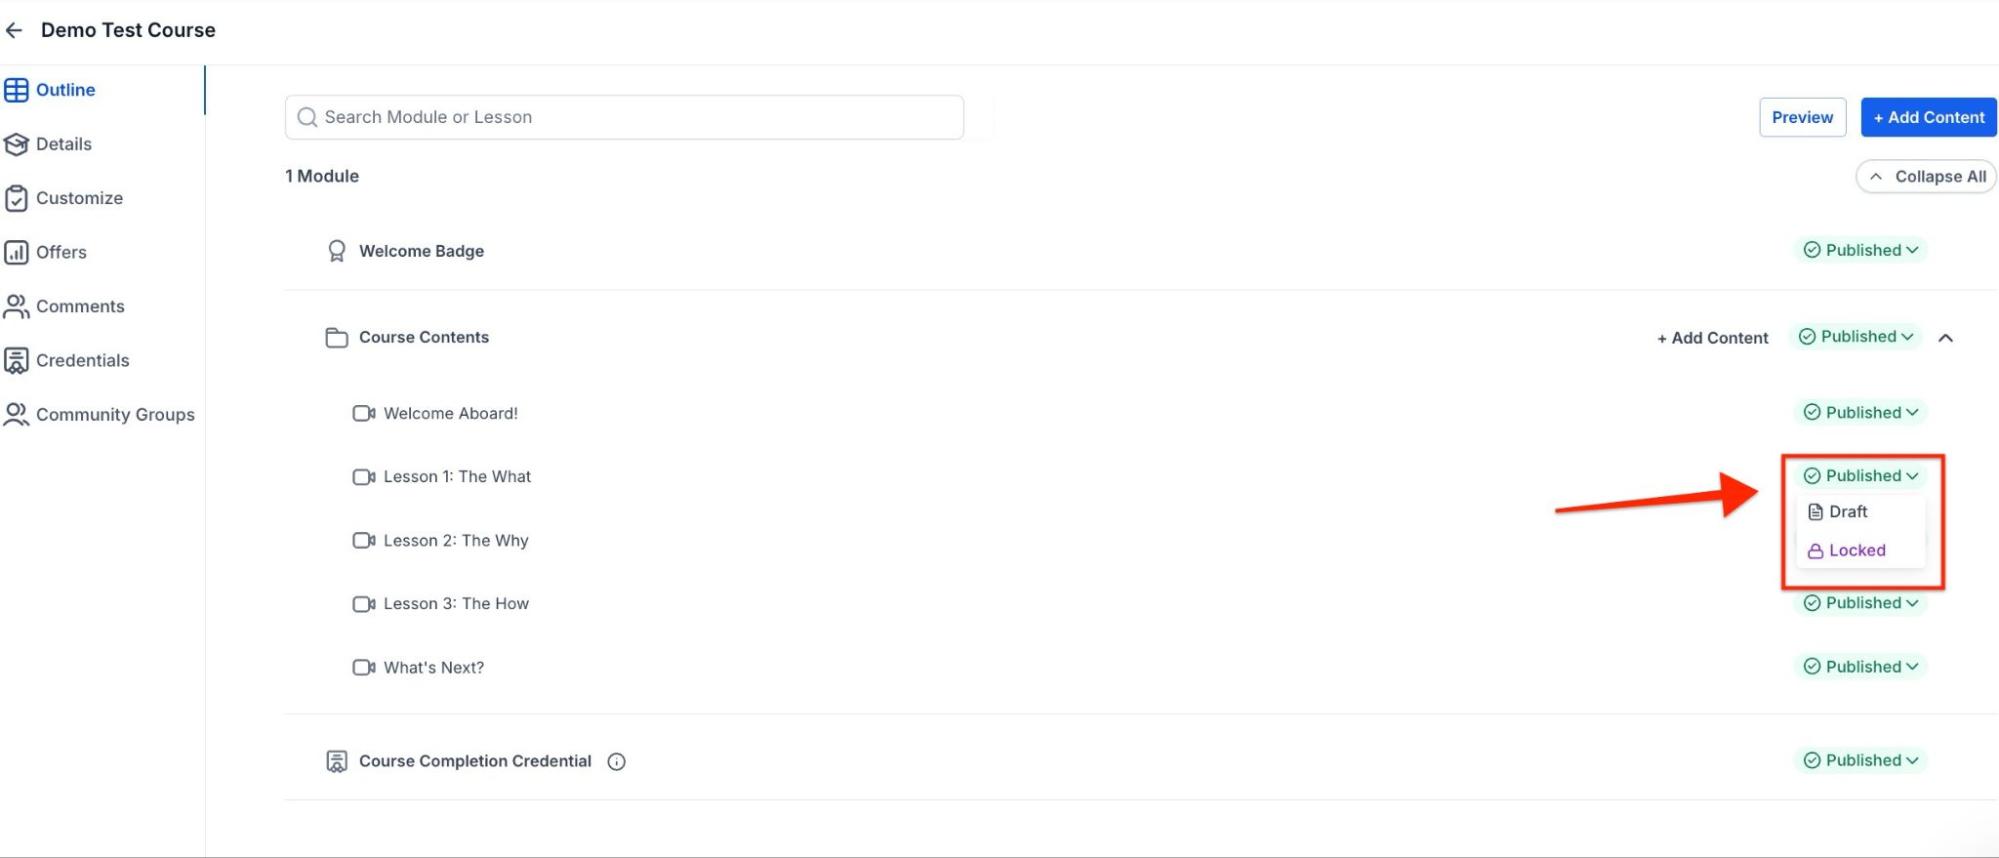
- Set the Module’s visibility to Draft until you’re ready to publish.
- You can also set the lesson’s visibility to Draft or Locked.
6. Creating Assessments
- To add assessments, select Add Assessment.
- Enter the Title and select the Module.
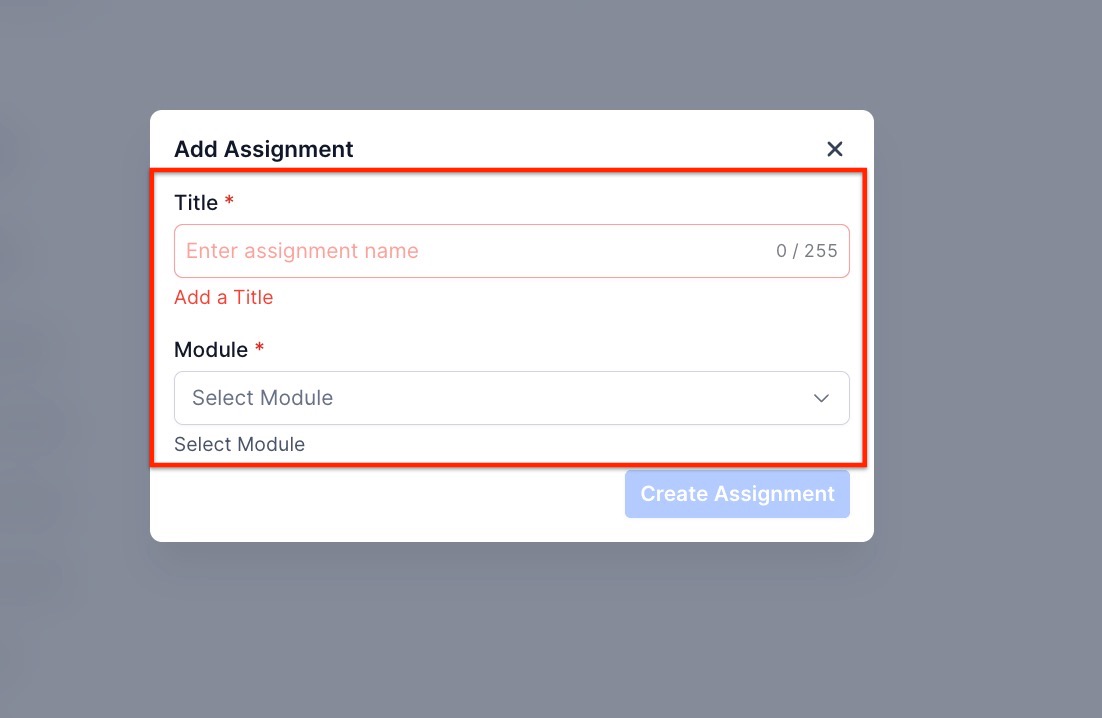
Add Instructions, Assessment Material, set the thumbnail, toggle on or off ‘Ungraded Assessment’, and enter the Completion message

- Once done, click Save.
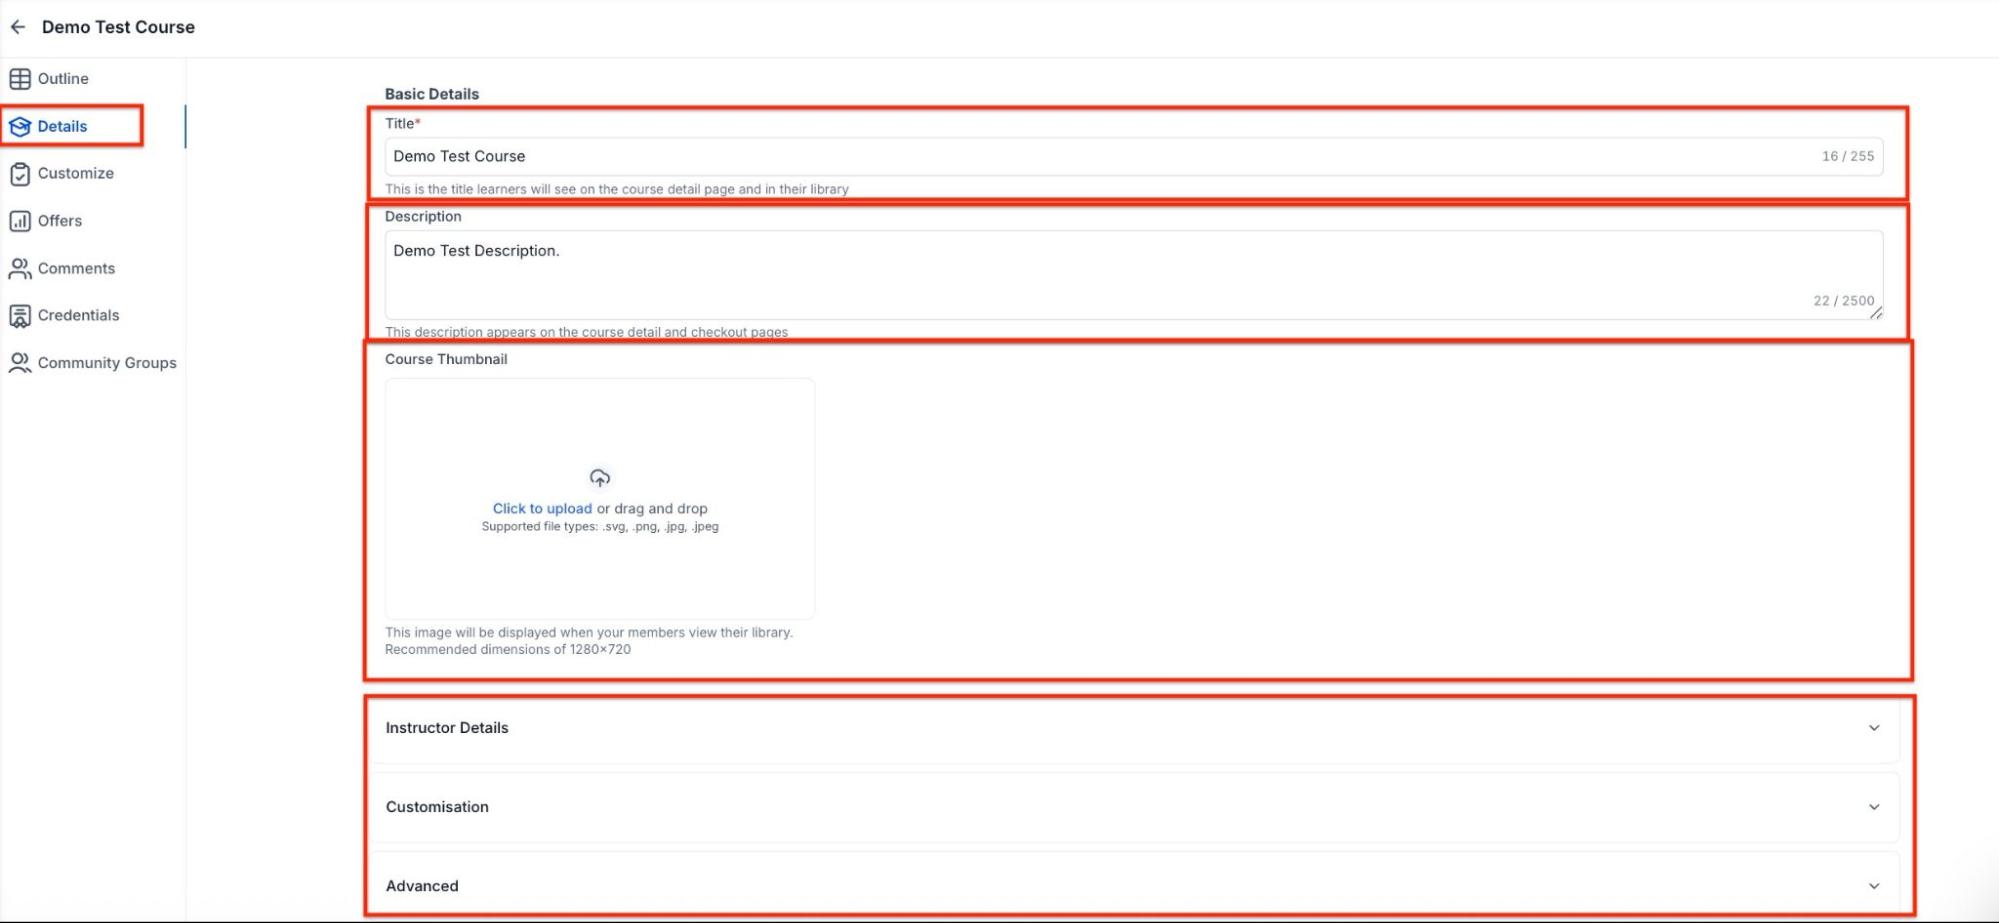
7. Customize Course Details
- In the Details tab, you can:
- Enter the course title and description.
- Add instructor details, logos, and favicon.
- You can also add custom CSS or tracking codes if needed
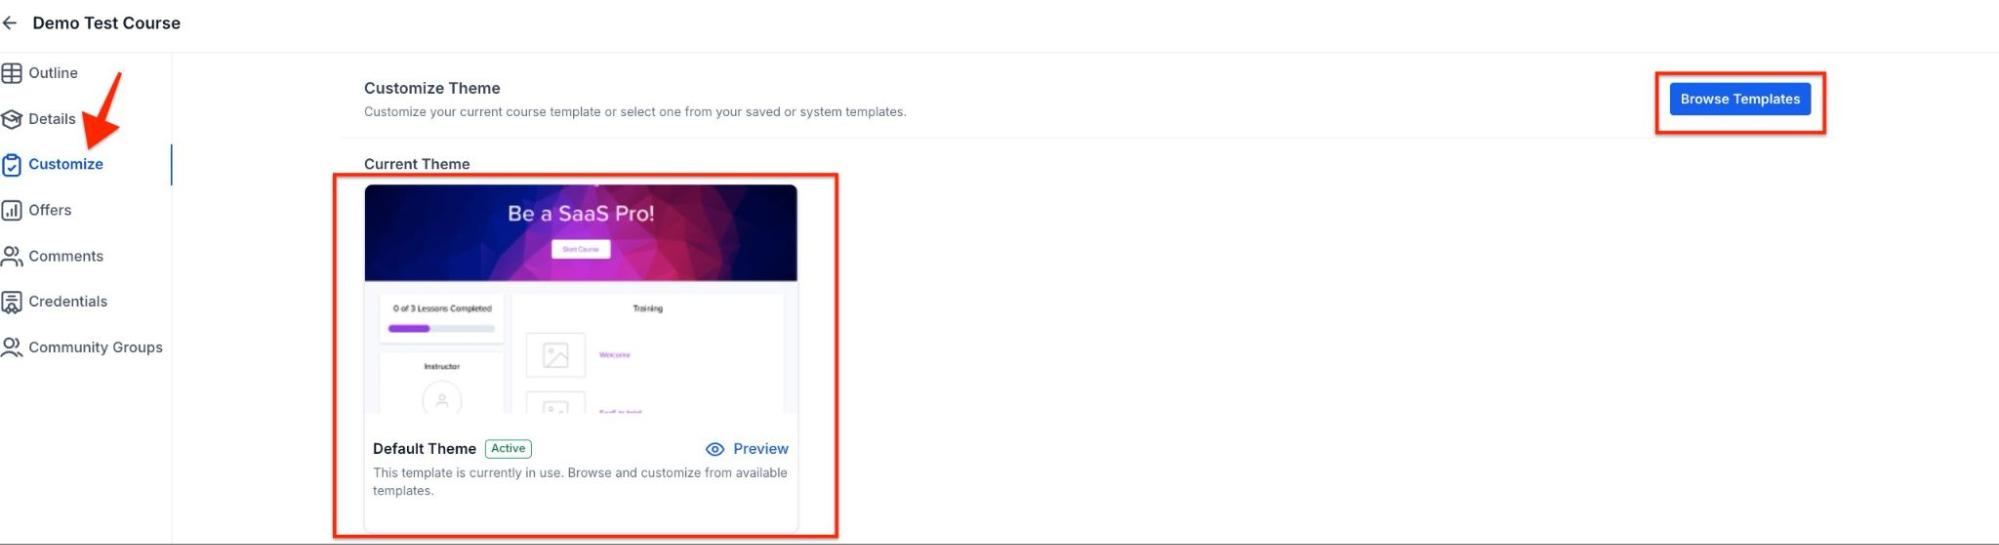
8. Course Design & Customization
- The Customize tab allows you to edit the theme and design of your course.
- You can also choose a theme from the available templates.
9. Create an Offer
Under the Offers tab, click Create New Offer to set up the course price.

- You can set it to free or paid.
- Set up a start and end date for the offer, and choose whether to offer a test mode for payments.
10. Publish & Share Your Course
After setting everything up, click Publish.
FAQs
Question: Can I import courses from Kajabi?
Answer: Yes, you can import existing courses directly from Kajabi.
Question: How do I manage course assessments?
Answer: Create multiple-choice or single-choice questions and track scores.
Question: Can I offer discounts for my courses?
Answer: Yes, you can create special offers and promo codes.
Question: Can I customize the course’s design?
Answer: Yes, you can edit the theme, colors, fonts, and layout.
Question: How do I track my revenue from course sales?
Answer: Revenue analytics allow you to track the performance of paid courses.
Question: Can I customize the look and feel of my course?
Answer: Yes, the Customize tab allows you to edit themes, fonts, colors, layouts, and branding elements such as logos and favicons.
Question: Can I schedule lessons to drip over time?
Answer: Yes. Drip settings allow you to release lessons gradually based on enrollment date or a custom schedule.
Question: Are trial periods available for all types of course pricing plans?
Answer: No, trial days are specifically only applicable to Recurring Pricing plans. They cannot be applied to "Free" or "One Time" payment structures.
Question: Do I need to manually set up a badge to welcome new learners?
Answer: No. Mastermind automatically attaches a Welcome Badge to every new course. It is issued automatically upon a learner's first enrollment without any extra setup required.
Question: Can I change or disable the automatic Welcome Badge?
Answer: Yes. You can choose from five curated templates specifically for this purpose. If you do not wish to use a Welcome Badge, you can turn it off by switching the badge status to "Draft."