Domain Transfer In - Review DNS Records
This article explains the process of reviewing DNS records when transferring a domain into your account under Mastermind. Proper review of DNS records ensures that websites, emails, and other services continue to function smoothly after the domain transfer. By carefully importing or scanning DNS records, users can prevent service interruptions and maintain uninterrupted access to all connected products.
Key Features and Benefits
- Service Continuity: Ensures websites, email, and other services remain operational during transfer.
- Centralized Management: Allows users to manage DNS records directly from one platform.
- Flexible Methods: Supports both DNS zone file upload and automatic scanning for convenience.
- Error Reduction: Cross-checking records minimizes configuration mistakes.
- Full Control: Edit, add, or remove records as needed before completing the transfer.
How to Use: Step-by-Step
Step 1: Retrieving DNS Records
There are two methods to retrieve DNS records:
1. Upload DNS Zone File
- Recommended to import all DNS records from your current DNS provider without missing any entries.
Steps:
1- Log in to your current DNS provider or registrar.
Note: If nameservers have been updated to a different provider, log in to that DNS provider. For example, if your domain is purchased at GoDaddy but nameservers point to Cloudflare, Cloudflare is now managing DNS.
2- Navigate to DNS settings for the domain you want to transfer.
3- Locate the option to export the DNS zone/records file.
4- If unavailable, contact your DNS provider or registrar support to obtain the zone file.
Special Notes for Registrars:
- Some registrars may not offer downloadable zone files; in that case, records may need to be recreated manually.
Auto Scan DNS Records
- Convenient method where existing DNS records are automatically detected.
- Important: Some records may not be detected. Always cross-check scanned records against your current DNS provider’s settings and make necessary edits to avoid service disruption.
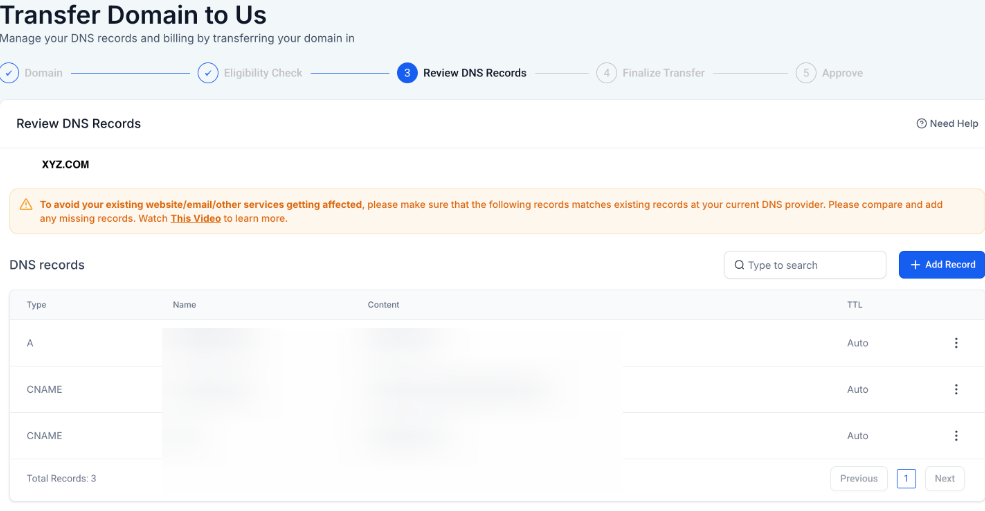
Step 2: Reviewing DNS Records
Once DNS records are retrieved:
1- View Records: All DNS entries are displayed in a table format, categorized by type (A, CNAME, TXT, MX).
2- Add Records: Click “Add Record” to include any missing entries.
3- Edit/Delete Records: Modify or remove records as needed.
4- Search Records: Use the search function to find specific entries by name, type, or value.
GoDaddy Interface -
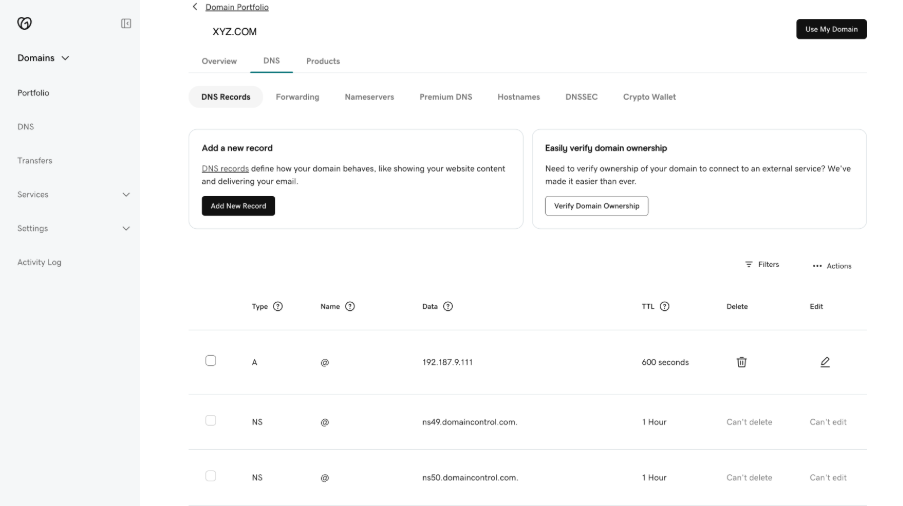
Pro Tip: Always manually cross-check scanned DNS records with your current DNS provider to ensure no records are missed. Missing records can cause websites or emails to stop working post-transfer.
FAQ’s
Question: What if some DNS records are missing after auto-scan?
Answer: Manually cross-check with your current DNS provider. Add or edit any missing records before completing the transfer.
Question: What if my nameservers are managed by a different provider?
Answer: Your DNS provider manages the records regardless of where the domain is registered. Log in to the DNS provider to review or export records.
Question: Can I transfer DNS records if my registrar and DNS provider are different?
Answer: Yes, you must access the DNS provider (e.g., Cloudflare) to export or review records. The registrar holds the domain but not the DNS configuration.
Question: Do I need to edit DNS records after scanning?
Answer: Yes. Always verify scanned records against the current DNS setup to ensure completeness and accuracy.
Question: Will missing DNS records affect my services?
Answer: Yes. Missing or incorrect DNS entries can cause websites, email, and other connected products to stop functioning.
Question: Why do I see multiple MX records with different "Priority" numbers?
Answer: Email providers often use multiple servers for redundancy. When reviewing these, ensure you copy both the Value (the server address) and the Priority number exactly. A lower priority number (like 0 or 10) tells the internet to try that server first.
Question: Is the "Auto Scan" method guaranteed to find all my records?
Answer: Not necessarily. While convenient, some records may not be detected. It is a critical "Pro Tip" to always manually cross-check scanned results against your current provider’s settings to avoid service disruption.
Question: What should I do if my domain registrar doesn't allow me to download or export a DNS zone file?
Answer: If your registrar or DNS provider does not offer a downloadable zone file, you may need to recreate your DNS records manually. In this case, it is best to contact your provider's support team to obtain the necessary record details so you can add them individually during the review process.