How to Connect a Domain Step by Step
This article explains how to connect a custom domain to your digital assets under Mastermind. Connecting a domain ensures a consistent branded presence across websites, pages, emails, and client-facing tools. The guide outlines connection methods, manual DNS setup, supported use cases, troubleshooting scenarios, and best practices so the process remains reliable and adaptable across different providers and timeframes.
Key Features and Benefits
- Unified Branding: Maintains a consistent brand identity across all customer touchpoints.
- Improved Trust and Credibility: Custom domains appear more professional than default URLs.
- Centralized Domain Management: One domain can support multiple products and services.
- Email Deliverability: Proper authentication reduces spam filtering risks.
- Flexible Setup Options: Supports both automated and manual DNS configurations.
Step-by-Step Domain Connection Process
There are two primary ways to connect a domain: automatic connection and manual connection.
1. Automatic Method (For Supported Providers)
This method simplifies the process by securely authorizing DNS access so records are added automatically.
How to Use:
1- Go to Settings > Domains in your account.
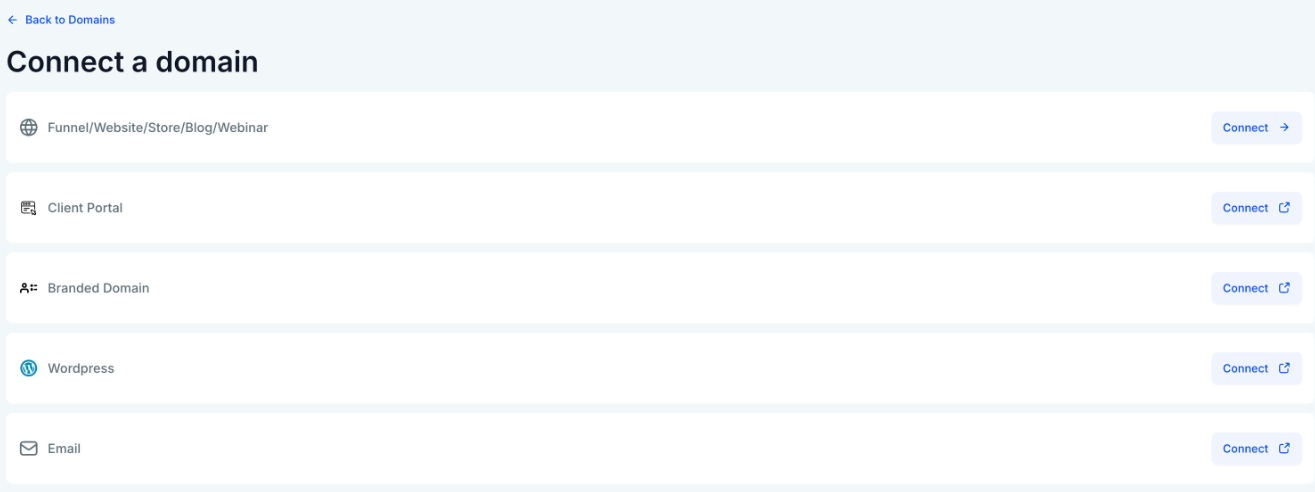
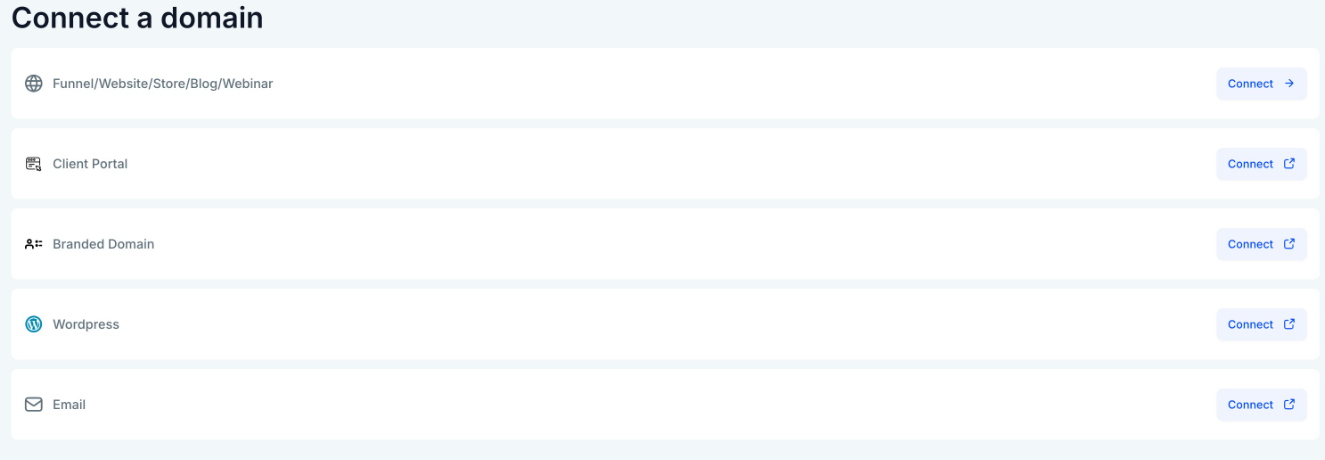
2- Choose “Connect a Domain”
3- Choose the product you'd like to connect (e.g., funnel, website, email).
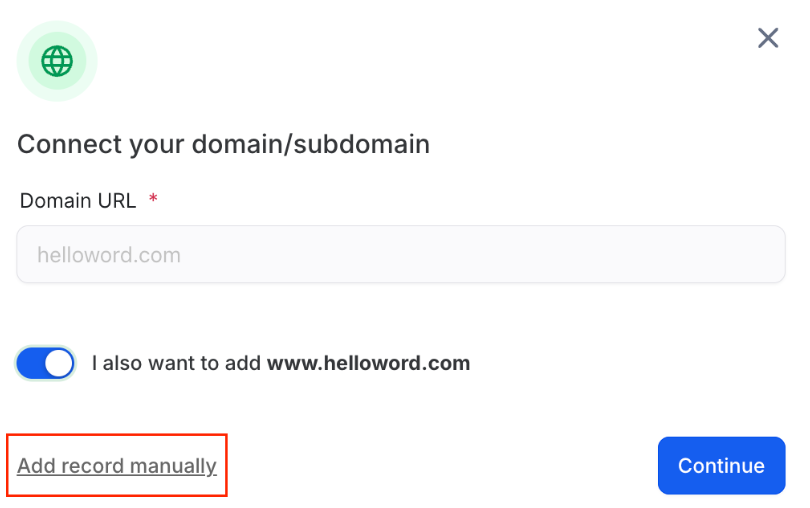
4- Enter your root domain or subdomain in the provided field. If adding the "www" subdomain as well, you'll see an option to add the root domain.
5- If your domain is registered with Google Domains, GoDaddy, or Cloudflare, an "Authorize" button will appear. Click it to grant Domain Connect permission to access and manage your DNS settings.
6- Complete the on-screen instructions and return to the domain dashboard.
Best For:
Users whose domain providers support automated DNS authorization.
2. Manually Adding a Domain
Manual setup is required when automatic authorization is unavailable.
How to Use:
1- Go to Settings > Domains and select “Connect a Domain.”
2- Choose the product you'd like to connect (e.g., funnel, website, email).
3- To connect the domain to a funnel, website, blog, or webinar, enter the domain name exactly as requested in the prompt.
4- Select the option to add DNS records manually.
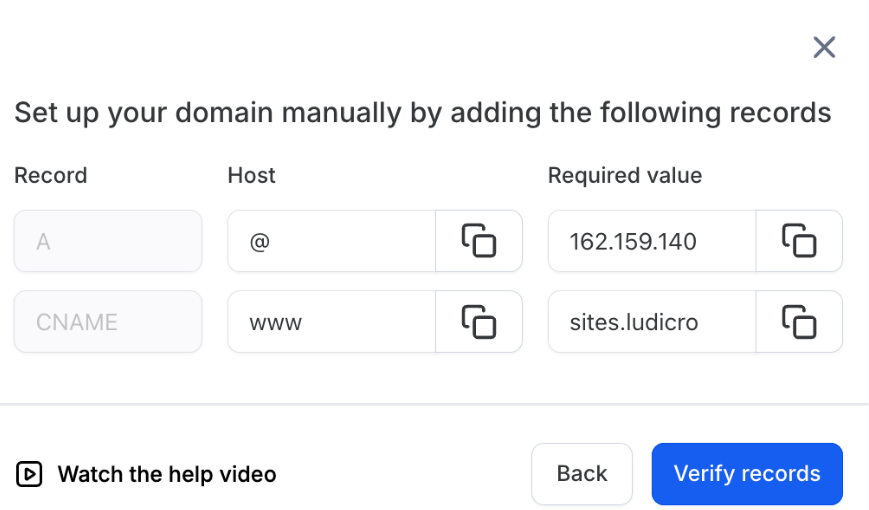
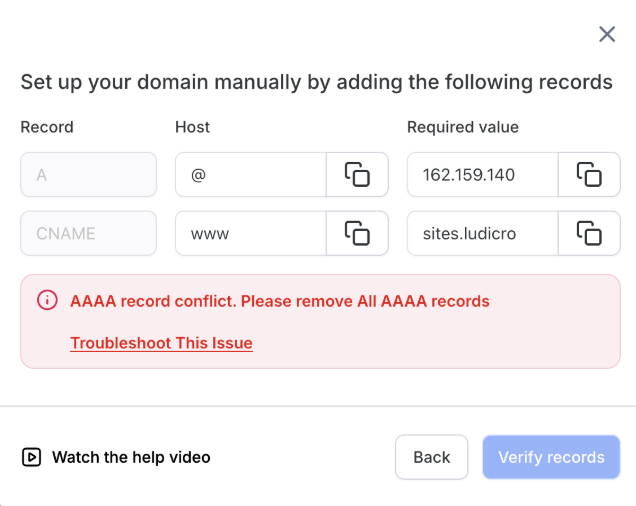
5- Copy the provided DNS records (A, CNAME, TXT).
6- Log in to your domain registrar and add each record exactly as shown.
7- Save changes and wait for DNS propagation, which can take up to 24 hours.
Manual DNS Setup by Provider
While interfaces differ, the principles remain the same across providers.
General DNS Guidelines
- A Records: Used for root domains pointing to an IP address.
- CNAME Records: Used for subdomains like “www.”
- TXT Records: Used for verification and email authentication.
- Proxy or Routing Features: Should remain disabled unless explicitly required.
Always save changes and allow time for propagation before rechecking status.
Troubleshooting Common Domain Connection Issues
While connecting your domain either manually or automatically, you could run into a few common issues like
- Multiple A Records: Conflicting A records pointing to different IPs.
- AAAA Record Conflict: IPv6 records interfering with expected routing.
- CAA Record Conflict: Certificate authority restrictions blocking SSL issuance.

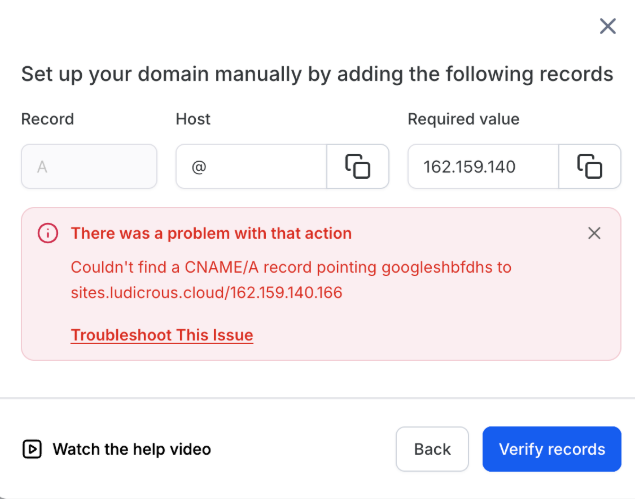
- DNS Records Do Not Match: Entered values differ from required records.
- Domain Connected Elsewhere: Domain already assigned to another product or account.
- Product Conflict: Same domain assigned to multiple incompatible services.
Resolving these typically involves removing conflicting records or ensuring values match exactly.
Products You Can Connect a Domain To
Funnel / Website / Store / Webinar / Blog
Use your domain for customer-facing pages such as marketing flows, online stores, educational events, or content hubs.
Content Management Systems
Domains can point to externally hosted content systems using the provided DNS records and will validate once propagation completes.
Connecting a domain enables proper email authentication through verification records, improving inbox placement and sender reputation.
Branded Domain (White-Labeling)
Replace default system URLs with your own branded domain for a seamless, professional appearance.
Client Portal
Host dashboards or portals on your custom domain so clients access reports, assets, or campaigns through a branded URL.
Pro Tips
- Always back up existing DNS records before making changes.
- Avoid editing DNS settings repeatedly during propagation.
- Use subdomains when assigning multiple products to one domain.
- Check the domain status after 24 hours before troubleshooting further.
- SSL certificates are provisioned automatically once DNS records are verified.
FAQ’s
Question: Why should I connect a custom domain instead of using a default one?
Answer: A custom domain reinforces branding, builds trust, and offers better control over your digital presence.
Question: How long does a domain connection usually take?
Answer: Most connections complete within minutes, but full DNS propagation can take up to 24 hours.
Question: Can one domain be used for multiple products?
Answer: Yes, typically through subdomains, allowing different services to coexist without conflict.
Question: What happens if my DNS records don’t match?
Answer: The connection remains pending until records are corrected to match the required values.
Question: Do I need technical expertise to connect a domain?
Answer: Basic familiarity with DNS settings helps, but step-by-step guidance makes the process accessible for most users.
Question: Can I connect a domain that I am already using for a different website?
Answer: A single root domain (e.g., website.com) can only point to one place. However, you can use Subdomains to connect to different products. For example, use www.website.com for your main site and app.website.com for your Client Portal.
Question: What happens with my SSL certificate once my DNS records are verified?
Answer: SSL certificates are provisioned automatically for you once the system verifies that your DNS records are correctly set up.