Understanding Call Dispositions: How to Set Call Outcomes and Trigger Workflows
Managing calls efficiently is essential for any business that relies on phone communication. The Call Dispositions allows teams to record the outcome of every call and use these outcomes to trigger automated workflows. By selecting a simple post-call option, users can streamline follow-ups, improve reporting, and ensure that every interaction receives the right next step. This article explains how Call Dispositions work, their benefits, and how to use them effectively within Mastermind.
Key Features and Benefits
Custom Dispositions
Users can select a call outcome such as “Follow Up” or “Requested Appointment” after each call. Admins have the flexibility to create, rename, or delete custom outcomes, allowing the system to match business-specific needs.
Post-Call Picker
A simple, built-in selector appears after each call in the web dialer, making it easy for users to choose the disposition without navigating away or adding extra steps.
Automation-Ready
Workflows can be triggered based on the selected disposition using a dedicated “Custom Disposition” filter. This makes it possible to automatically send messages, apply tags, re-enqueue contacts, and more.
Improved Visibility
The selected disposition is saved to the contact’s record and displayed in call reporting tables and filters. This ensures consistent tracking, auditing, and insights across all calls.
Better Operational Efficiency
Faster call wrap-ups and automated next steps mean more calls per day, fewer manual tasks, and improved follow-through across teams.
How to Use Call Dispositions
Step 1: Finish a Call
After ending a call, a small window will appear prompting you to choose a disposition.
Step 2: Pick One Disposition
Choose the outcome that best reflects the call for example, “Follow Up,” “Requested Appointment,” or “Not Interested.”

Step 3: Allow Workflows to Trigger
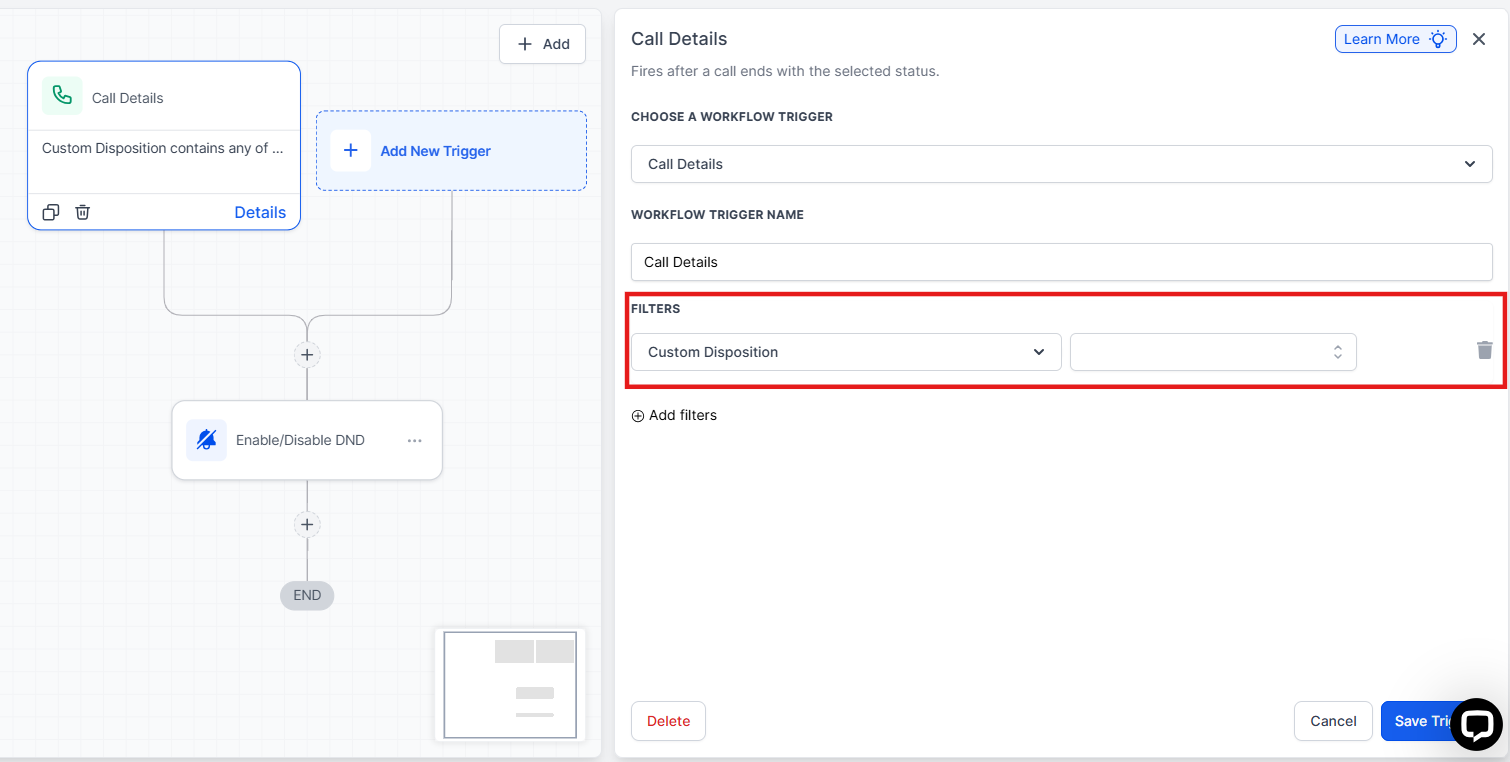
Once a disposition is selected, any workflow configured to react to that outcome will automatically run. This may include sending a message, adding a tag, creating a task, or placing the contact back into a call queue. To set that workflow trigger, you will need to navigate to Automation > Workflows > Select one of the existing workflows or create a new one. Then add the trigger: Call Details > Add the filter: Custom Disposition.
Setup for Admins
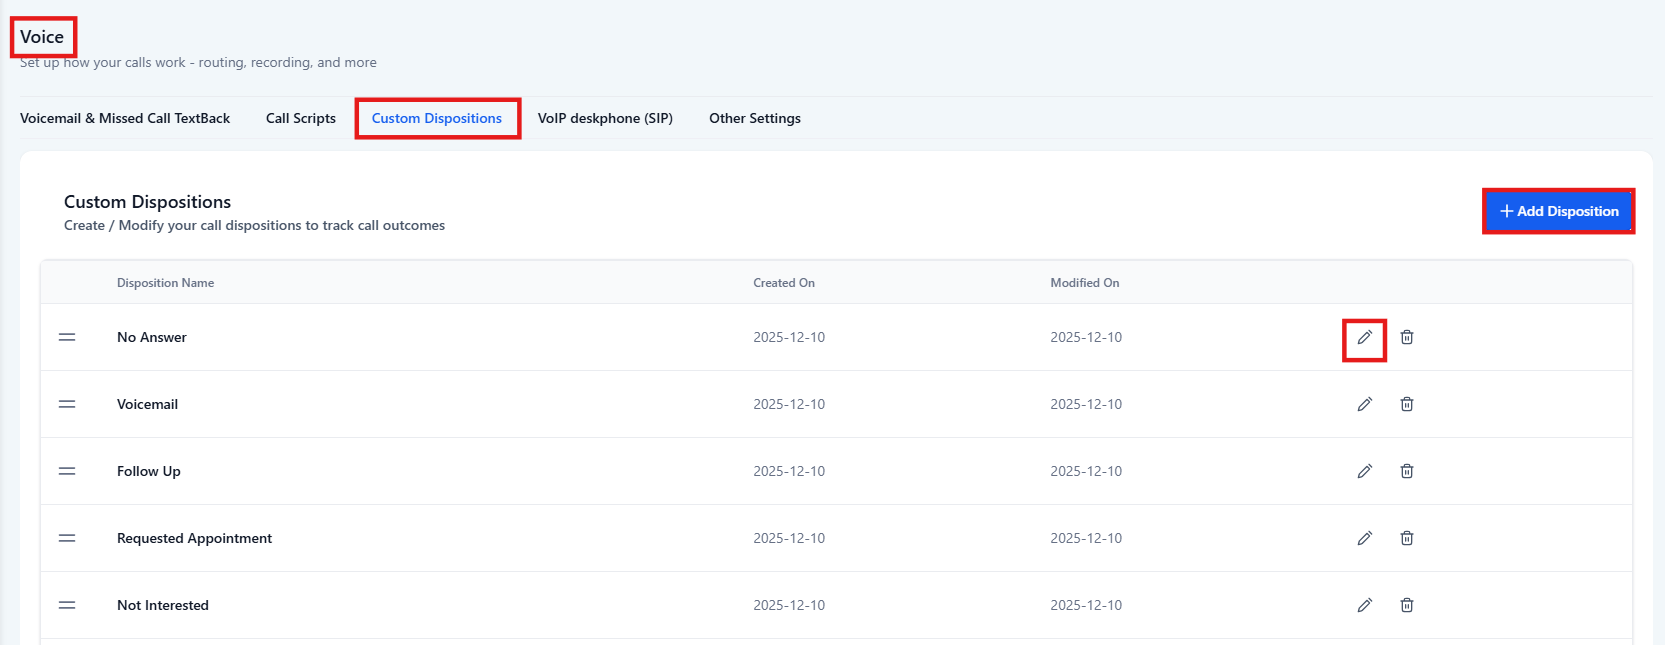
Step 1: Access Settings
Go to Settings → Phone System → Voice → Call Dispositions.
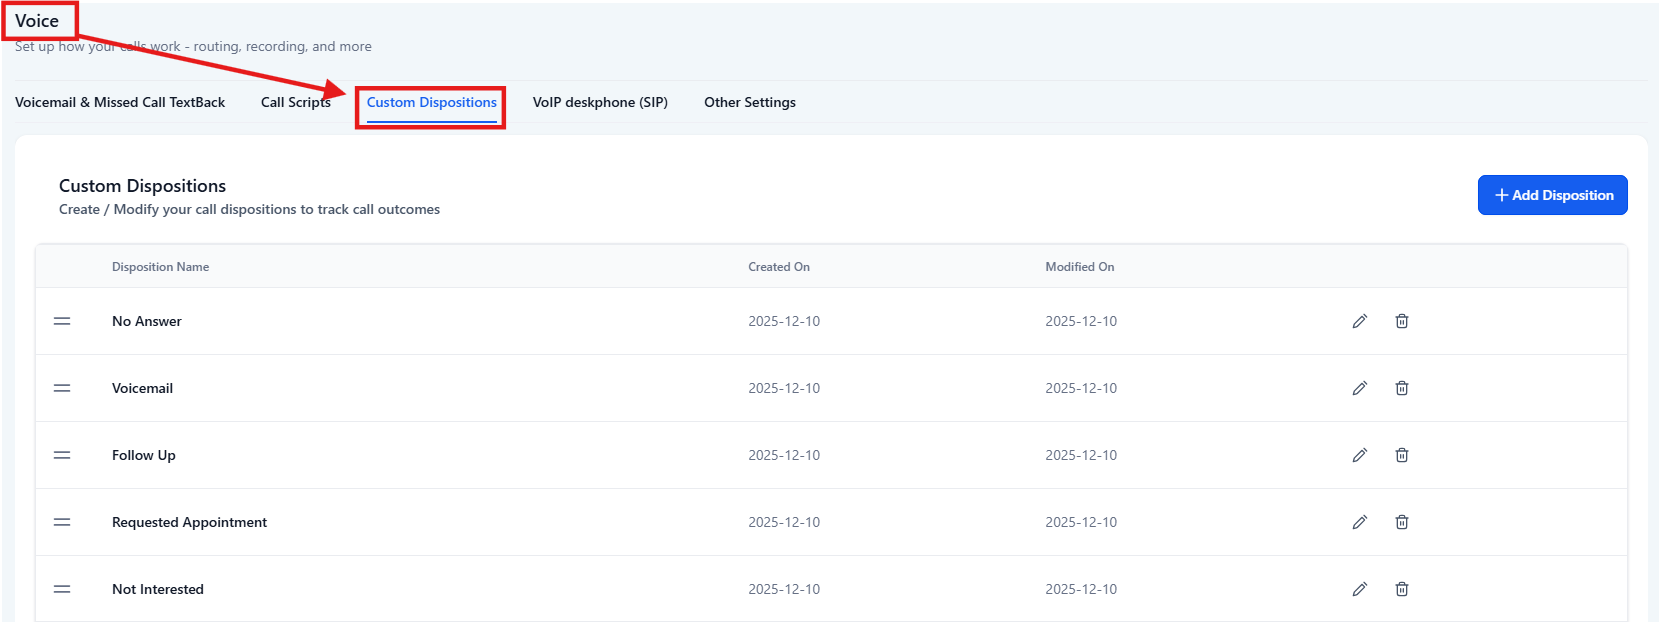
Step 2: Review and Customize Dispositions
You may edit existing options or create new ones. Up to 10 dispositions can be active at any time.
Step 3: Configure Workflow Automations
In the workflow builder, use the Custom Disposition filter under “Call Details.”
Set your automation rules based on selected call outcomes.
Examples of How Dispositions Can Be Used
- Requested Appointment → Automatically send a message with a booking link and create a follow-up task.
- Follow Up → Re-enqueue the contact into the dialer after a set delay.
- Not Interested → Add a tag and remove the contact from any ongoing campaign.
Pro Tips
- Keep disposition names clear and consistent so agents select the correct one quickly.
- Review reporting regularly to identify common call outcomes and optimize scripts or processes.
- Consider using short labels (e.g., “Follow Up,” “Callback Needed”) to keep the post-call flow fast.
- Test new workflow rules using sample contacts before rolling them out to the entire team.
FAQ’S
Question: Can I change the name of a disposition later?
Answer: Yes. Renaming a disposition will not affect existing workflows. They will continue to function using the updated name.
Question: What happens if I delete a disposition?
Answer: Any workflow using that disposition will stop running. Update those workflows before deleting to avoid disruptions.
Question: How many dispositions can I create?
Answer: You can create up to 10 dispositions. This limit helps maintain simplicity and prevents user confusion.
Question: Do dispositions replace call statuses?
Answer: No. Dispositions provide more detailed outcomes and can enhance or complement workflows that rely on call status.
Question: Where can I see the call disposition after a call is completed?
Answer: The disposition is stored on the call record and will appear in the call reporting section and filters when available.
Question: How do I trigger a specific workflow based on a selected call disposition?
Answer: To set a workflow trigger, navigate to Automation > Workflows, select or create a workflow, and add the Call Details trigger. Then, apply the Custom Disposition filter to specify which call outcome should start the automation.