How To Customize The Product Welcome Email Using Product Settings or Workflows
How To Customize The Membership Welcome Email Using Membership Settings or Workflows
There are a few options to send credentials when someone creates their Membership account. You may want to customize this email for your members, so follow these steps to review your options:
Option 1: System-Generated Email Using a Template
Step 1: Navigate to Memberships on the left >Courses at the top right> Settings from the dropdown menu> Toggle On the "Send Welcome Email" option.
Step 2: Choose a template from the dropdown list.
Note: You will need to create your template to create a custom welcome email and the Default Template is not editable or viewable without testing it. You would accomplish this with custom values, continue this article to see what this means
Note: This will send an automated email from the system with login credentials to the user when they complete the offer checkout. This email template can be customized and saved within the Email Builder \
Step 3: Save your changes.
Option 2: Create a Workflow to Send a Customized Email
Step 1: Navigate to Tools & Reporting > Automations > Workflows
Step 2: Create or edit an existing workflow

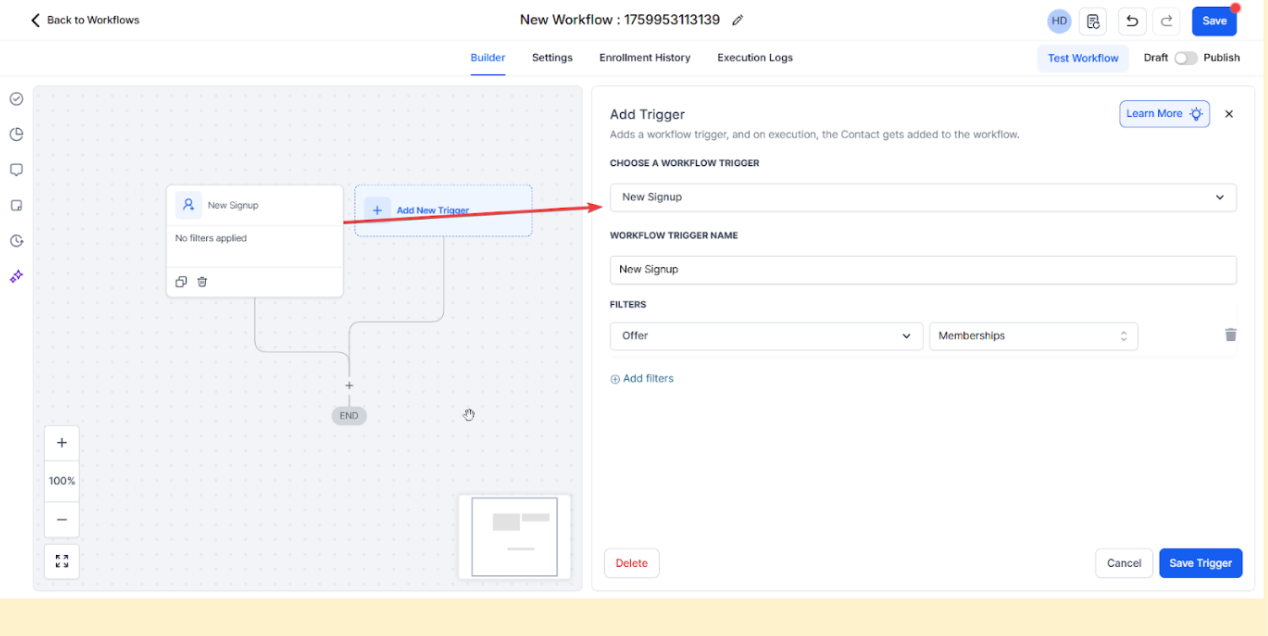
Step 3: Select the “New Signup” Workflow trigger

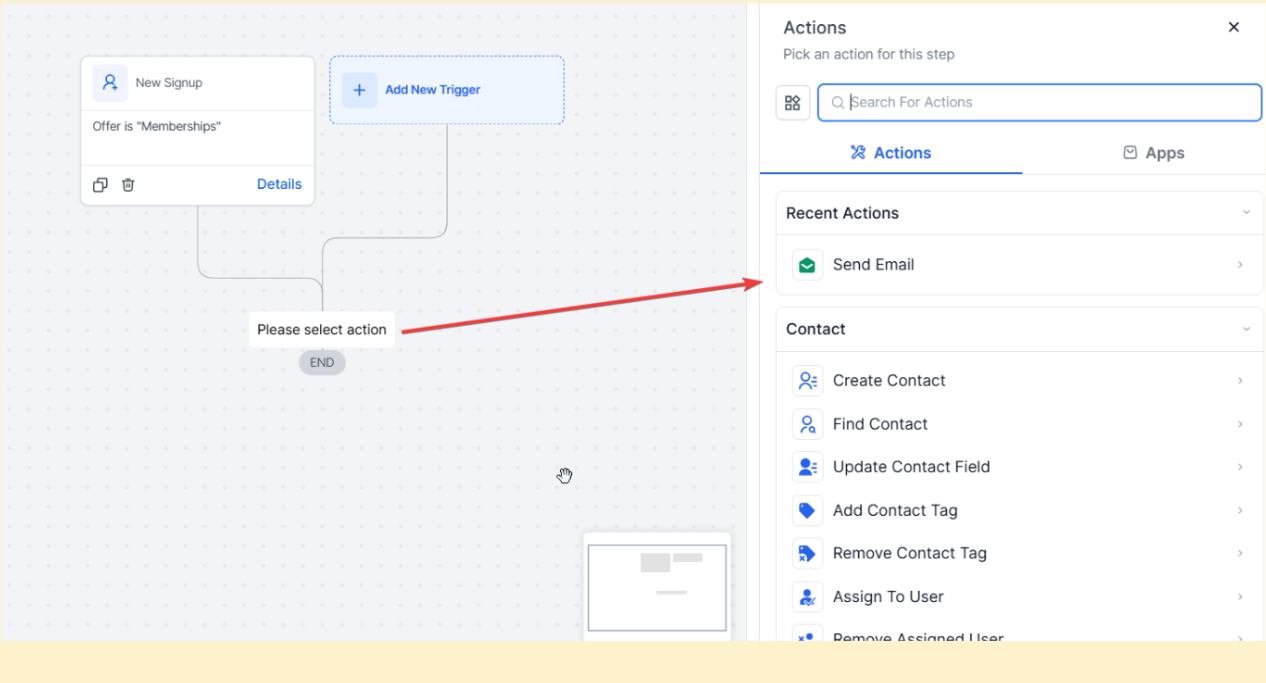
Step 4: Select Send Email in Action

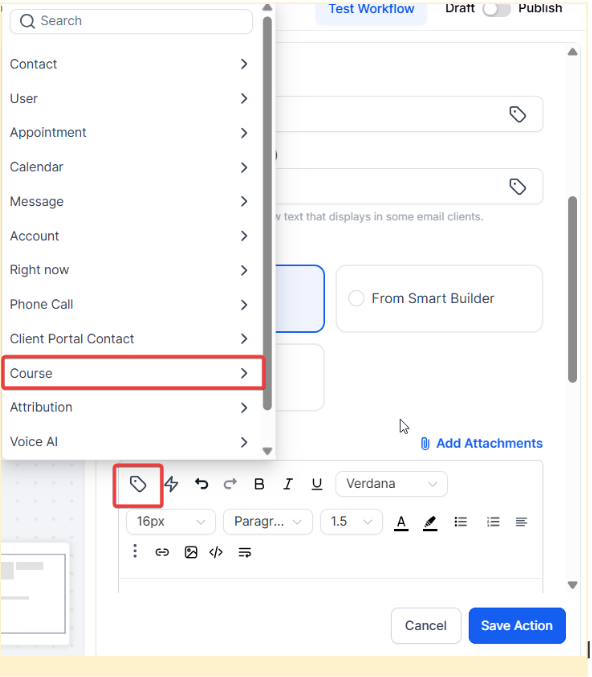
Step 5: Enter the content of your email. You’ll need a From Name, Email, and Subject, and you can select a template or use your content.
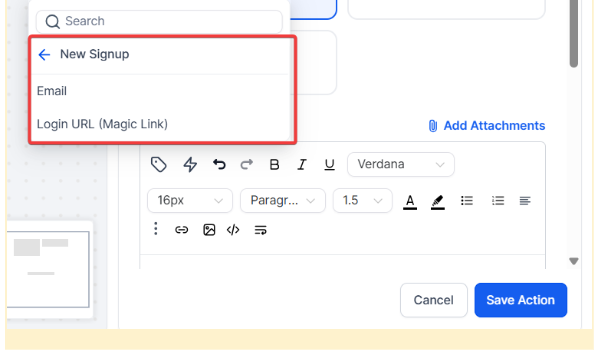
Step 6: Note that by using ‘New Signup’ you now have access to new custom values. These are called Membership Contacts and are at the bottom of the Custom Values list right above your unique custom values. Grab both your email and password and place them appropriately in the body of your email.


Step 7: If you use Option 2, be sure to toggle off the system-generated email (Option 1). Otherwise, both the system-generated template option and the workflow-customized options will be sent.
FAQ’s
1. What are Membership Contacts in custom values, and how do I use them?
Membership Contacts are specific custom values related to the member's account, such as their email and password. These values are found at the bottom of the Custom Values list and can be placed in the email content to automatically insert the member's login credentials.
2. Why should I toggle off the system-generated email if I’m using a custom workflow email?
You should toggle off the system-generated email to avoid sending two emails to the new member. If both options are enabled, the member will receive both the system-generated email and the workflow-customized email, which could confuse.
3. Can I use both the system-generated email and a custom workflow email at the same time?
While technically possible, it’s not recommended because it may result in the member receiving duplicate emails. It's better to choose one method to ensure clarity and a streamlined user experience.
4. How do I ensure that the custom values like email and password are correctly included in the workflow email?
When setting up your workflow email, use the Membership Contacts custom values (found at the bottom of the Custom Values list) to insert the member's email and password. This ensures the credentials are correctly populated in the email sent to the new member.
5. What happens if I don't create a custom template and leave the system on the default template?
If you don't create a custom template and leave the system on the default template, the system-generated welcome email will be sent to the new member using the default template. However, this template is not viewable or editable without testing, so it may not fully meet your customization needs.
6. Will changing my app or site name affect existing members?
No. Updating your site or app name will only affect the display and branding elements for future visits.
Your existing members will still retain their access, and their membership functionality will remain unchanged.
