How to send a Regular Email Campaign
In this article, you will learn how to send a regular email campaign. This email can be sent right away or scheduled to many contacts at once.
Part 1: Create the email
- Head to Marketing & Sales > Email & Social Media > Campaigns > Create Campaign

- Choose the email template you want to use for your marketing email campaign.
- Design your email and content by adding all the necessary elements

- You can save your email campaign and edit it if needed later until you are ready to send it
How to Verify Your 'From' Email Address to Avoid Being Sent to Spam
Verifying emails before sending campaigns helps prevent identity spoofing and ensures your messages reach the intended recipients. To use this feature, follow these steps:
1. Setting Up an Email Campaign: Begin by setting up your email campaign in the campaign builder. Once done, click on the send or schedule icon:

2. Verifying the Sender Email: During setup, ensure the sender email is verified by following the verification prompts.

Enter the 6-digit code that you will receive after putting in your email address:

3. Handling Unverified Emails: Address any unverified emails by correcting them and re-verifying them.

4. Completing the Verification Process: Finalize the verification for all email addresses.

5. Managing Verified Emails: Review and manage your list of verified emails.


6. Sending the Verified Campaign: Once all emails are verified, proceed to send your campaign.
Note: Ensure all emails are verified before sending to maintain a strong email reputation and avoid deliverability issues.
Part 2: Customize your email
- Drag and drop your desired elements into the builder area.

- The layout rounding feature allows you to enhance the aesthetics of your email designs by adjusting the corner radius of elements. Select the layout element, and adjust the corner radius using the slider.


- For all the text-related elements, you can use the inline editor

The inline editor can contribute to faster and higher-quality email creation with increased ease.
The following key features are included:
- Styling options with Heading 1, Heading 2, Heading 3, Heading 4, Heading 5, and Paragraphs.
- Support for approximately 18 fonts, with plans to include custom fonts for Google.
- A wide range of font sizes, ranging from 8px to 96px.
- Text color and text highlight options, allow users to select colors using hex codes.
- Formatting options such as bold, italic, underline, and strikethrough.
- Convenient hyperlinking for word redirection and text alignment.
- Proper line spacing for paragraphs (1.5) and headings (1.25).
- Bullet list capabilities, offering both ordered and unordered lists.
- Text formatting that allows seamless copy and paste from external sources while removing any applied styling.
- Custom values support to cater to specific needs.
- Content AI leverages the power of artificial intelligence to assist in generating content faster.
- Updated default padding settings: Top (12), Bottom (12), Left (24), and Right (24).
Part 3: Send Email
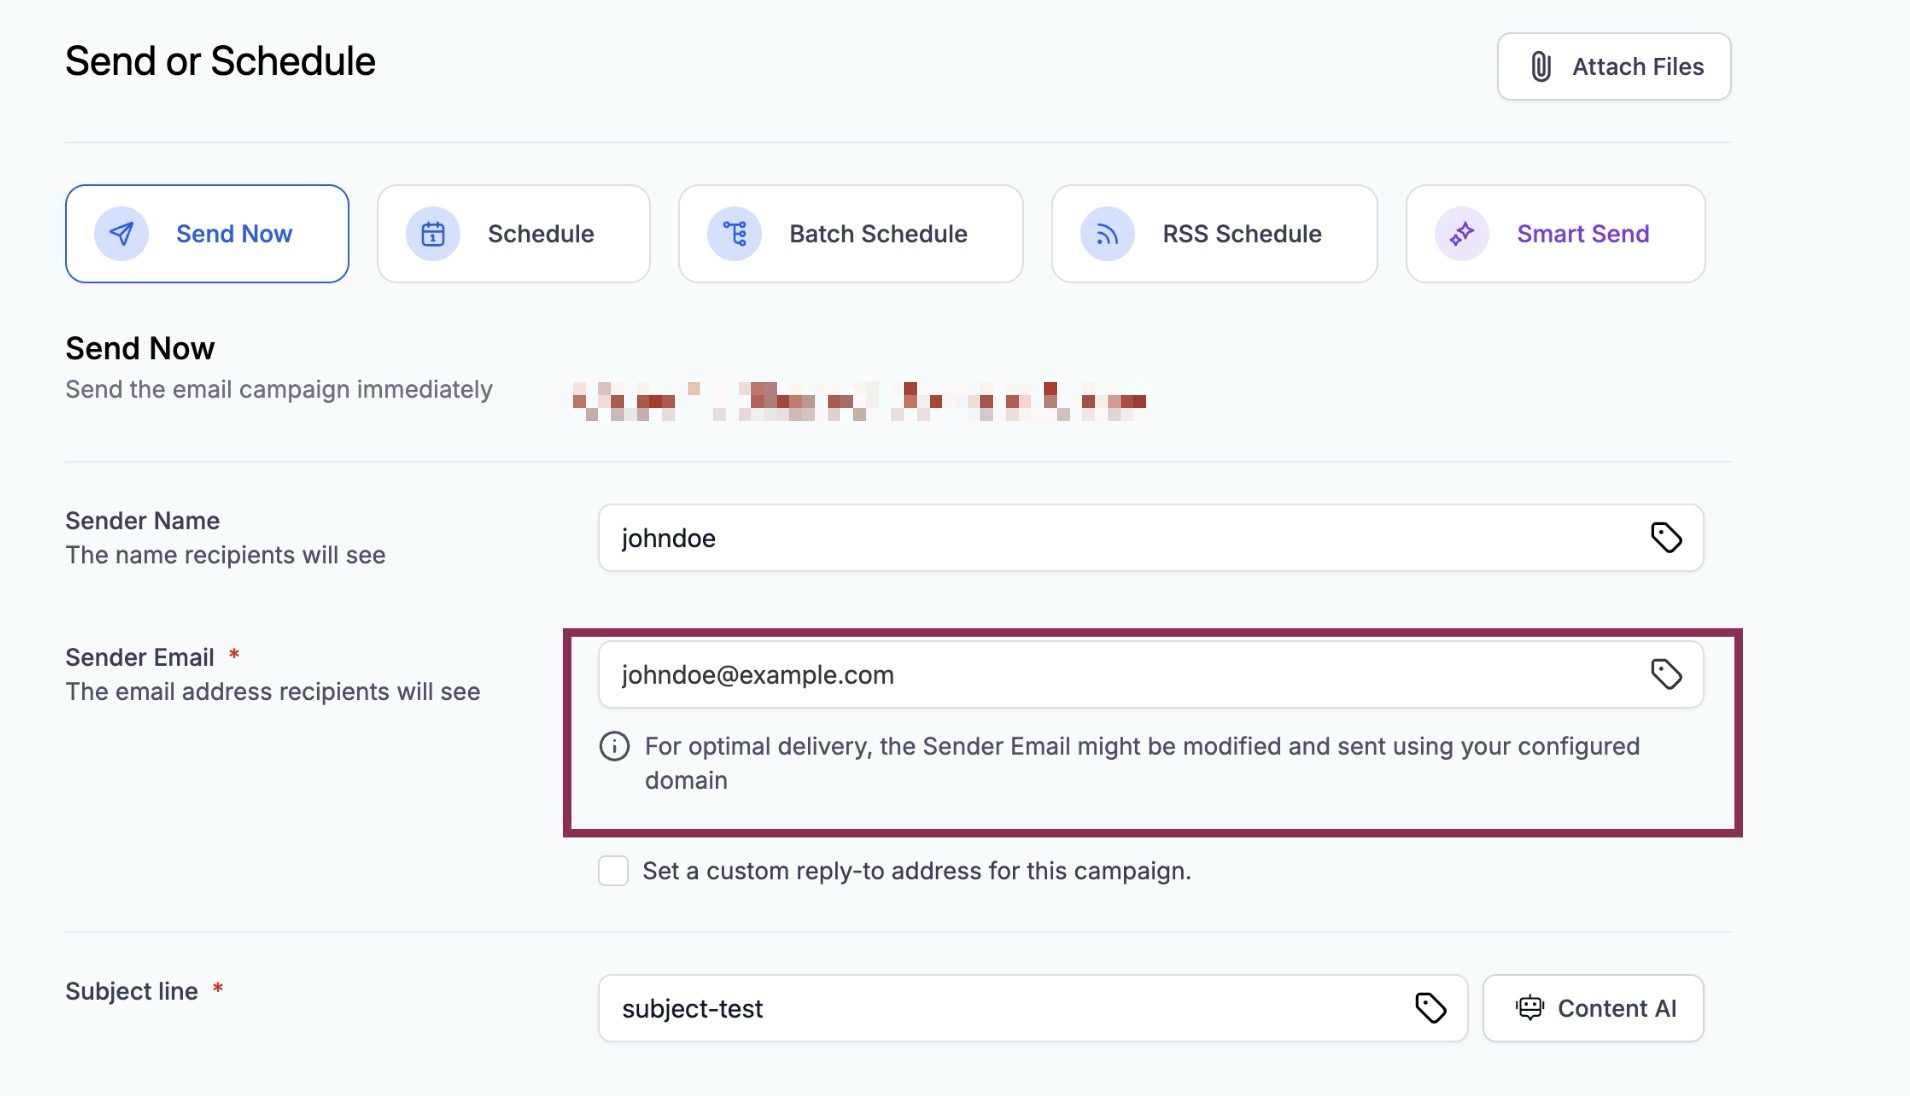
- Click on “Send or Schedule”
- Fill out the information in the To and From section
- Add your subject line in the Subject section
- Select the option to Send Now or Schedule (Depending on when you want to send the email, now or later)
- If you choose the schedule option, you will need to add the date and time (please note that the email will be sent in your account's timezone)

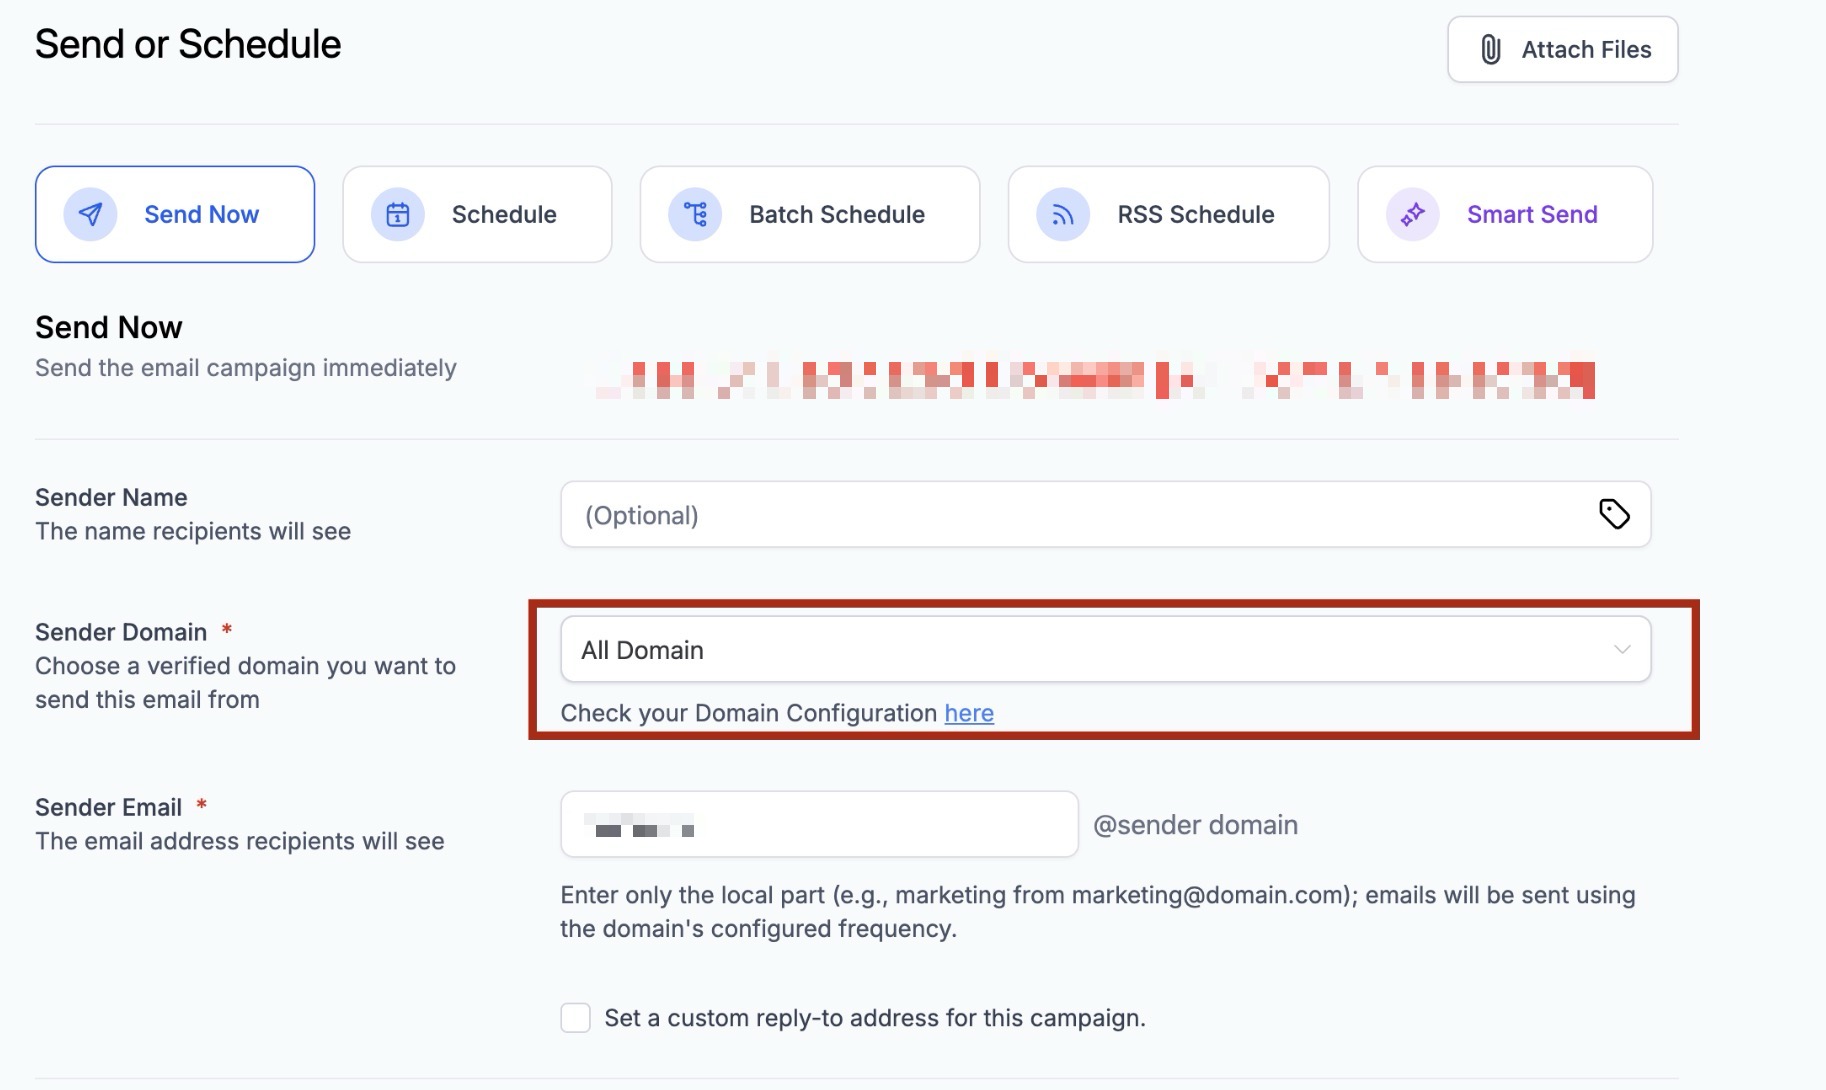
- You also have the ability to choose the sender domain for your campaigns. If using a public or shared email, the system will automatically adjust to ensure compliance, avoiding campaign failures. Note: This is for LC Email only.
- The system will automatically pre-select the correct sender domain, and users will be alerted to any issues with their selected domain. Note: This is for LC Email only.
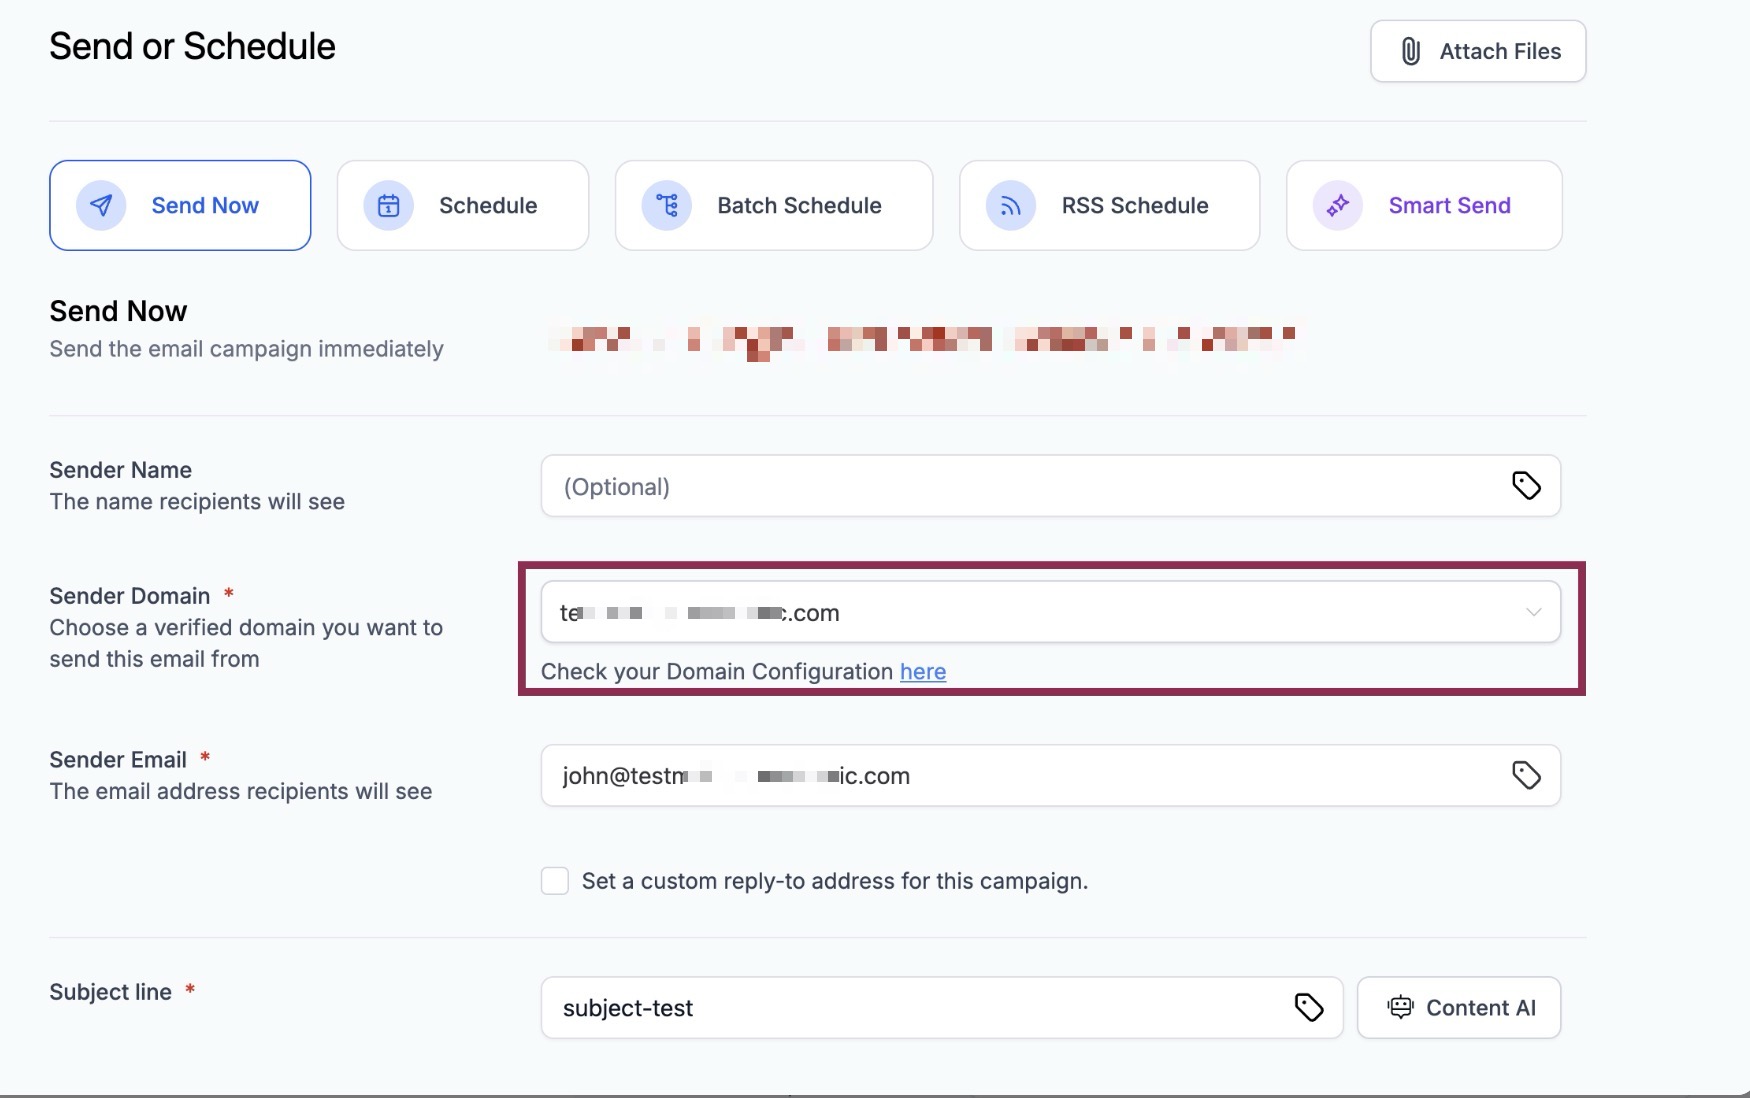
- You can choose a single domain or all domains (based on domain configuration rules) for their campaign. Note: This is for LC Email only.
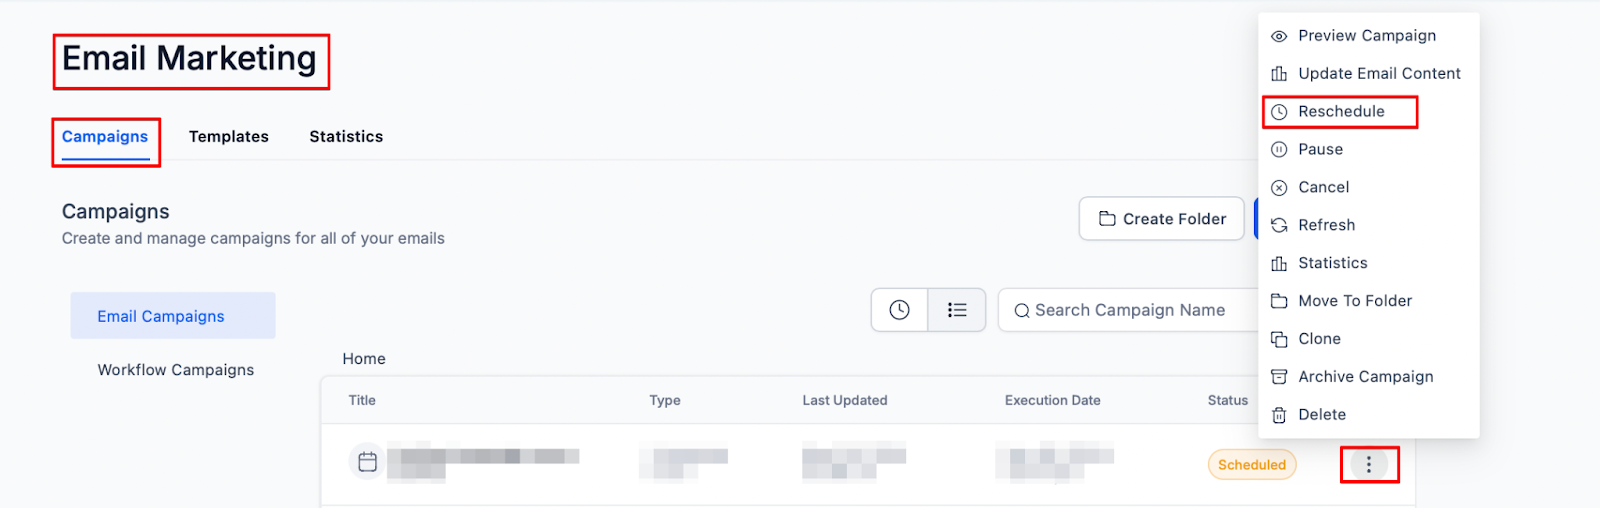
Note: You can reschedule your campaign one hour before the execution date/time. To do this, click on the reschedule button and set the date/time of the campaign. It is suggested that you apply drip/batch schedule mode when sending large quantities of emails to avoid high bounced rates and thus avoid suspensions.
You can also send the campaign via email as a test. This will help you to see how your email will be seen by your leads.
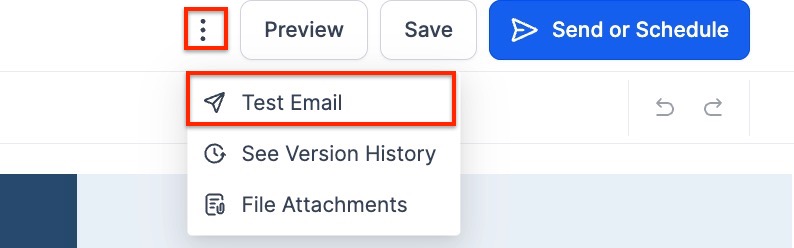
Click on the 3 dots on the left side of the Save button and click on Test Email. Add the details and click on “Send Test Email”.
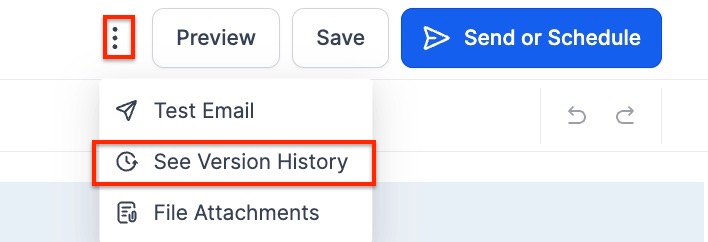
Note: You can restore older versions by clicking on the 3 dots next to the Save button. It will show you the dropdown option to see the version history and restore the older version.
Additional Features for the Email Campaigns
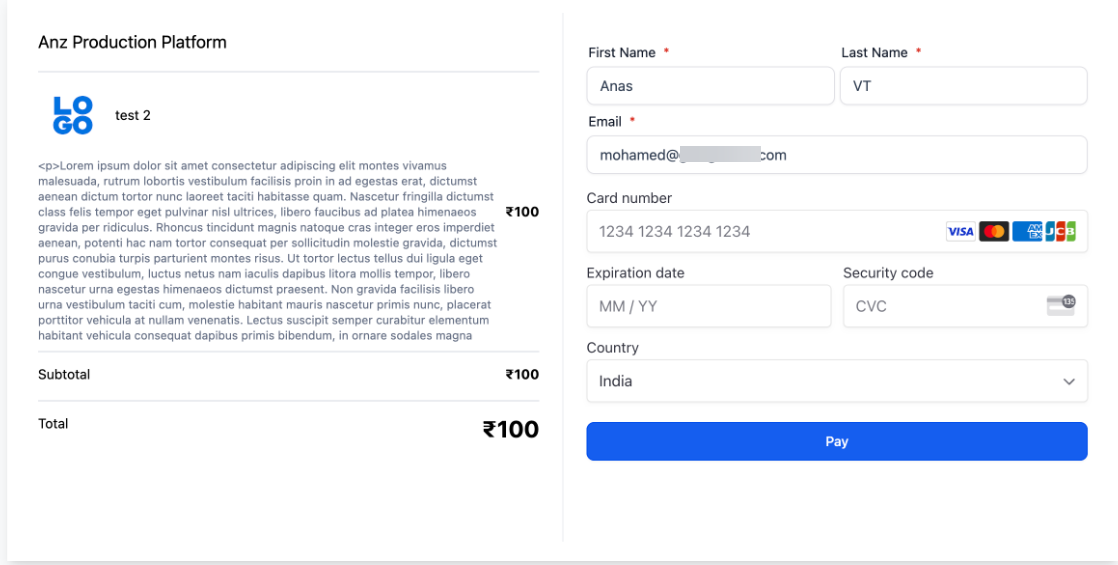
1- Direct Checkout for Product Elements
Users can generate customized payment links and tailor the checkout page within the same campaign, improving the setup and tracking of conversion metrics.
How to Use:
- Navigate to the email marketing section,
- Create a new campaign,
- Add a product element, and select direct checkout.

- Customize the checkout page by clicking the link icon next to the product, modify the layout, and saving your changes. There are no special requirements or limitations, ensuring a seamless experience for all users.
2- Forms and Inline Surveys
You can embed feedback forms or surveys directly into your email campaigns, making it easier to collect responses from recipients without them having to leave their inboxes.
How to Use:
- Simply go to your email marketing campaign
- Add the Form Element
- Choose a feedback type
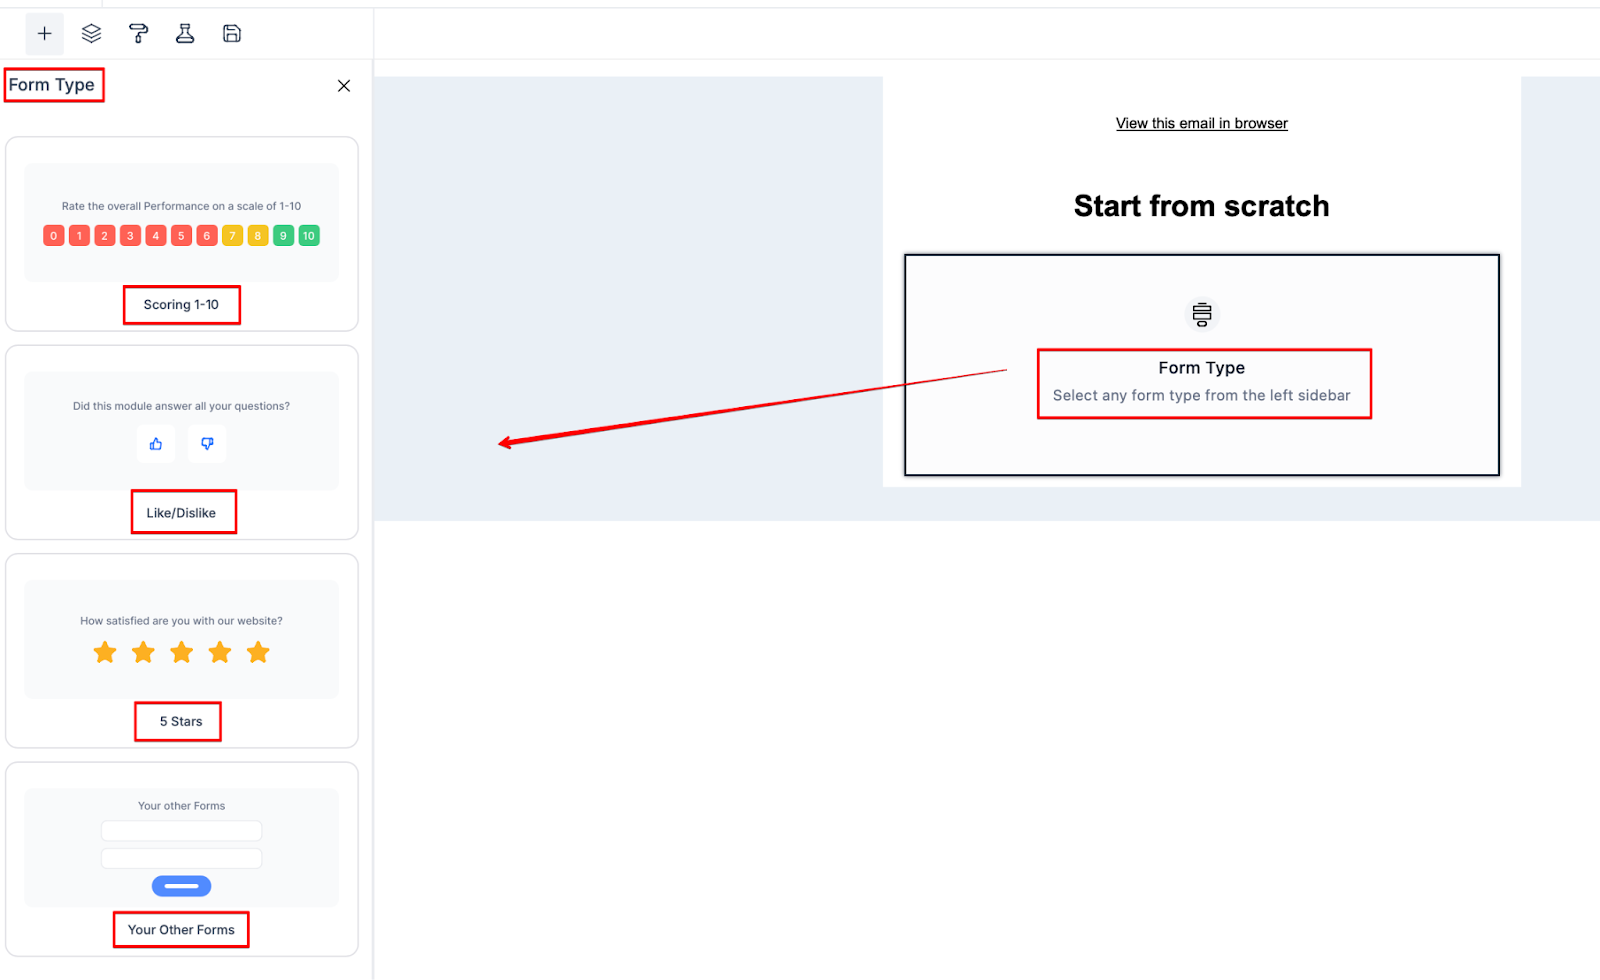
- Customize the design, and send your campaign.

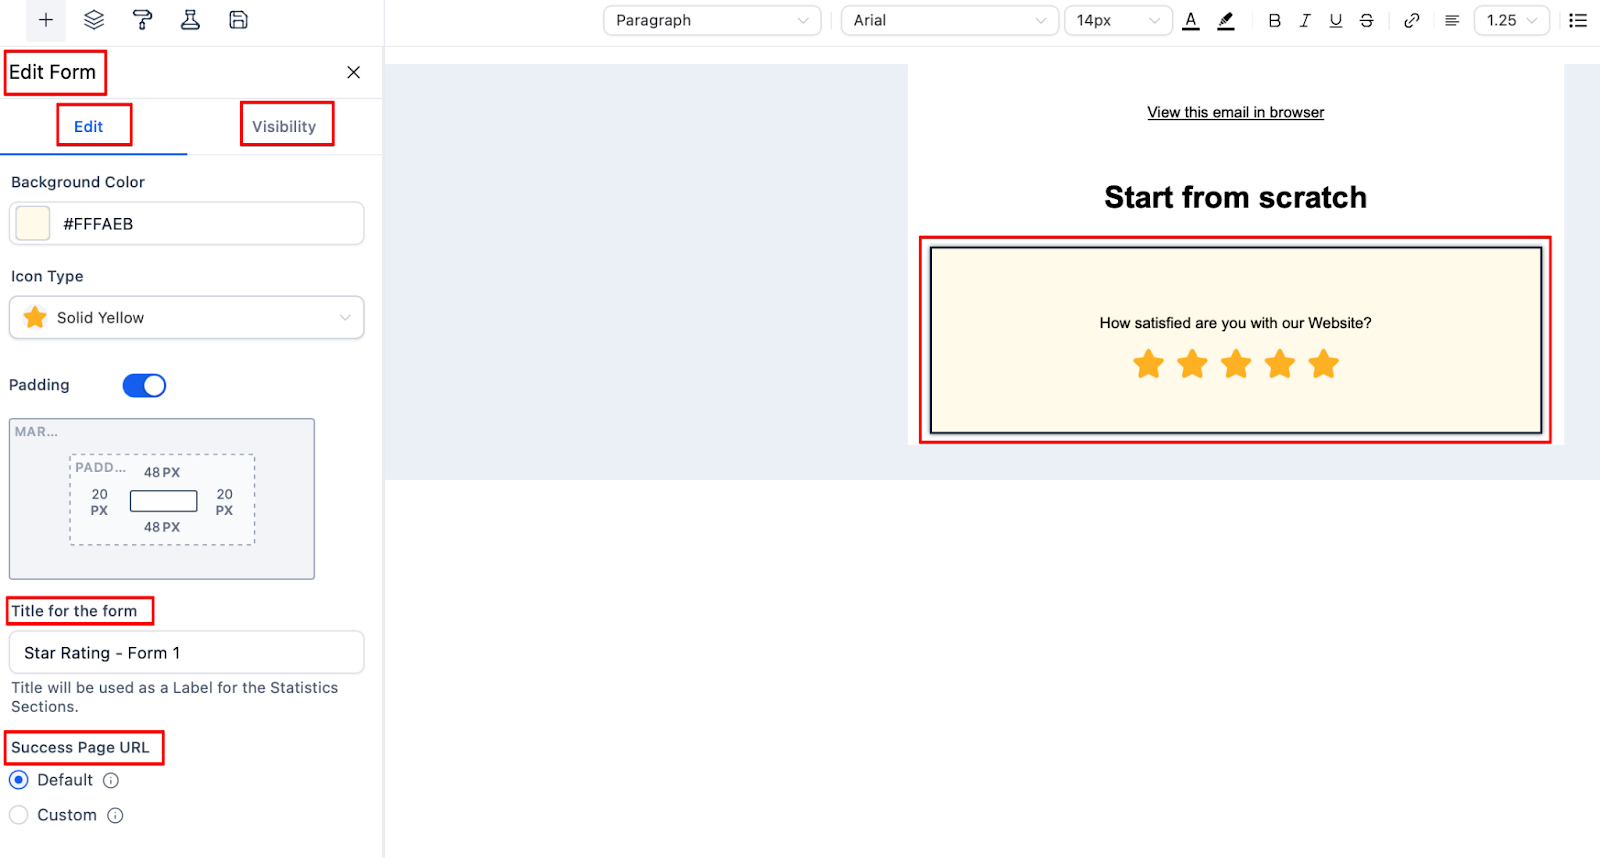
Note: This feature is available for email marketing campaigns.
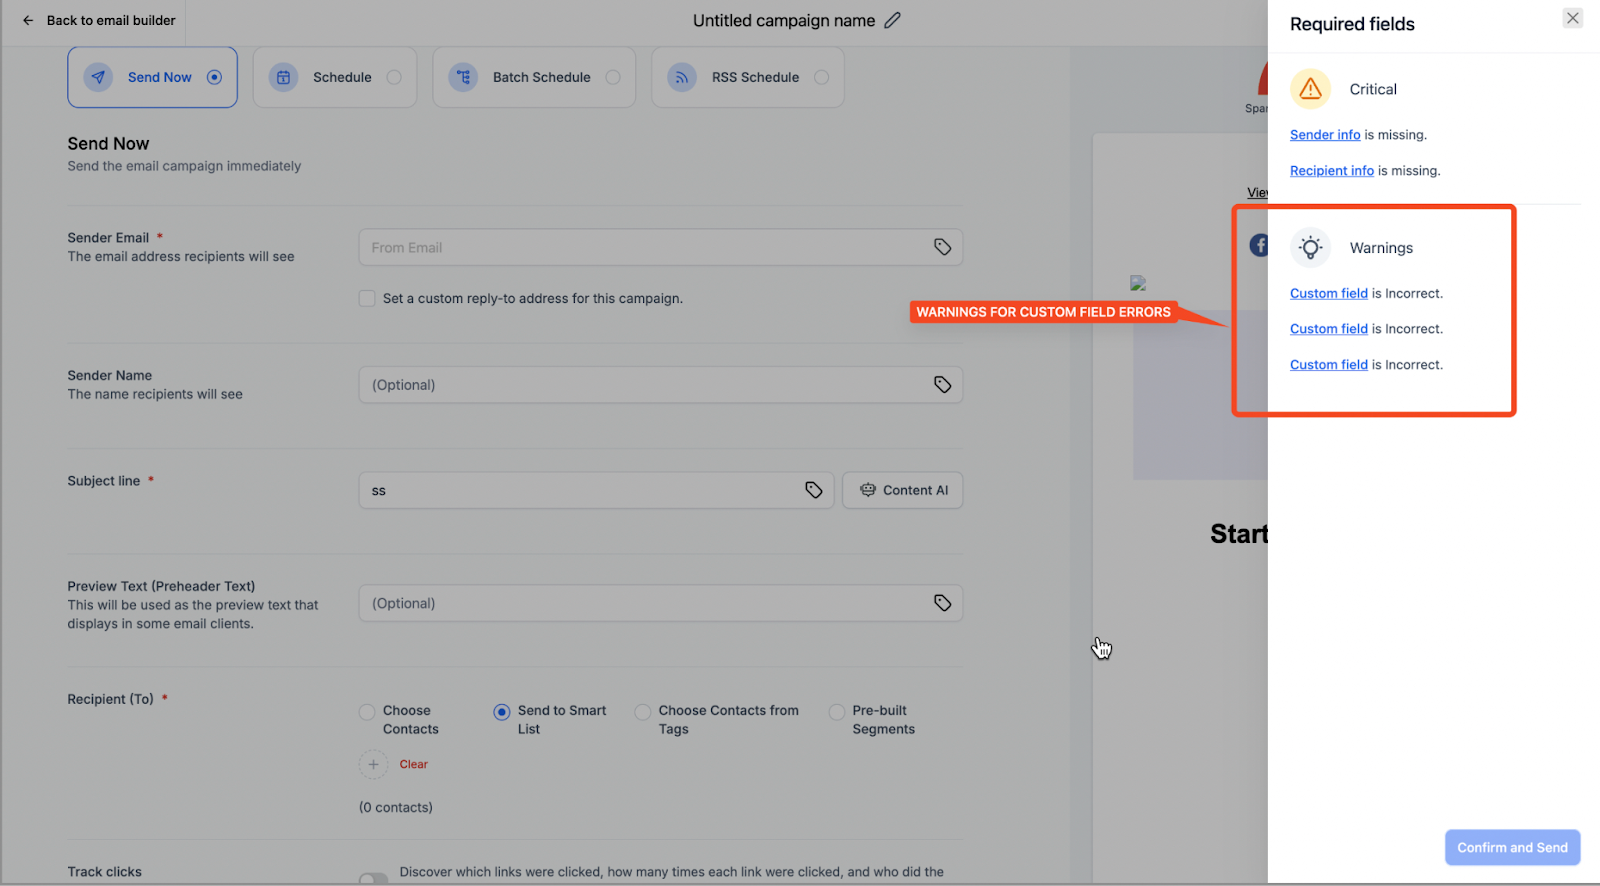
3- Checklist for Custom Value Errors
To enhance error detection, the custom value error checklist covers all content types, ensuring a more thorough validation process. It includes text, button elements, images, videos, social elements, logos, FAQs, image sliders, and forms are also included. This helps prevent overlooked errors, improving email accuracy and professionalism.
FAQ
Q: How do I create and send a regular email campaign?
To create and send a regular email campaign, navigate to Marketing > Emails > Campaigns, select your desired email template, design your email, and then either send it immediately or schedule it for later.
Q: Why is it important to verify my 'From' email address?
Verifying your 'From' email address is essential to ensure your emails are delivered successfully and not marked as spam, which helps maintain a strong email-sending reputation.
Q: How can I add product elements with direct checkout links to my email campaign?
You can add product elements with direct checkout links by navigating to the email marketing section, creating a new campaign, and selecting the direct checkout option for the product element. Customize the checkout page as needed.
Q: What are the key features of the inline editor for customizing emails?
The inline editor allows you to easily style your email with various heading options, font styles, colors, text formatting, and more, making it simple to create high-quality emails efficiently.
Q: How do I schedule or send my email campaign after it's created?
Once your email campaign is ready, click on "Send or Schedule," fill out the recipient details, add a subject line, and choose to either send the email immediately or schedule it for a later date and time.
Q: How do I manage Sender Domain settings in my campaigns?
You have control over the sender domain for their campaigns. If using a public or shared email address, the system will automatically adjust it to ensure compliance. You can also choose the domain you wish to use for each campaign from the available options. Note: This is for LC Email only.
Q: Can I undo a change I made to my email design?
Yes. Click the three dots next to the Save button to access Version History. This allows you to view previous iterations of your design and restore an older version if you made a mistake.