Email Builder: Understanding Advance Conditions for Smart Lists and Tags
Advanced conditions for Smart Lists and Tags offer powerful functionality to ensure your campaigns are always reaching the most up-to-date audience. By using these advanced conditions, you can automatically include new contacts that are added to your lists or tags between the time a campaign is scheduled and the time it is sent. This article will guide you through the key features, benefits, and steps to effectively use advanced conditions for Smart Lists and Tags, helping you optimize your campaigns for maximum reach and engagement.
NOTE: Advance Conditions will only work for Schedule, Batch, and RSS Email Campaign options.
Key Features and Benefits
- Dynamic Contact Addition: Advanced conditions automatically include new contacts added to Smart Lists or Tags after a campaign is scheduled, ensuring no new leads are missed.
- Enhanced Campaign Reach: By capturing all relevant contacts, your campaigns have a wider audience, potentially increasing engagement and results.
- Automated Updates: Save time and effort by automating the inclusion of new contacts without manually updating your lists or tags.
- Improved Campaign Accuracy: Ensure your messages reach the most accurate and complete audience at the time of sending, reflecting your latest data.
How to Use Advanced Conditions for Smart Lists
1. Create a New Campaign:
- Start by creating a new campaign using the pre-built templates available in your account under Marketing & Sales > Email & Social Media > Emails > Campaigns

2. Edit Contact Details:
- Set up the campaign content and define the contacts you want to target. Once done, Click on "Send and Schedule"

3. Access Advanced Conditions:
- Then navigate to the recipient tab.
- Choose the Smart List option and select your desired Smart List.

4. Apply Advanced Conditions:
- In the Advanced Conditions field, select the options that best meet your needs. This will ensure that any new contacts added to the Smart List between scheduling and sending will be included in the campaign.

Example:
If a Smart List named "Marketing" has 100 contacts when an email campaign is scheduled for January 30th, and 30 more contacts are added to the Smart List before the scheduled send date, the campaign will automatically update to include the new 30 contacts. As a result, 130 contacts will receive the email on January 30th.
How to Use Advanced Conditions for Tags
1. Create a New Campaign:
- Initiate a new campaign using pre-built templates provided by your platform.
2. Design Campaign Content:
- Prepare and edit the content for your campaign to suit your target audience.
3. Select Tags for Recipients:
- Click on "Send and Schedule," then go to the recipient tab.
- Choose the option to select contacts based on Tags.
- The tags will need to be created first by going to Settings > Tags
- Pre-built Segments: You can click that to choose pre-built segments
- Build Segments: You can click that to create your own segments

4. Apply Advanced Conditions:
- Select the relevant options in the Advanced Conditions field. This setting will include new contacts tagged after the campaign has been scheduled.

Example:
If a Tag named "Digital" is linked to 1,000 contacts when an email campaign is scheduled for January 30th, and 40 new contacts are assigned the tag "Digital" before the send date, all 1,040 contacts will receive the campaign email on January 30th.
Automated Tagging
Implement automated tagging in your campaigns to track how contacts interact with your emails. In the "Send or Schedule" screen, turn on "Add Tags" and click “Add Conditions’’ to set up specific triggers based on recipient actions such as opens, clicks, replies, or unsubscribes.


1. Choose the interaction type (e.g., opened, clicked) from the dropdown menu.

2. Specify the action to trigger the tagging. Enter the tags you want to apply when the conditions are met. You can use existing tags or create new ones for specific actions.

3. After sending, go to the "Campaign Stats" page and click "Tags" to see your tag summary. Click "View Contacts" to see who was tagged based on your conditions.

4. Once you’ve set up all conditions and tags, save your settings. Ensure that automated tagging is activated for the campaign before sending it out.
Create Recipient Segments for Email Campaigns
This allows users to build recipient segments directly within the email campaign, eliminating the need to pre-create Smart Lists or navigate to separate sections. Enables quick and flexible targeting for email campaigns, with easy exclusions based on tags, contacts, or segments.
1. Open a campaign in new or edit mode, go to the "Send" or "Schedule" screen, and click "Build Segments" in the recipient section.

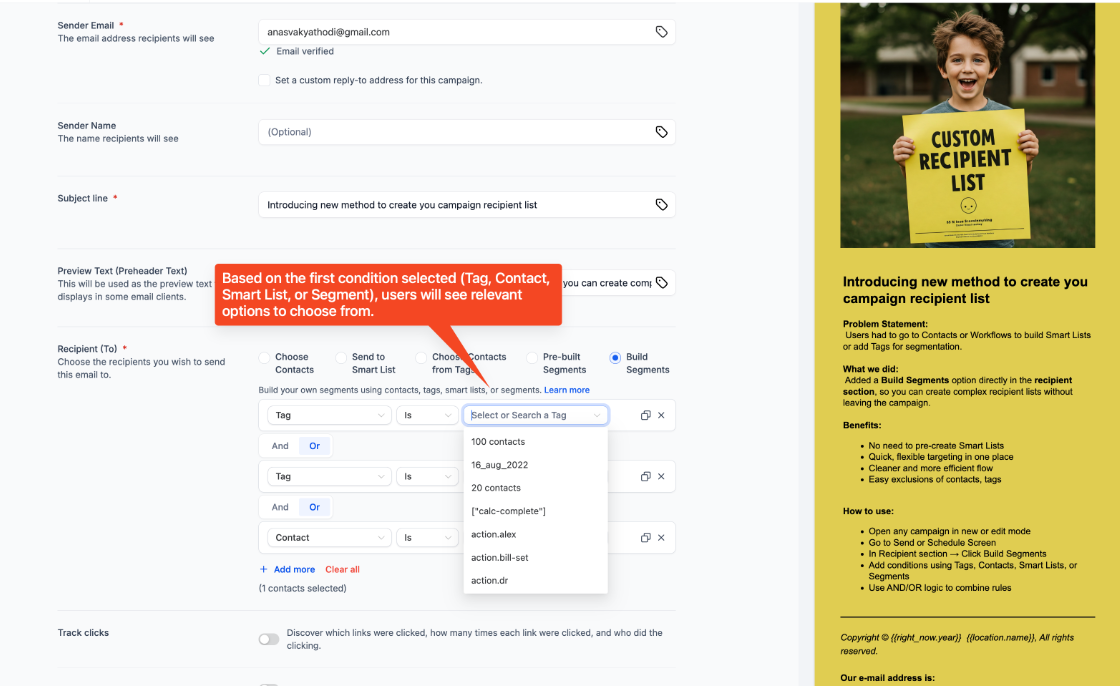
2. Then, add conditions using tags, contacts, Smart Lists, or segments
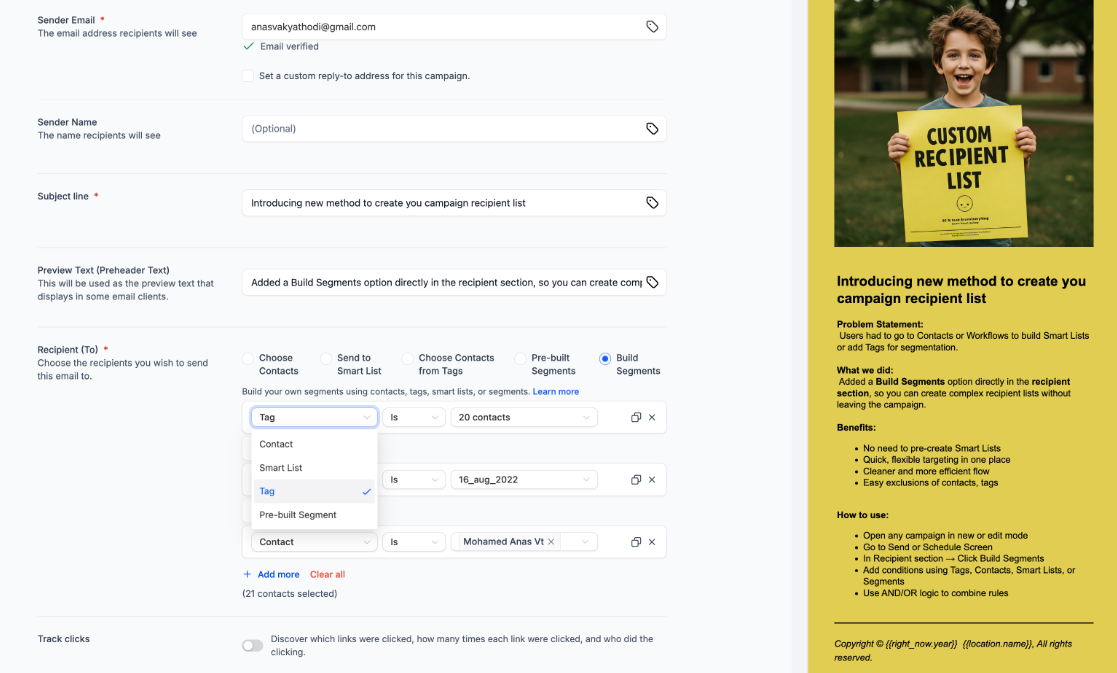
3. Apply AND/OR logic to combine rules.
Pro Tips:
- Regularly Review Lists and Tags: To maximize the effectiveness of advanced conditions, ensure your Smart Lists and Tags are regularly reviewed and updated according to your audience needs.
- Test Before Sending: Always test your campaigns with the advanced conditions enabled to verify that all new contacts are properly included.
- Limitations: Advanced conditions apply only to new contacts added between the campaign scheduling and sending time. They do not affect contacts removed or updated within the same period.
- Ensure Proper Permissions: Make sure that your account settings allow the use of advanced conditions, as some features may require specific permissions or account configurations.
FAQs
Question: What are the advanced conditions for Smart Lists and Tags?
Answer: Advanced conditions automatically add new contacts linked to Smart Lists or Tags that were created between the time a campaign is scheduled and the time it is sent, ensuring your campaign reaches the most up-to-date audience.
Question: How do I apply advanced conditions to a campaign?
Answer: When setting up your campaign, go to the recipient tab under "Send and Schedule," select Smart Lists or Tags, and choose the options in the Advanced Conditions field to include new contacts added after the campaign is scheduled.
Question: Will advanced conditions add contacts removed from a Smart List or Tag?
Answer: No, advanced conditions only add new contacts. Contacts removed or updated during the time between scheduling and sending are not automatically adjusted.
Question: Can advanced conditions be used for other recipient types besides Smart Lists and Tags?
Answer: Advanced conditions are specifically designed for Smart Lists and Tags to dynamically update your audience. Other recipient types may not support this feature.
Question: Are there any special requirements to use advanced conditions?
Answer: You may need specific permissions or account settings enabled to use advanced conditions. Check your platform’s documentation or settings to ensure you have access to this feature.
Question: What is automated tagging, and how can it benefit email campaigns?
Answer: Automated tagging helps track interactions within your email campaigns by applying tags based on actions like opens, clicks, and more. This enables better monitoring of contact engagement and improves campaign targeting.
Question: If I schedule an email three days in advance, will it catch a contact added five minutes before the send time?
Answer: Yes. One of the greatest benefits of Advanced Conditions in Mastermind is that the system performs a final "refresh" of your Smart List or Tags just seconds before the actual broadcast begins. This ensures that even the most recent leads are included.
Question: If I add a contact to an "Exclusion Tag" after scheduling the campaign, will they be removed?
Answer: As noted in the limitations, Advanced Conditions primarily focus on additions. To ensure late exclusions are honored, it is best to build a Segment that explicitly states "Tag is [X] AND Tag is NOT [Exclusion Tag]" so the refresh logic catches the negative condition.