Overview of the Service Menu in Calendars
If you've ever wondered what a Service Menu is and how it can benefit your business, this article will shed light on its significance and the steps to make the most of it.
What is a Service Menu?
At its core, the Service Menu is a centralized hub that streamlines the process of showcasing and booking your services. Imagine a menu at a restaurant, neatly categorizing dishes to make it easier for you to decide what you want. Similarly, the Service Menu categorizes your services, making it a breeze for clients to navigate and book multiple services with ease, all through a single booking widget.
The Service Menu is directly linked to the Service Calendar, a specialized calendar designed explicitly for service-based businesses. In this calendar, you can create various services, assign staff members, categorize them, and display them within one unified scheduling link - which is the Service Menu.

What can you do with the Service Menu?
Here's what you can achieve:
1. Create Calendars for Each Service:
- Easily establish dedicated calendars for each service you offer.
- Assign specific staff members to these service-specific calendars.
2. Organize Calendars into Categories:
- Group your calendars into categories, simplifying navigation for your clients.
- Decide which groups or services to display on the scheduling page, eliminating the need to navigate multiple calendars.
- Create a centralized booking widget for all your services, eliminating the hassle of navigating various calendars and becoming overwhelmed.
3. Streamline Booking for Clients:
- Allow clients to effortlessly book multiple services or schedule appointments for multiple individuals.
- Let clients select their preferred staff member while booking an appointment.
- Provide clients with vital information such as appointment duration, cost, and the assigned staff member for each booking.
4. Integrate Custom Forms into Service Menus:
- Enhance the booking process by integrating custom forms into your service menu calendars. This allows you to gather specific information beyond the default fields (name, email, phone number), such as social media links, business websites, or detailed service requirements, tailoring the experience to your business needs.
Who Can Benefit from It?
The beauty of the Service Menu is that it is versatile and adaptable. It's a perfect fit for a wide range of businesses offering services, including:
- Salons and Hairdressers
- Spas and Wellness Centers
- Massage and Therapy Clinics
- Fitness Studios and Trainers
- Healthcare Providers
- Event Planners
- Pet Groomers
- And many more!
If you're in the business of providing services and you want to elevate the booking experience for your clients, the Service Menu is the ideal solution.
Getting Started: Prerequisites
1. Create a Group:
- Think of a group as a category for your services.
- Calendars added to a group will appear under that category tab on the appointment widget.
- To create a new group, navigate to Calendar settings and select "Create Group."
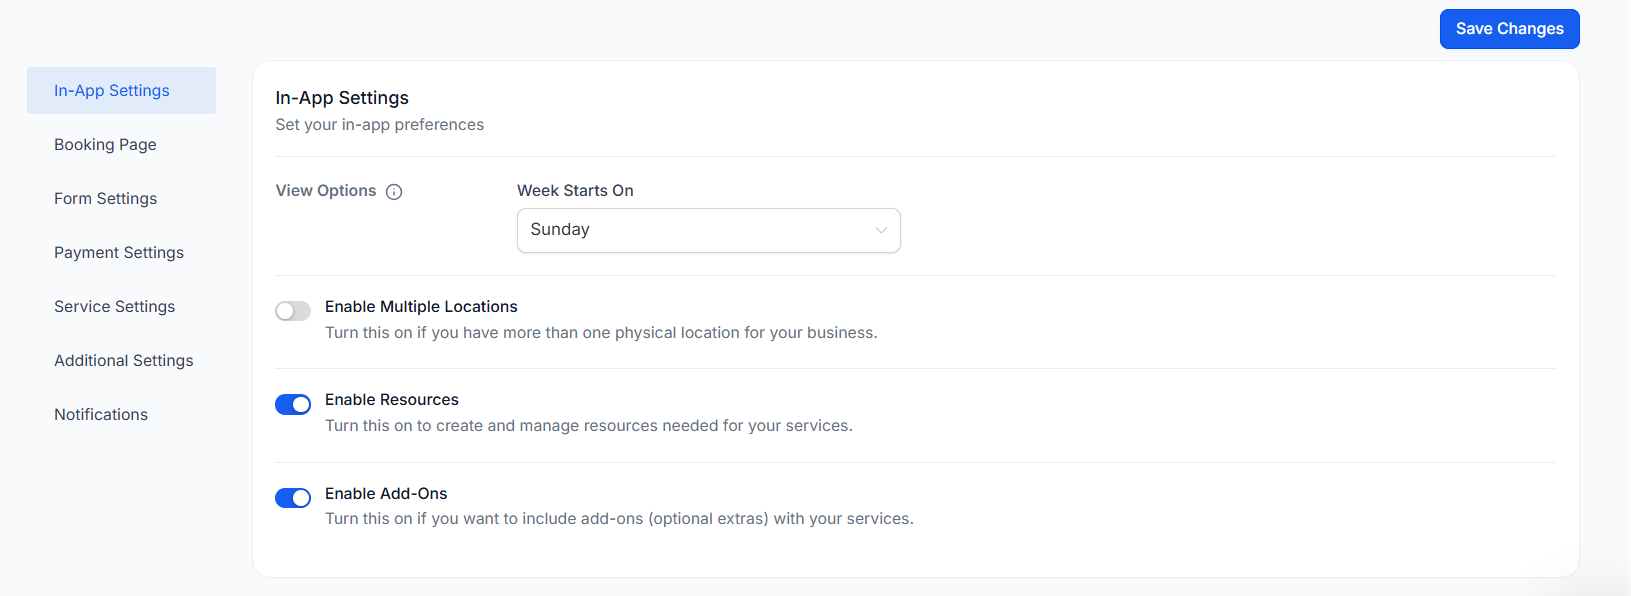
Note: Before proceeding with the creation of your Service Menu, make sure that the Service Menu feature is enabled in your settings. To do this, go to Preferences in your Calendar Settings, and toggle the Service Menu option to turn it on.
Example: You can create the Group “Hair Care” for your hair-related services like Hair Cut, Hair Spa, and Hair Coloring

2. Create a Service Calendar:
- Design dedicated calendars for each service you offer.
- Assign each calendar to its respective group.
Example: For your Hair Care services, you may create different calendars such as Hair Cut (Male), Hair Cut (Female), Hair Spa, and Hair Coloring.

3. Create a Service Page Menu:
- Decide which service calendars and groups you want to display on the appointment widget.
- Offer your clients a single place to make bookings.
Example: Your service menu can include two categories, “Hair Care” and “Skin Care,” with different services listed under each.

By following these steps, you can efficiently manage your appointments and make the most of the Service Menu.
How to create a Service Menu?
Step 1: Prepare your Service Calendars
Before you create a service menu, ensure that you have created your service calendars and added them to groups. Here's how:
- Create your service calendars in the "Calendar Settings."
- Add these calendars to relevant groups.
Step 2: Create your Service Menu
- Head to the "Service Menu" tab.
- Click on "Create Service Menu."
- Fill in the following details for your menu:
- Name: Provide a name for your service menu.
- Description: Add a brief description of your services.
- URL/Slug: Customize the URL for your service menu.
- You can also:
- Toggle the consent checkbox on/off.
- Customize the consent message.
- Choose to show a thank you message after booking or redirect users to an external URL.
- To integrate a custom form, navigate to the form selection area within the Service Menu setup, choose the desired form you created, and save the configuration. This form will override any forms set at the individual calendar level, providing a unified data collection experience across all services in the menu.
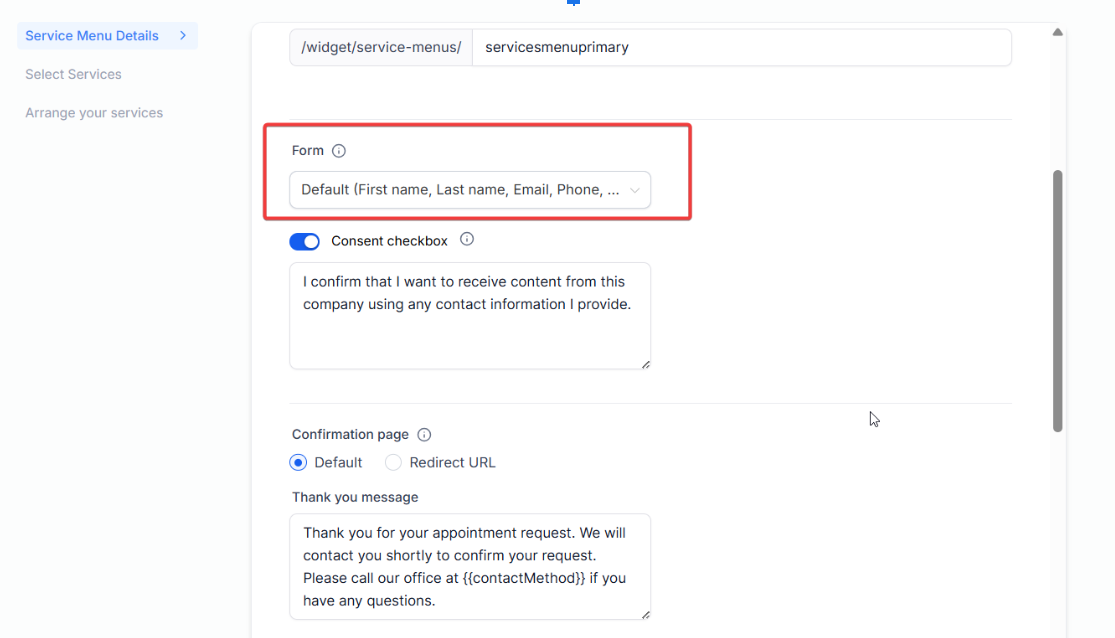
Note: When editing your service menu later, you can assign a service-specific form or a Global form to be included in your booking process. When a service-level form is set, it will be used for that specific service when booked. However, if multiple services are booked together, the global form will always be used.
- Once you've filled in the details, move to the next step - “Select Services"
Step 3: Select & Arrange your Services
- In the Select Services tab, select the groups or individual services you want to display in the menu.
Note: If you haven't created service calendars or added them to groups, you'll need to do so before they appear in this list
- Copy

- After selecting the services, arrange them in the order you want them to appear on the service menu.
- You can decide the sequence in which the groups and services are displayed.
- Once satisfied with the arrangement, click "Save."
- Your service menu is now ready to be used. You can use the scheduling link provided to direct your clients to the service menu.


To disable the Service Menu, follow these steps:
1. Go to Calendar Settings.
2. Click on "Preferences."
3. Under "In-App Preferences," toggle the "Service Menu" option to turn it off.
4. After turning off the "Service Menu" option, note that the "Service Menu" tab under "Calendar Settings" > "Calendars" will no longer be accessible
FAQ's
Question: How do I create a Service Menu in Mastermind?
Answer: To create a Service Menu, go to Calendar Settings, click on "Preferences," and enable the Service Menu option. Then, head to the "Service Menu" tab under "Calendars," click on "Create Service Menu," and fill in the necessary details like name, description, and URL. You can also select and arrange the services or groups you want to display.
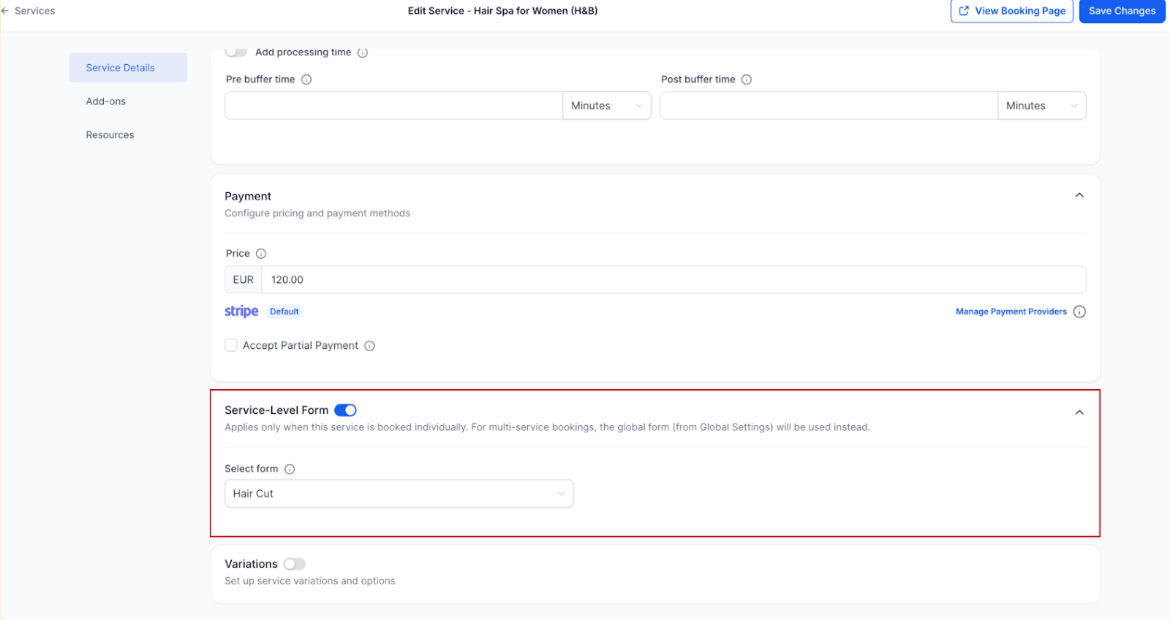
Question: How do Service-Level Forms work, and how do they differ from the global form?
Answer: Service-Level Forms allow you to assign specific forms for individual services, in addition to the global form. By default, the global form applies to all services. However, if a service-level form is set for a particular service, it will be used when that service is booked. When multiple services are booked together, the global form will always be used. This feature helps you collect service-specific information without overloading or duplicating a single global form.
Question: What types of businesses can benefit from using the Service Menu?
Answer: The Service Menu is ideal for service-based businesses like salons, spas, healthcare providers, fitness studios, event planners, pet groomers, and many others. It helps streamline the booking process, making it easy for clients to book multiple services or appointments with specific staff members.
Question: How can I organize my services within the Service Menu?
Answer: You can organize your services by creating groups in the Calendar Settings. Group your service calendars under these categories, which will then appear under the corresponding tab on the appointment widget. This categorization helps simplify navigation for clients.
Question: What happens if I disable the Service Menu?
Answer: If you disable the Service Menu in your Calendar Settings under "Preferences," the "Service Menu" tab under "Calendar Settings" > "Calendars" will no longer be accessible. This will revert the booking experience back to individual calendar bookings without the consolidated service menu.
Question: Can I display appointment details like duration and cost on the Service Menu?
Answer: Yes, the Service Menu allows you to provide clients with important appointment details such as duration, cost, and the assigned staff member, enhancing the booking experience and providing transparency.
Question: How do I select and arrange services in the Service Menu?
Answer: In the "Select Services" tab of the Service Menu setup, you can choose which groups or individual services to display. You can then arrange them in the desired order by dragging and dropping, allowing you to customize how services appear to clients.
Question: Can I integrate custom forms into my Service Menu?
Answer: Yes, you can integrate custom forms into your Service Menu by selecting and assigning a specific form within the "Service Menu" setup. This allows you to collect tailored information from your clients, beyond the default fields like name, email, and phone number. The custom forms are particularly useful for gathering business-specific details, such as social media links or service requirements.
Question: What form will a client see if they decide to book two or more services at the same time?
Answer: When multiple services are booked together in a single session, the system will always use the global form instead of individual service-level forms to ensure a unified data collection experience.