Bulk Actions - Import and Export Contacts
The Bulk Actions feature in your Contacts/Smart Lists section is designed for efficiency, allowing you to handle multiple actions for selected contacts or even your entire contact list. Here's a step-by-step breakdown:
To export contacts:
Step 1: Choose Your Contacts
- Navigate to your contacts section.
- To select specific contact records, check the appropriate box next to the name or select the checkbox at the top of list to select them all.

Step 2: Bulk Export Contacts
- On the top of your list of contacts, select the Export button:

- A pop-up will come up. Select "Export" to continue.

If the export is successful, you will see the following pop-up window:

- You can select "Check Progress" which will bring you to a page that will show you all previous bulk actions taken for your contacts, including the most recent:

Additional Notes:
- Importing and exporting contacts is only available on the Business System Plan and may not be available to Success System members.
- Every contact record intended for import should have at least a phone number or an email address for a successful upload.
Why Export Contacts?
1. Migrating to a New CRM or Account
- Benefits: Seamless transition, retention of contact details, no manual data entry.
2. Creating Targeted Marketing Campaigns
- Benefits: Improved marketing efficiency, higher conversion rates, personalized outreach.
3. Collaborating with Team Members
- Benefits: Enhanced teamwork, consistent information, centralized data management.
4. Generating Reports and Analytics
- Benefits: Data-driven decisions, identification of trends, understanding customer needs.
5. Backup and Data Security
- Benefits: Protection against data loss, easy data restoration, and increased peace of mind.
FAQ’s on Contact Export
Q1: Can I Export Specific Data Fields?
- Answer: Yes, you can customize the data fields in the exported .csv file.
Q2: What About Notes Exceeding 255 Characters?
- Answer: Only the most recent note, up to 255 characters, is included. More extended notes are truncated.
Q3: Can I Export from Multiple Accounts Simultaneously?
- Answer: Exports are done separately for each account, but you can combine .csv files later.
Q4: Is Automatic Export Possible?
- Answer: Currently, this feature is not available.
Q5: How do you Import the .csv File into Another Platform?
- Answer: Follow the import instructions of the new platform, typically involving column mapping.
Importing a comprehensive contact list is a cornerstone of effective database management. When done correctly, it ensures your contacts are organized with the best data, facilitating more efficient business operations.
Pre-requisites:
- Only users with an 'Admin' role will have the option to import and export contacts. You can adjust your User Settings by visiting: Settings > My Staff > Team Management.
- The import file needs to be a .csv file
- Have only one sheet/tab within the spreadsheet
-
Be smaller than 50MB
(Note: a typical .csv file with four columns and 10,000 records will be ~500kb in size)
- The first row should NOT be blank! Include a header row in which at least one column header corresponds to a field in the system.
How to Import Contacts to Mastermind:
- Have a .CSV file with the contacts you want to import

Step 1: Prepare Your .csv File
- Row 1 of the file should have essential headers such as ‘first name’, ‘last name’, ‘email’, ‘phone’, ‘additional phones’, ‘tag’, and so forth.
- When adding multiple phone numbers for a single contact, list them in the "additional phones" column. This feature allows you to manage multiple phone numbers seamlessly.
- Format phone numbers correctly. If a "+" sign is required, add an apostrophe at the start (e.g., '+191668128779').
- Avoid using File Upload and Signature Fields in the import.
- For DND columns, remember that contacts will be set to DND for all channels unless specified otherwise through workflows and tags.
- Clean your list and check for duplicates before importing. This is crucial for maintaining data integrity and avoiding deliverability issues. Please refer to this guide for finding and removing duplicates:
Step 2: Import Your Contacts
1- Two options exist for adding contacts:
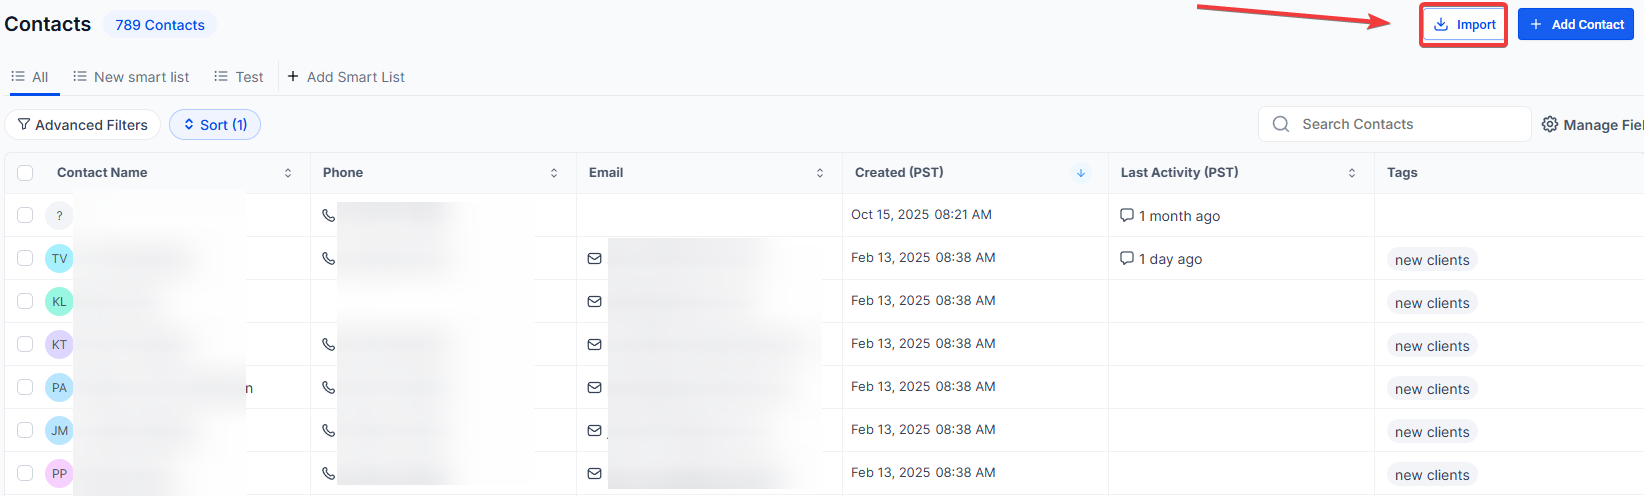
- Manually create a contact by clicking the “+ Add Contact" button in the top left corner.
- Click and choose the Import option to upload in bulk via a CSV file.
- On the import screen, select Contacts you wish to import.
- Click Next.

Step 2: Upload Your CSV File
- Upload the CSV file that contains your contact data.
- Choose whether you want to create new records, update existing ones, or both.
- If a Contact ID is provided in the CSV file, the contact will be updated; otherwise, a new one will be created.
- Click Next to continue.

Step 3: Map Fields
- Map the fields from the CSV file to the correct contact fields.
- Ensure accurate field mapping to avoid errors.
Here are a few important things to note:
- If you check the "Don't update Empty Values" box, any field with an empty value in the imported file will not be updated, even if the field already has a value for the contact.
- If you don't want to import certain fields, you can leave them unmapped and check the box at the bottom to continue. Just make sure all mandatory fields are mapped. If any fields are unmapped, either map them or select "Don't import data" for those columns to proceed.

Step 4: Verify and Import
- Review the field mappings to confirm accuracy.
- You may also choose to add a tag, create a smart list, or include the contacts in a workflow during this step.
- Once reviewed, confirm and proceed with the import.

Step 5: Monitor Import Status
- Monitor the progress of the import under the Bulk Actions page.
- You can check the status, download error logs, and troubleshoot any issues under the Error tab.

Troubleshooting Common Errors and Solutions
Error: Missing Required Fields for Contact Creation/Update
- Solution: Ensure that for creating new contacts, at least one of the following fields is present: Name, Phone, or Email. For updating contacts, ensure Contact ID, Name, Email, or Phone is included, according to your de-duplication settings.
Error: Duplicate Phone or Email Found
- Solution: Verify your de-duplication settings in Settings> Business Profile in "Allow Duplicate Contacts." If duplicates are restricted, either adjust the settings to allow duplicates or update the phone/email in your file to be unique.

Error: Invalid Contact ID or Not in Your Sub-Account
- Solution: Verify that the Contact ID in your file matches a valid contact in the current sub-account. If the contact has been deleted, retrieve the correct Contact ID for the record.
Error: Invalid Phone Number Format
- Solution: Ensure phone numbers are in the E.164 format (e.g., +1 1234567890). For US numbers, alternative formats like 123-456-7890, or (123) 456-7890 are also acceptable. For international numbers, verify using an appropriate tool like libphonenumber. Run your phone number format by the tool in conjunction with the country code to ascertain its appropriateness for upload.
Error: Invalid Date Format
- Solution: Ensure dates are in one of the supported formats such as YYYY-MM-DD, MM/DD/YYYY, or DD-MMM-YYYY. Correct the date format in your file before reattempting the import.
Supported Formats:
- YYYY-MM-DD (e.g., 2024-09-08 or 2024-9-8)
- YYYY/M/D (e.g., 2024/09/08 or 2024/9/8)
- YYYY.MM.DD (e.g., 2024.09.08 or 2024.9.8)
- M.D.YYYY (e.g., 09.08.2024 or 9.8.2024)
- M/D/YYYY (e.g., 09/08/2024 or 9/8/2024)
- M-D-YYYY (e.g., 09-08-2024 or 9-8-2024)
- YYYY/MM/DD (e.g., 2024/09/08)
- MM/DD/YYYY (e.g., 09/08/2024 or 9/8/2024)
- MM-DD-YYYY (e.g., 09-08-2024 or 9-8-2024)
- MM.DD.YYYY (e.g., 09.08.2024 or 9.8.2024)
- DD MMM YYYY (e.g., 08 Sep 2024 or 8 Sep 2024)
- MMM DD YYYY (e.g., Sep 08 2024 or Sep 8 2024)
- YYYY MMM DD (e.g., 2024 Sep 08 or 2024 Sep 8)
- DD-MMM-YYYY (e.g., 08-Sep-2024 or 8-Sep-2024)
- MMM-DD-YYYY (e.g., Sep-08-2024 or Sep-8-2024)
- YYYY-MMM-DD (e.g., 2024-Sep-08 or 2024-Sep-8)
- DD MMM, YYYY (e.g., 08 Sep, 2024 or 8 Sep, 2024)
- MMM DD, YYYY (e.g., Sep 08, 2024 or Sep 8, 2024)
- DDth MMM YYYY (e.g., 08th Sep 2024 or 8th Sep 2024)
- MMM DDth YYYY (e.g., Sep 08th 2024 or Sep 8th 2024)
- DDth MMM, YYYY (e.g., 08th Sep, 2024 or 8th Sep, 2024)
- MMM DDth, YYYY (e.g., Sep 08th, 2024 or Sep 8th, 2024)
- DD MMMM YYYY (e.g., 08 September 2024 or 8 September 2024)
- MMMM DD YYYY (e.g., September 08 2024 or September 8 2024)
- YYYY MMMM DD (e.g., 2024 September 08 or 2024 September 8)
- MMMM DD, YYYY (e.g., September 08, 2024 or September 8, 2024)
- DD MMMM, YYYY (e.g., 08 September, 2024 or 8 September, 2024)
Error: Invalid Email Address Format
- Solution: Ensure all email addresses in your file are correctly formatted, such as example@domain.com. Correct any errors and reattempt the import with the updated file.
FAQs
Question: What file format should I use to import contacts?
Answer: You should use a .csv format for importing contacts.
Question: Can I import multiple contacts at once?
Answer: Yes, you can import all your contacts in a single process, saving time and effort.
Question: What happens if I have duplicate phone numbers or emails in my file?
Answer: If duplicates are found, they will be flagged based on your de-duplication settings. You can adjust these settings or update the details in your file to avoid errors.
Question: Can I update existing contacts during the import process?
Answer: Yes, you can update existing contacts by ensuring the correct Contact ID or other unique identifiers are included in your file.
Question: How do I ensure the correct fields are mapped during import?
Answer: You should map the fields from your CSV file to the correct contact fields. If certain fields are not mapped, choose "Don’t import data" for unmapped columns to proceed.
Question: Can I undo an import if there are mistakes?
Answer: Only new contact imports can be reverted. Updates to existing contacts cannot be undone.
Question: What is the best format for phone numbers during import?
Answer: Phone numbers should be formatted in E.164 format (e.g., +1 1234567890) for proper recognition and import.
Question: How do I export contacts from the platform?
Answer: To export contacts, navigate to the Export option, select any desired filters (like tags, lists, or date range), and initiate the export. The system will generate a CSV file for download.
Question: Can I filter the contacts I export?
Answer: Yes, you can apply filters to export specific contacts based on criteria such as tags, lists, or date range, ensuring you only export relevant contact data.
Question: Are there limits to file size or sheet structure?
Answer: Yes, the CSV must contain only one sheet and be less than 30 MB in size.
Question: Can I filter contacts during export?
Answer: Yes, filters can be applied to export specific contacts, ensuring you download only relevant data.