Form Customization & Styling Options
Customizing forms can significantly enhance their visual appeal and functionality. With Mastermind, you can easily personalize your forms to align with your branding and improve user engagement. This article provides a comprehensive guide on how to use the form customization features effectively.
How to Use Form Customization Features
1- Access the Form Builder
- Navigate to “Marketing & Sales” Tab > “Funnels and Pages” > "Forms” > From the dropdown select "Builder".
- Select the form you want to customize or create a new form.

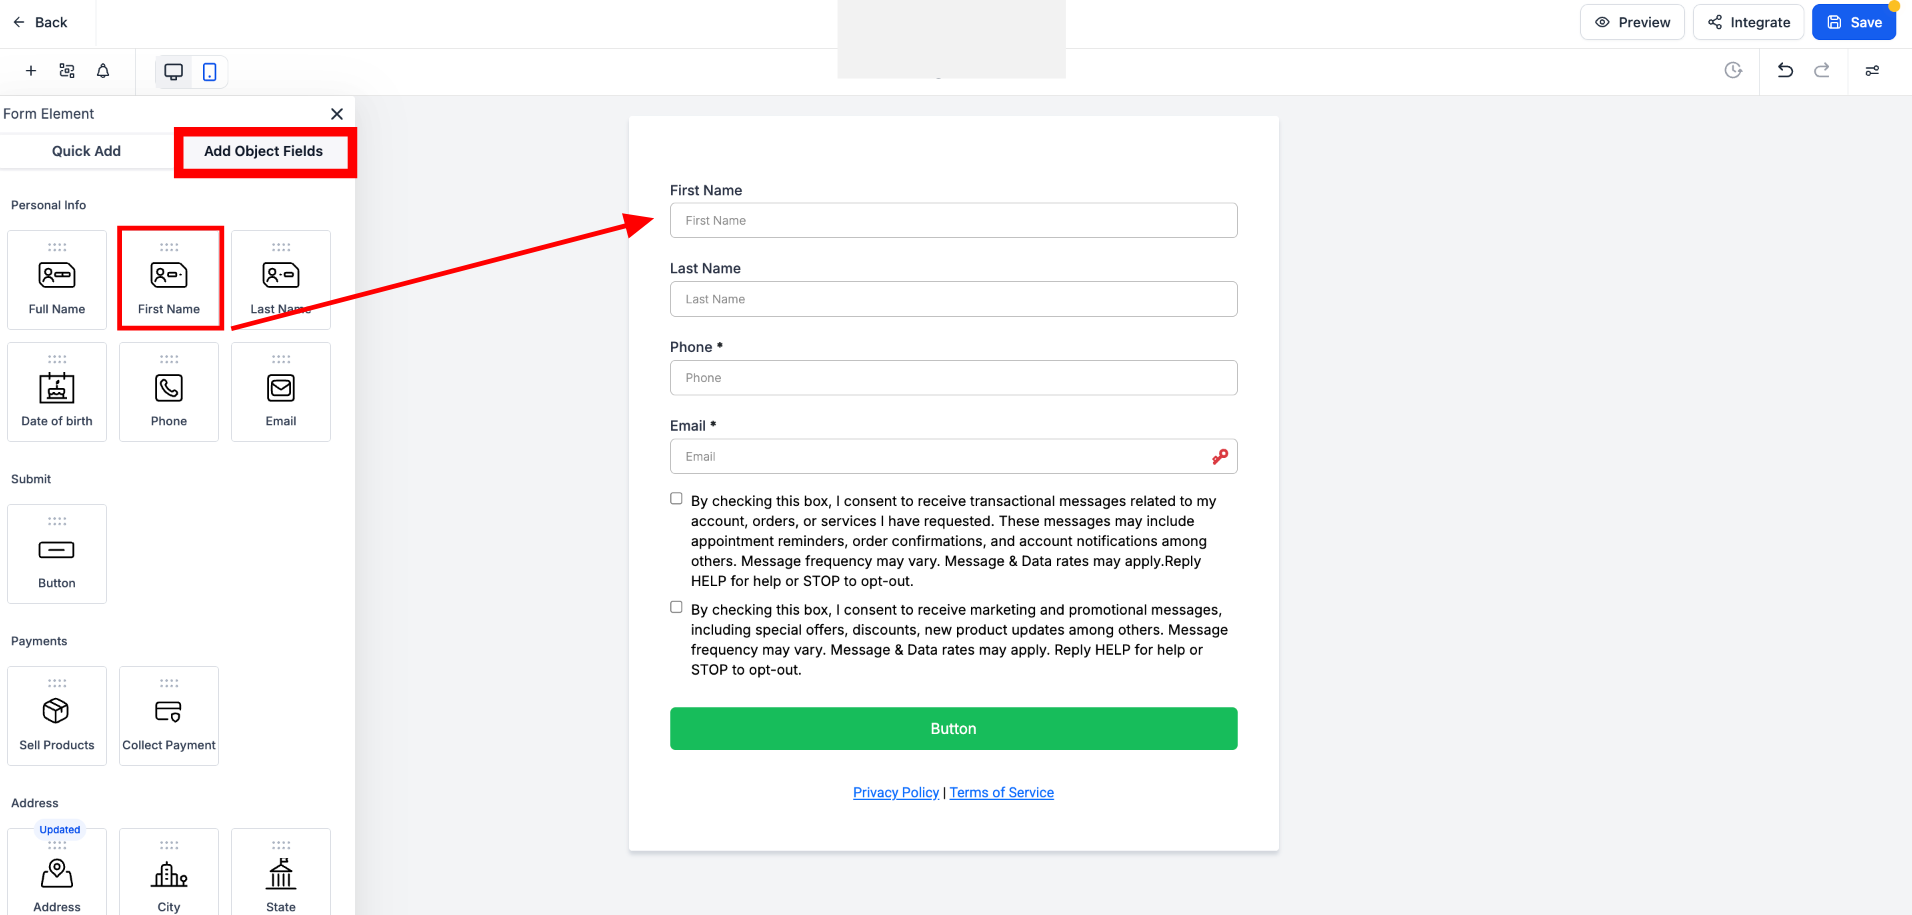
2- Adding Form Elements
Adding elements to forms and surveys in Mastermind is a simple process that allows you to customize fields, questions, and design components to collect the precise information you need from your audience.
- Standard and Custom Fields: Add fields from the left panel. You can choose from standard fields like text boxes and drop-down menus, or add custom fields as needed.
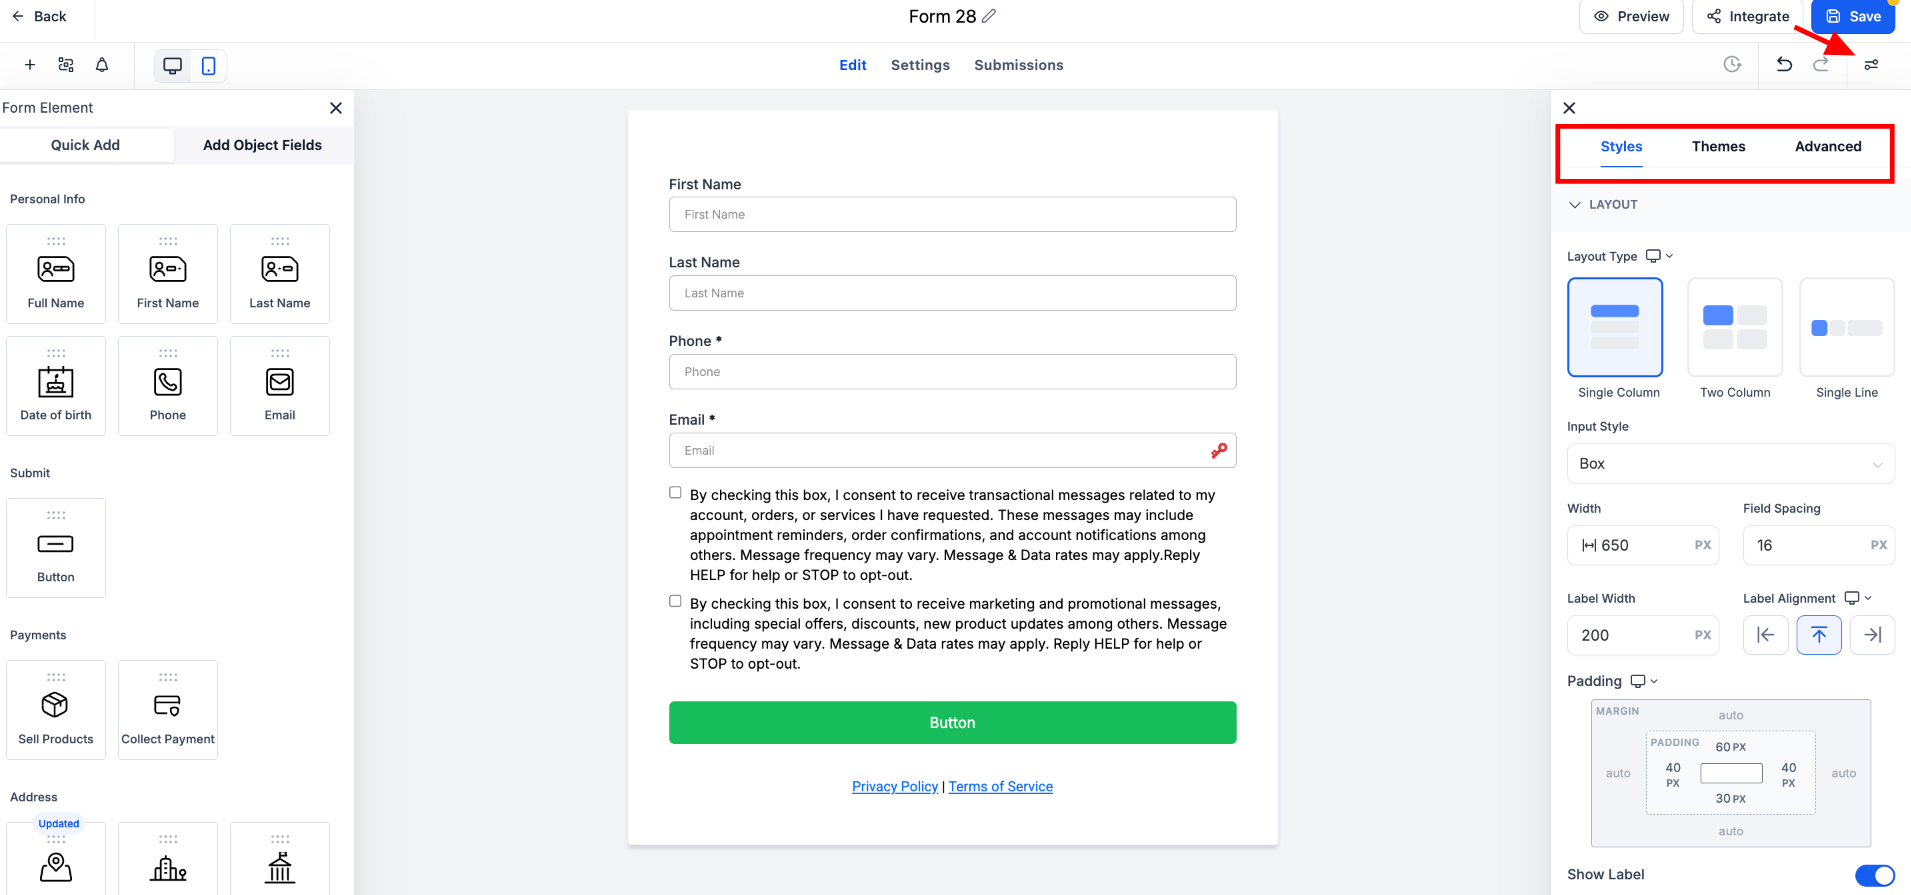
3- Styling Options:
All styling, themes, and advanced settings are located on the right panel. Here, you can adjust the appearance and behavior of each form element.
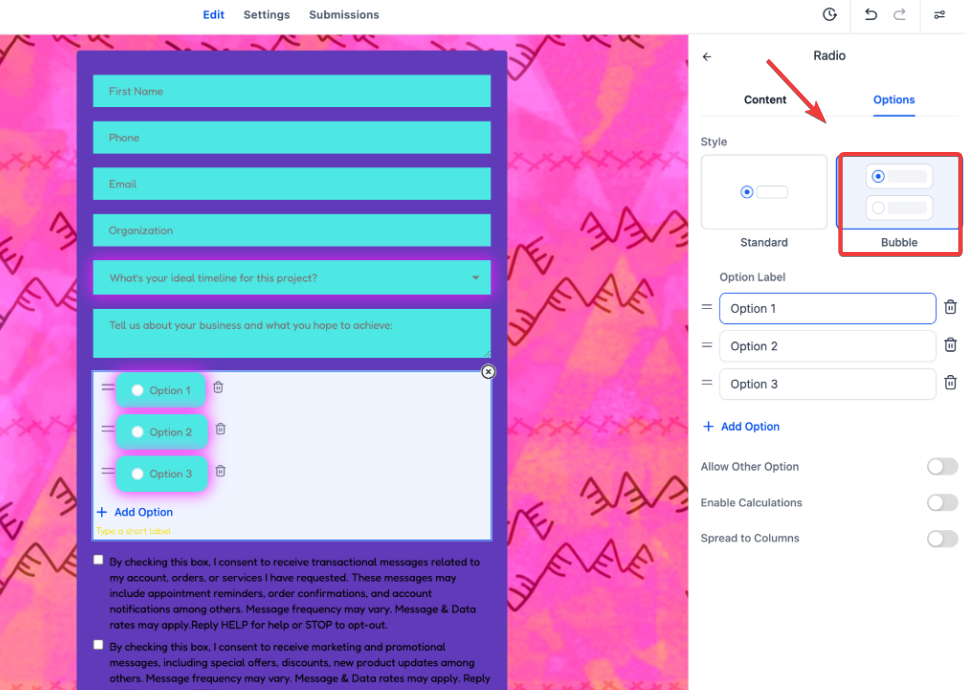
- Spread to Columns: Allows the configuration of multiple columns for radio buttons, radio images, and checkboxes, enhancing the visual styling and layout. Adjust the column settings in the right-hand menu. This feature applies to new forms and does not affect existing ones.

- The Bubble Style option gives radio buttons and checkboxes in forms a modern, rounded design. It improves user interactivity and looks sleek across devices.
Layout Settings:
- Single Column Layout: Fields arranged vertically, one below the other.

- Two-Column Layout: Fields are placed side-by-side in two columns for a balanced and compact structure.

- Single Line Layout: Up to 5 fields in a single horizontal line for a streamlined design.

- Field Width Setting: Adjust field widths as a percentage of the form width for tailored and aesthetically pleasing designs.
- Field Spacing Feature: Adjust the spacing between fields in your forms and surveys. This addition gives you more flexibility in how you organize and design your content.

Colors & Background Settings:
- Header Images: Upload your desired header image. This image will span the width of the form, positioned at the top for better visual presentation.

- Background Images: Upload a custom background image to cover the entire page of your form. This feature enhances the visual engagement of your forms.
Miscellaneous Settings:
- Custom Branding: Add your agency's logo, colors, and styles to forms and surveys to maintain brand consistency.

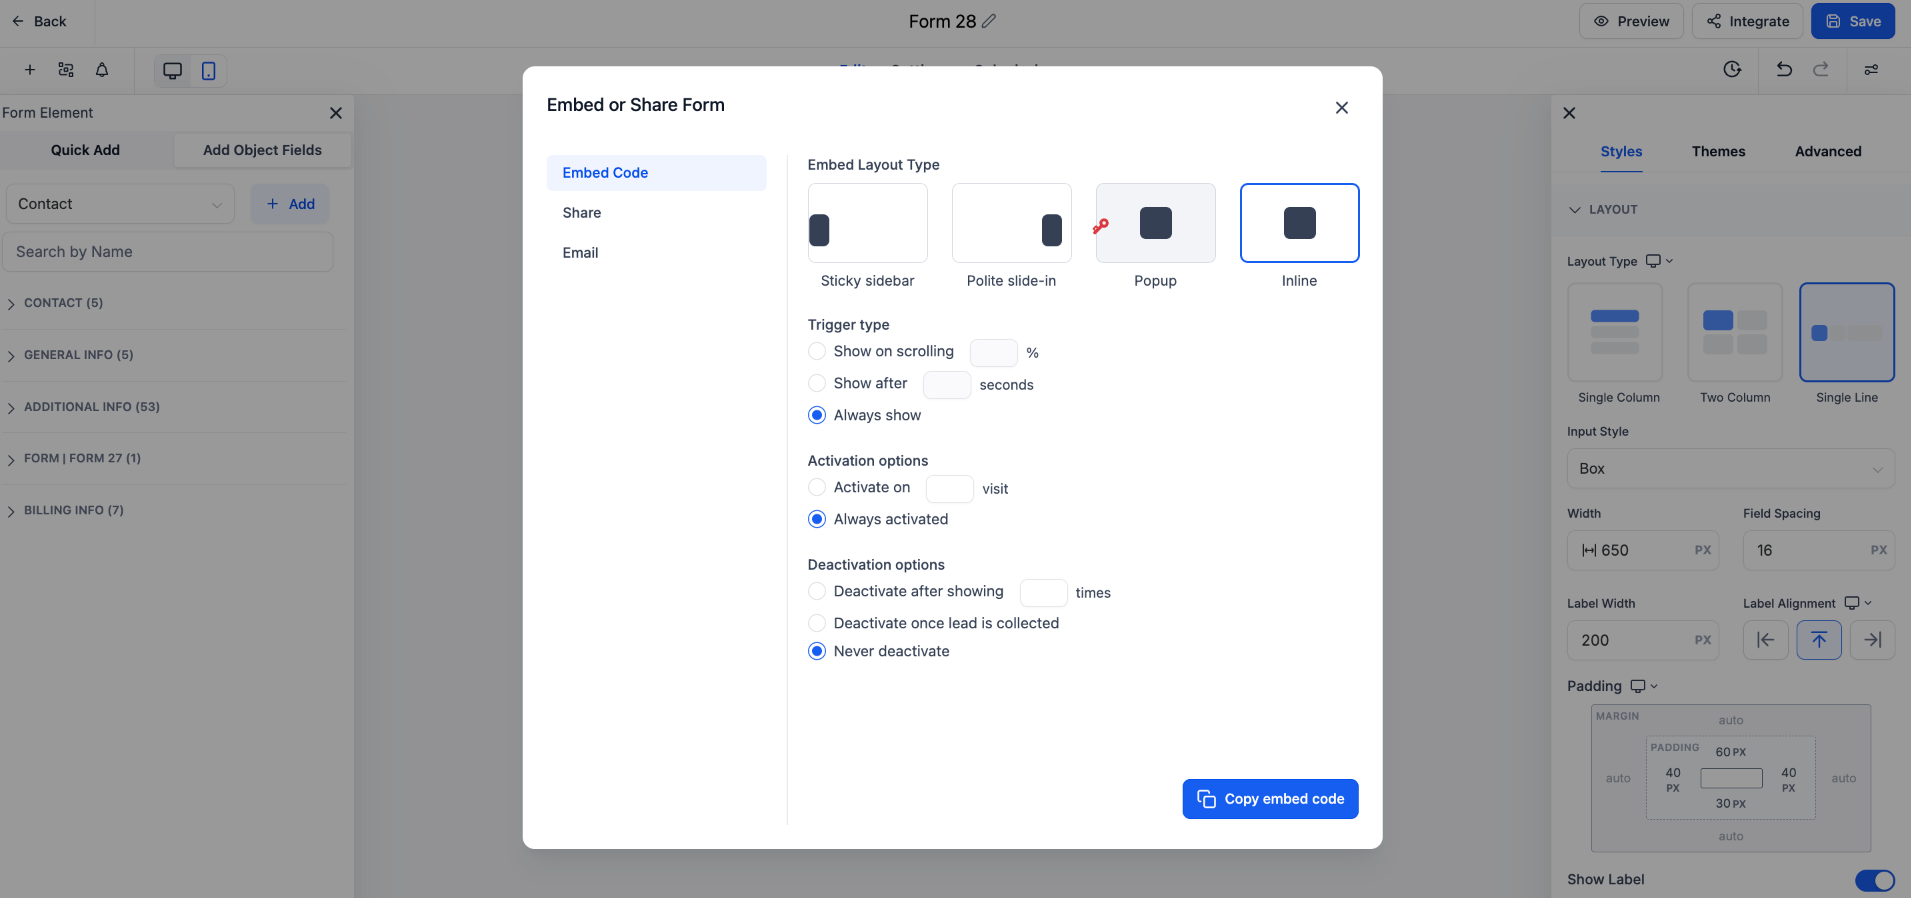
4- Integrating Forms
- Take advantage of multiple integration options to seamlessly connect your forms with various tools and services, enhancing their functionality and efficiency.
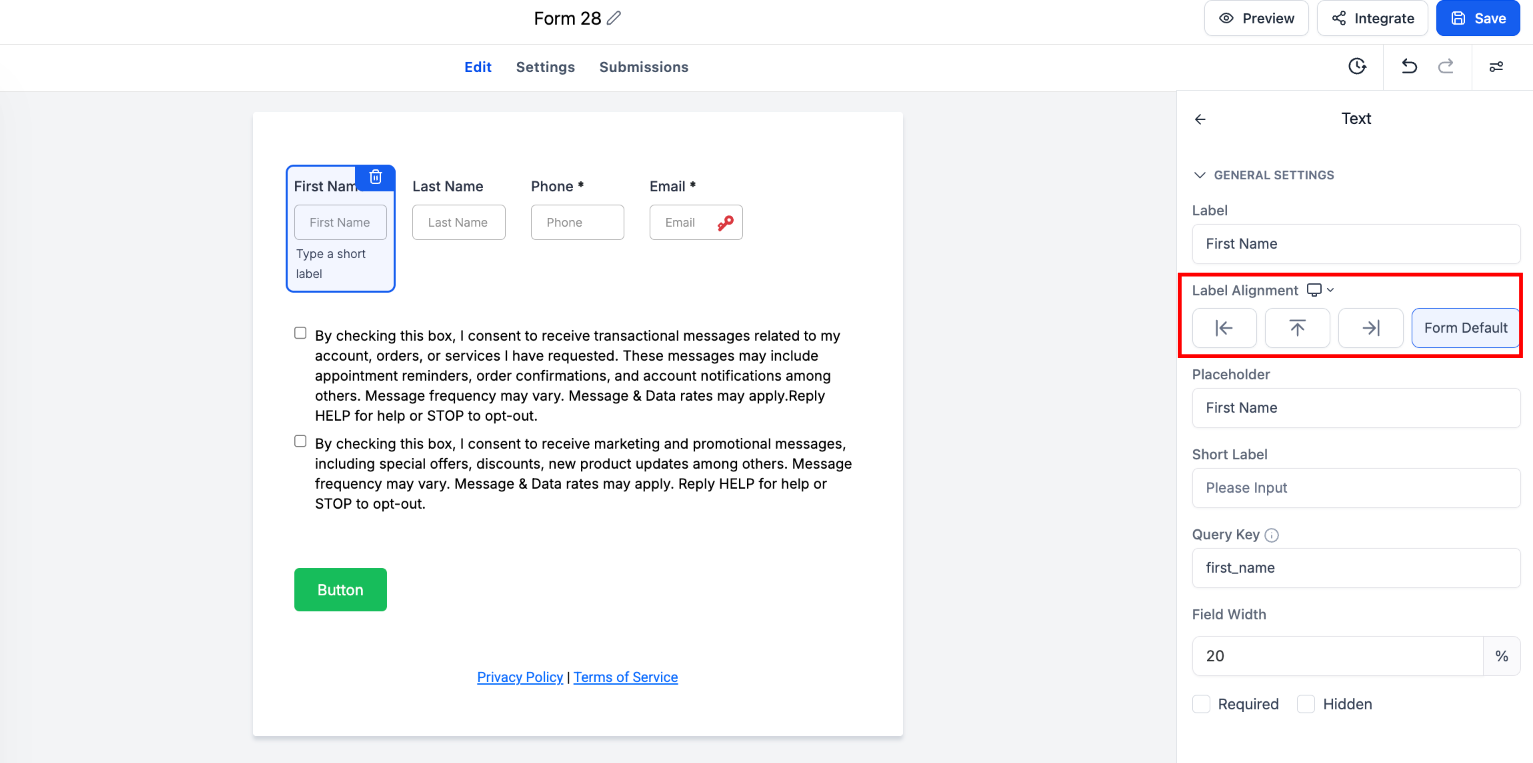
Element-Level Label Alignment for Forms
Element-Level Label Alignment allows users to set label positioning individually for each field in a form. It gives more precise layout control without relying solely on a global form setting. To apply, select a field within a Single Column layout, choose the desired label alignment: Left, Right, Top, or Form Default, and save the changes.
Pro Tips
- Consistency: Maintain consistency in your form design by using uniform fonts, colors, and element sizes.
- Accessibility: Ensure your forms are accessible to all users by following web accessibility guidelines.
- Testing: Regularly test your forms to ensure they work correctly across different devices and browsers.
FAQs
How can I customize the appearance of my form?
You can adjust the layout, field spacing, and field width using the options in the right panel. You can also upload custom header and background images for a more visually appealing design.
How do I adjust the form layout?
You can choose from a Single Column, Two-Column, or Answer: Single Line layout. Simply select the layout option from the right panel and adjust the settings according to your needs.
How can I add my logo and branding to the form?
You can upload your agency's logo and customize the colors and styles of the form to match your branding, ensuring consistency across your forms and surveys.
Will changes to form layout affect existing forms?
No, the layout settings for multiple columns or fields will only apply to new forms. Existing forms will not be affected by these changes.
Can I add custom header and background images to my form?
Yes. Upload a header image to span the top of the form or a background image to cover the entire form page, enhancing visual appeal.
Can I change the position of labels for individual fields?
Yes, you can use the Element-Level Label Alignment feature. When using a Single Column layout, you can select a specific field and choose to align its label to the Left, Right, Top, or use the Form Default.
Can I use Custom CSS if the built-in styling options aren't enough?
Absolutely. For advanced users, there is a Custom CSS box located under the "Styles" tab. This allows you to add specific code to change things like hover effects, custom shadows, or advanced animations that aren't available in the standard menus.