How To Set Up Payment Plans In Funnels
This article will teach you how to create products with a payment plan. This will allow you to charge your customer a specific number of payments for your product or service.
What you will need:
- Make sure your payment gateway is integrated (Stripe, PayPal, NMI, or Authorize Net)
- An order form
Note: Custom Authorization only works with recurring products.
Note: The payment plans can only be used in order form products.
Step 1: Set up your product
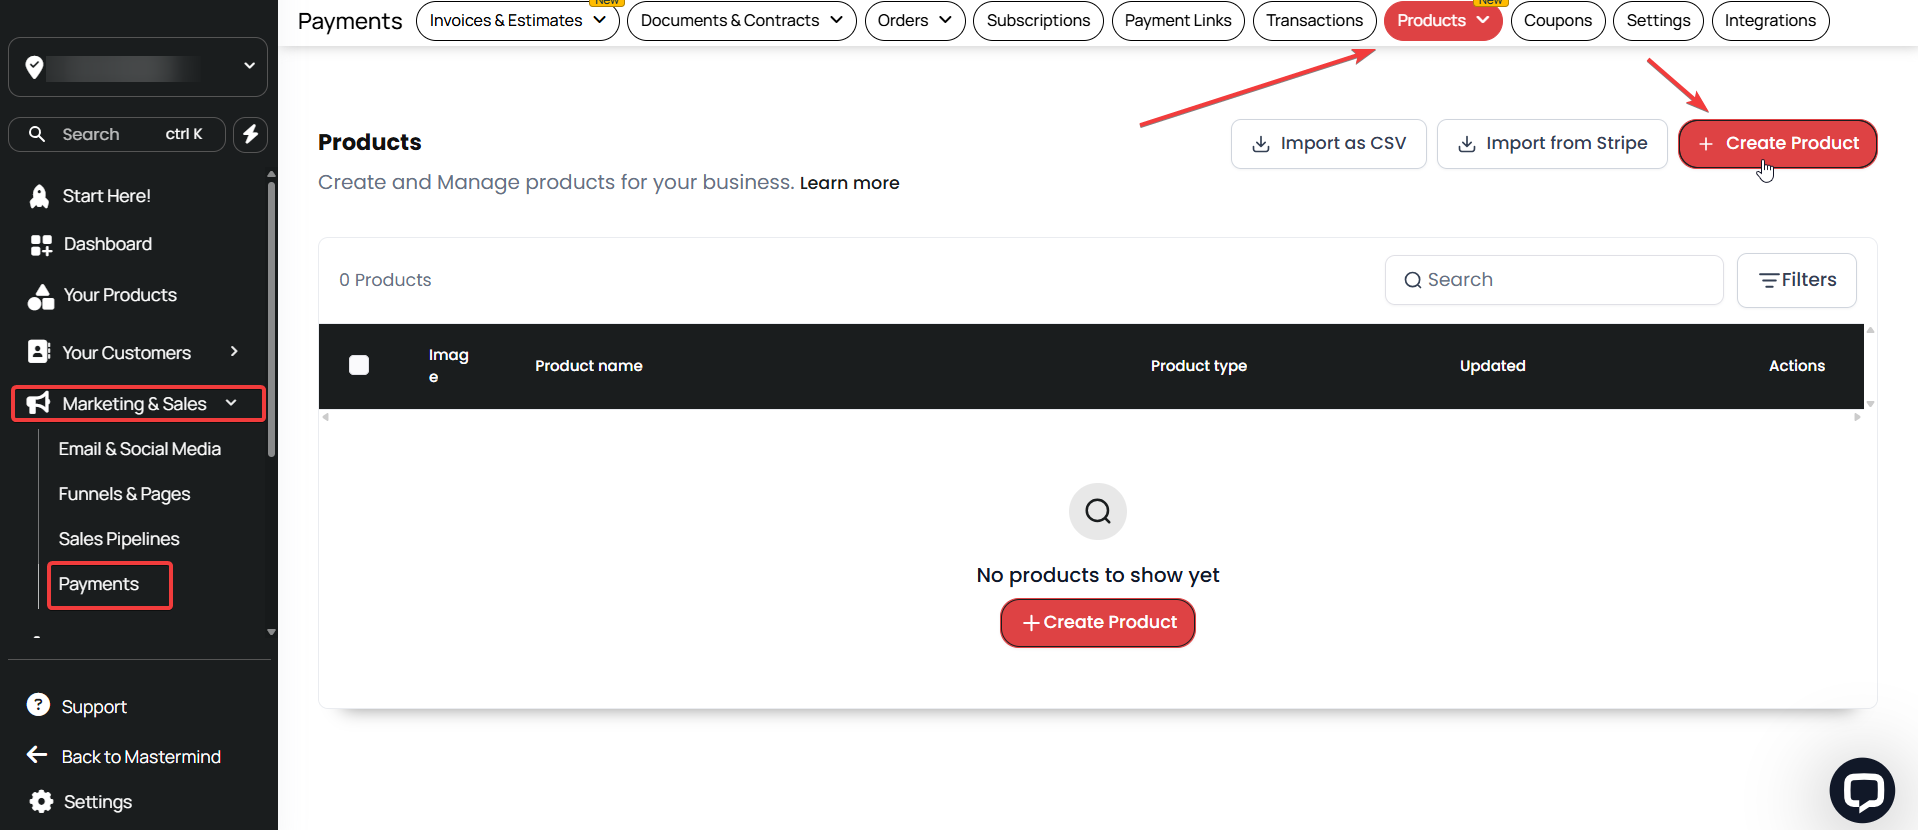
- Navigate to "Marketing & Sales" > "Payments" > "Products" > "+ Create Product"

- Fill out the first details (product title, description, image)
- Toggle On/Off Product Label (eg, Sale) and select its Visibility Duration
- Select Product Collection (if applicable), and fill out tax details.
- Click on Additional Options if you want to set up the Statement Descriptor
- The pricing area has a section where you will add the pricing, type, amount, compare-at-price, and billing period.
- Set a price and select "Recurring" on the product type.
- Choose a billing period (Ex. every 30 days, monthly).
- Add a setup fee (if applicable)
- Track Inventory. (See our article “Setting Up Product Inventory”)
- Here, you can add a price description if there is a trial period, the number of payments, and the setup fee.
Note: If you will add a trial period, it will count as one payment.
- You can also toggle the option "Membership Offer" if this product belongs to a membership offer and filter by the name of the offer.
- Click on Create
In the example above, customers will have a 7-day trial period and pay $50 for 4 months. This will give the customer access to the Membership Offer. Their access will be revoked once the 7-day trial and 4 months have passed. Remember that the trial period counts as 1 payment, so there are 5 payments (1 for the trial period + 4 for the monthly fees).
- A "compare-at price" shows the original price of a product next to a new, lower price. It helps people see how much they are saving with the discount. So if a toy used to cost $20 and is now $15, the $20 is the compare-at price.
- If you have product variants, then you may use this field.
- Set up your search engine listing.
For more information on Variants and Search Engine Listings (See our article “Setting Up Product Inventory”)
Offering Zero-Priced Products
Business users can set product prices to zero, providing flexibility for offering free products, whether as one-time purchases or subscriptions. This allows users to attract more customers, create free trials, or promote special offers. Zero-priced products can be added, sold, or imported through various channels like forms, funnels, or an online store.
Note: Zero-priced products can still be managed and tracked like any other.
Step 2: Set up the product in the funnel
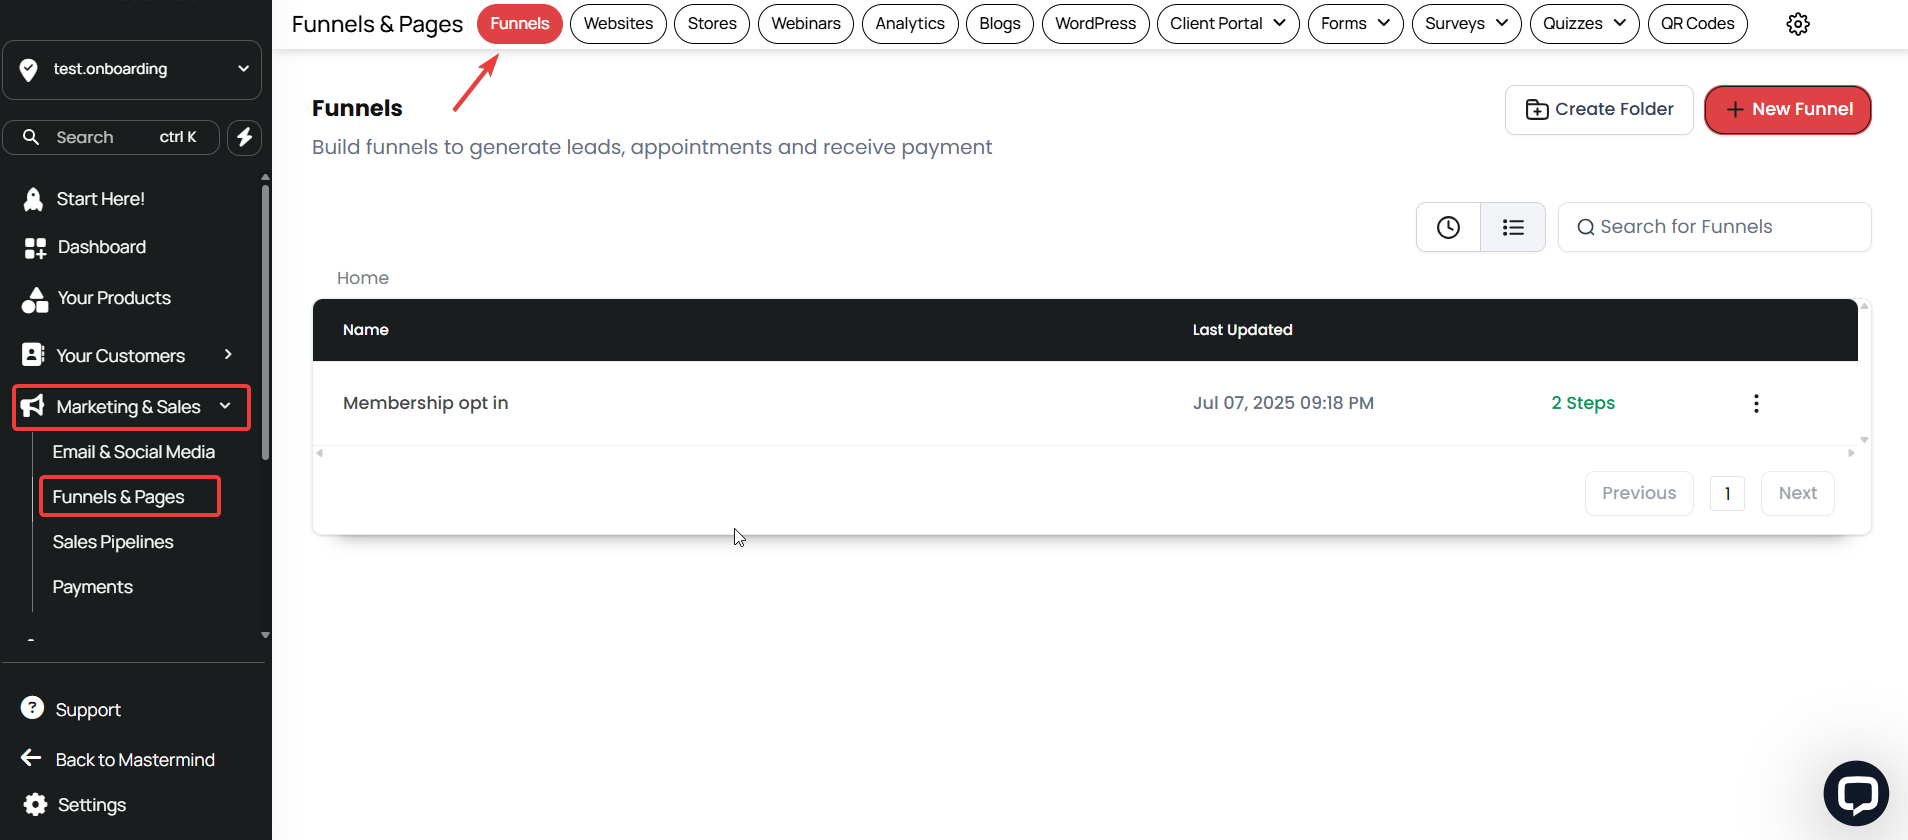
- Navigate to “Marketing & Sales” Tab > “Funnels and Pages” > "Funnels"

- Select the desired funnel and click on the step where you have the order form.
- Choose "Products."
- Click edit if you have an existing product or add a product
- Fill out the details you need.
- Click on Save.
Pro Tips
- Trial Period Consideration: When adding a trial period, remember it counts as one of the payments. Make sure to account for this when setting the total number of payments and communicating this clearly to customers.
- Custom Labels: Use the Product Label feature to highlight special promotions or sales, such as “Limited Time Offer,” which can attract more attention and increase conversions.
- Product Visibility: Adjust the visibility duration of your product labels to align with your marketing campaigns. This ensures your discounts and special offers are seen at the optimal time.
- Setup Fee Transparency: Clearly communicate any setup fees or trial periods in your product description to avoid surprises for customers and reduce cart abandonment.
FAQ
1. Can I use payment plans with all types of products?
No, payment plans can only be used with orders from products.
2. How does the trial period affect the payment plan?
The trial period counts as one payment. For example, if you offer a 7-day trial and 4 monthly payments, the trial is included in the total of 5 payments.
3. What should I do if I have product variants?
If your product has variants, make sure to fill out the variant-specific pricing details and use the appropriate fields for each variant.
4. How do I integrate a payment gateway for recurring products?
Ensure your payment gateway (such as Stripe, PayPal, NMI, or Authorize Net) is integrated and configured correctly in the Payments settings to handle recurring charges.
5. How do I track inventory for products with payment plans?
Enable inventory tracking in the product setup section. Each sale via the payment plan will deduct from your available stock like any other order.
6. Can I offer a payment plan on a standard "One-Step" or "Two-Step" order form?
Yes. Payment plans are specifically designed for Order Forms within your funnels or websites. Once the product is created, you simply go to the "Products" tab of your funnel step and attach it to the page. It will then appear as an option for the customer.
