Integrating with Google and Google Calendars
Connecting your Google Calendar helps you sync your bookings from Google Calendar to the system and vice versa. This ensures correct availability, prevents double bookings, and facilitates seamless scheduling and booking management.
Prerequisites
- Check if the writer's access is required:
- Writer's access to the calendar is necessary to add events created in the system to your Google Calendar.
For more information, check our article “What To Do If you Get the Google Calendar Writer Access Error”
- Read-only access will suffice if you simply want to fetch all your events from your Google Calendar into the system.
How to Integrate Your Google Account
-
Go to Settings > Integrations within Mastermind.
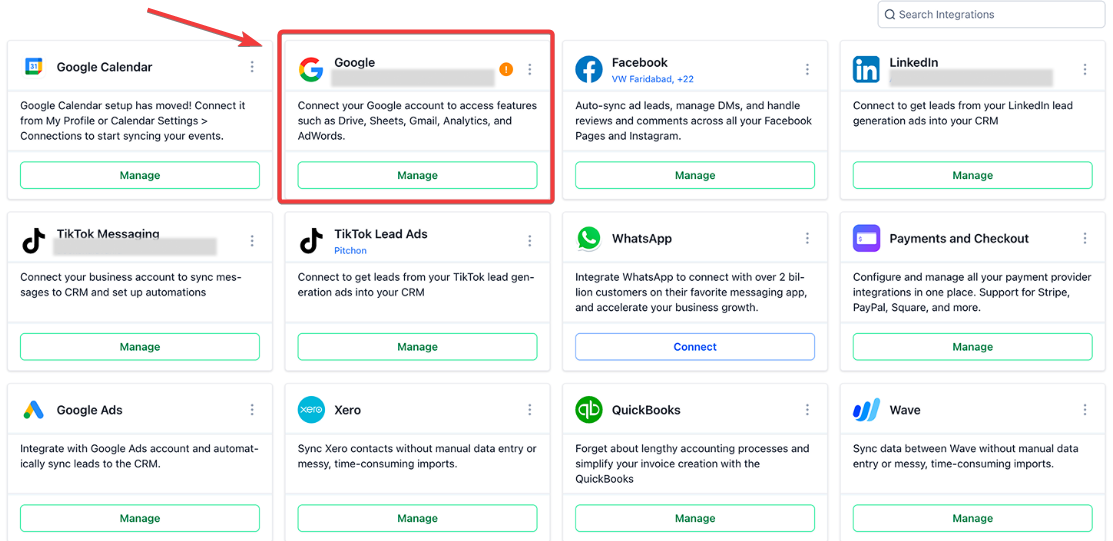
- Click “Sign in with Google” Under the Google Icon


- Follow the prompts to link your Google Account with Mastermind.
- Once integrated, you can access various Google services within Mastermind.
- You can add multiple Google accounts by clicking on 'Sign in with Google' on the integrations page.
- To disconnect an account, click the 'Connected' button and confirm deletion.\


Calendar Configuration
With Google Descope, you can connect your Google Calendar directly through the Calendar Connections tab, eliminating the need to integrate your Google account in the integrations section.

Note: To generate Google Meet links for each appointment, ensure that a Google Calendar is set as the linked calendar. If no Google Calendar is linked, Google Meet links will not be generated.
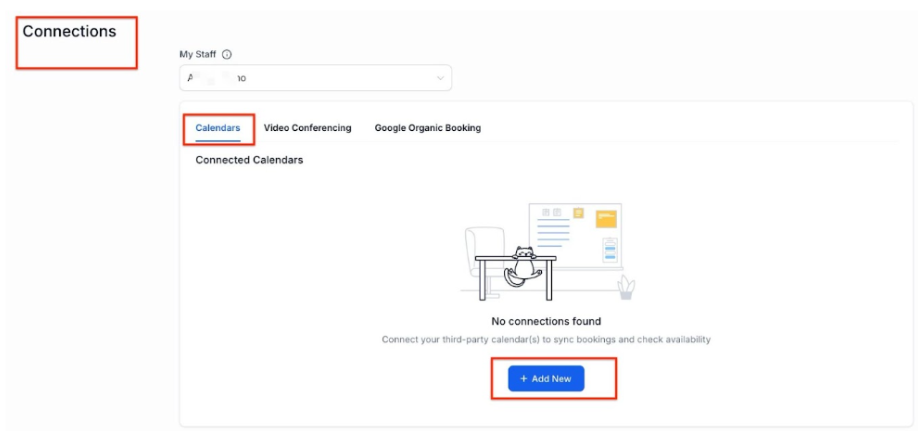
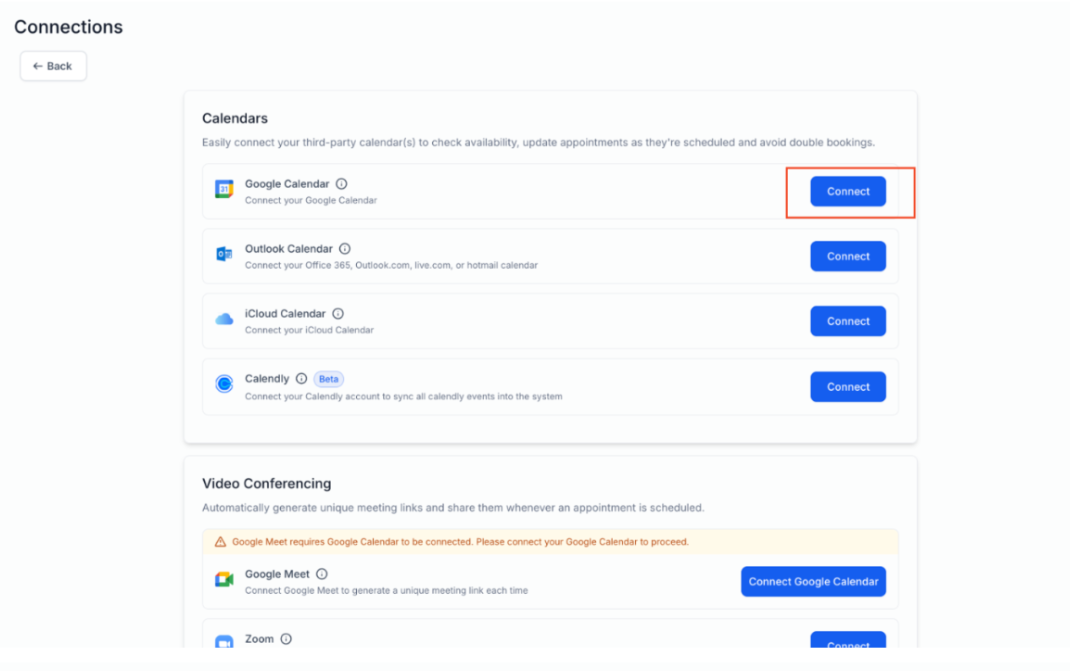
To proceed, navigate to Calendars > Calendar Settings > Connections.Step 1: Connect your Google Calendar
With Google Descope, you can connect your Google Calendar directly through the Calendar Connections tab, eliminating the need to integrate your Google account in the integrations section. Once connected, Google Meet is automatically enabled. To generate Google Meet links for each appointment, ensure that a Google Calendar is set as the linked calendar. If no Google Calendar is linked, Google Meet links will not be generated.
How to Use?
You can integrate your calendar from two locations:
- Settings > My Profile > Calendar Settings
- Calendars > Calendar Settings > Connections Tab
Step 2: Sync in User Calendar Configuration:
Syncing the Calendar with the User:
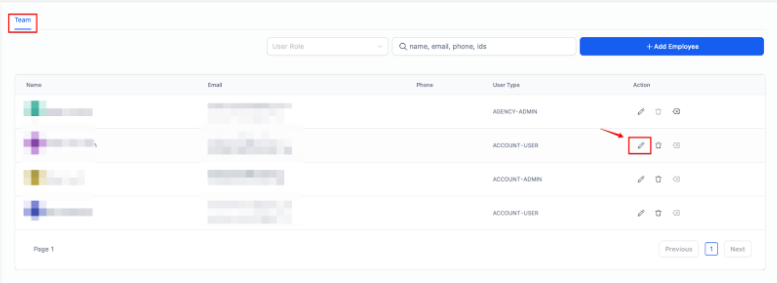
- Go to Settings > My Staff, and find and select the user to whom you want this calendar linked. It could be you or any of your team members.
- Click on the pencil icon to open the edit window, and scroll down to find Calendar Configuration.

- Select and Sync Calendar: Choose the calendar you will use (e.g., your Gmail calendar). Ensure it is properly synced. Verify that the calendar settings allow contact creation and automation triggers.
- Save Your Settings: Confirm and save your calendar settings. This step ensures your calendar is linked and ready for Google Meet Integration.
Step 3: Setting up Google Calendar in Calendar Settings:
Once your Google account is successfully connected, you need to complete your calendar configuration by selecting your linked calendar and conflict calendar.
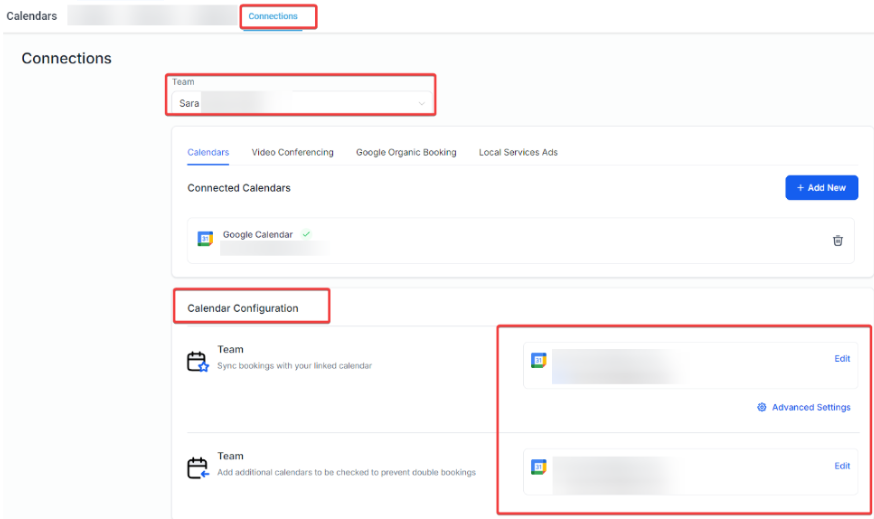
Head to Calendars > Calendar Settings > Connections.
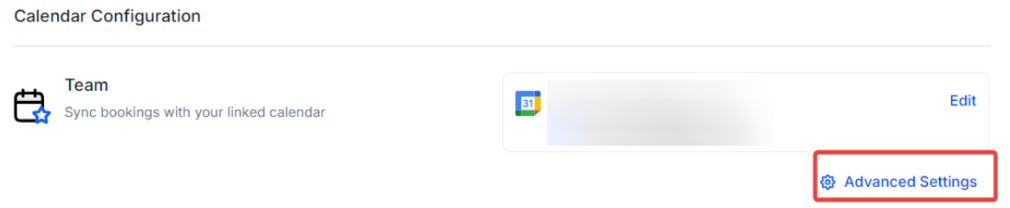
Calendar Configurations
Calendar configuration involves two settings: Linked Calendar & Conflict Calendar. Make sure to select a particular team member.
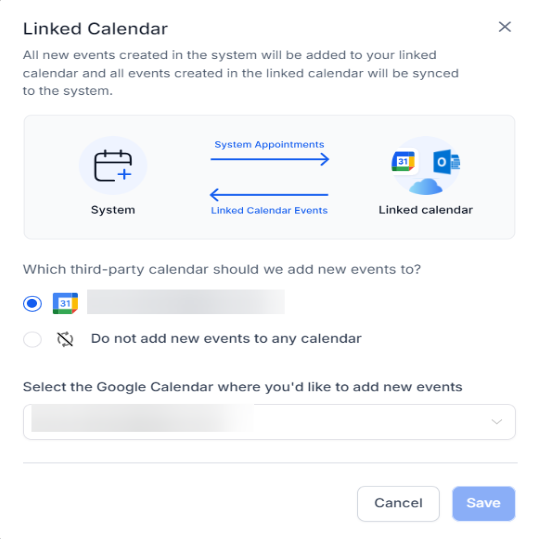
Linked Calendar:
All new events created in the system will be added to your linked calendar. For example, any new event created in the system will sync to your linked calendar, allowing you to view it directly on this third-party calendar (e.g., Google).
Note:
- Writer's access is required for the user to select a calendar as a linked calendar.
- By default, the linked calendar is added to the conflict calendar. This means any event created on the third-party linked calendar will be fetched in the system and pushed to the third-party linked calendar.
- You can set your Sync Preferences from the Advanced Settings.
- Conflict Calendar:
- Purpose: Events from third-party calendars designated as conflict calendars are synced to the system, marking your availability as occupied for the duration of the event.
- Behavior:
- Only events marked as 'BUSY' in the third-party calendar will block your availability. Events marked as 'FREE' will be fetched by the system without affecting your availability.
-
You can add multiple calendars to ensure thorough checking and prevent double bookings.
Step 4: Create a Calendar within Mastermind and connect it to Google Meet
Note: This option is currently unavailable for Class Booking and Simple/Event Calendars.
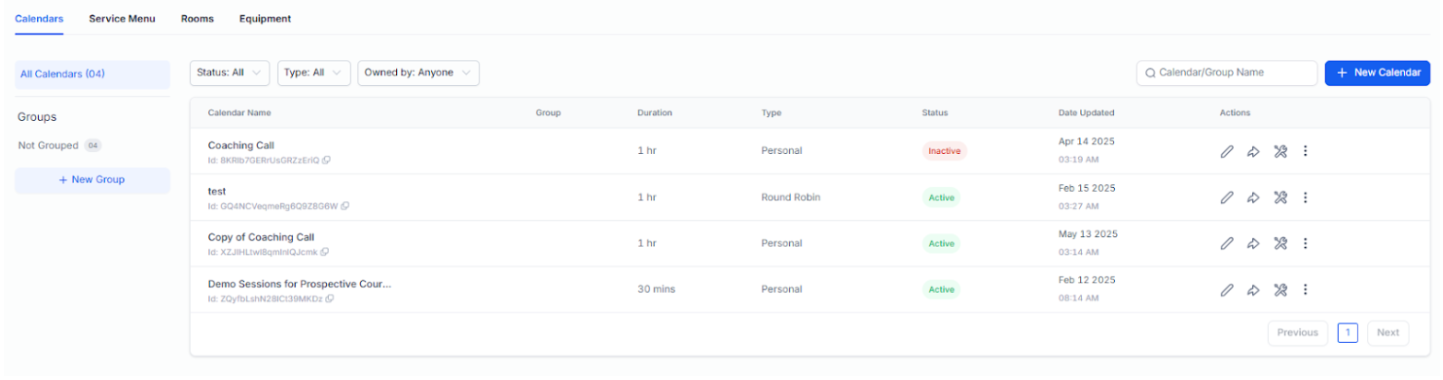
- Navigate to Calendar > Calendar Settings, within Calendars > Create or edit the Calendar.

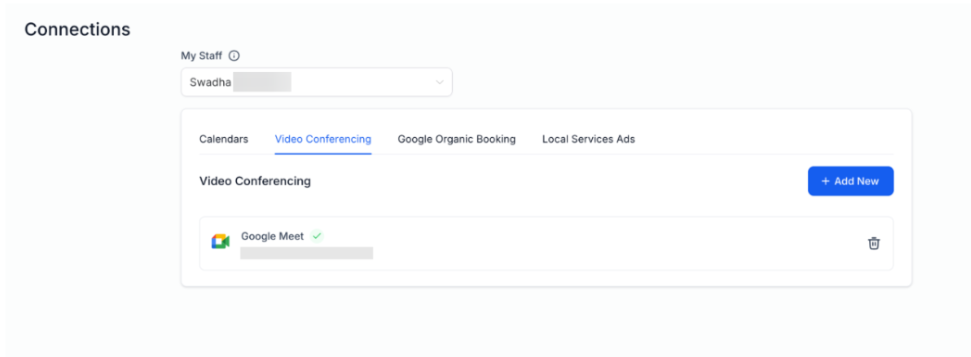
- In Meeting Details, scroll down to select the team member and choose Google Meet as the meeting location.
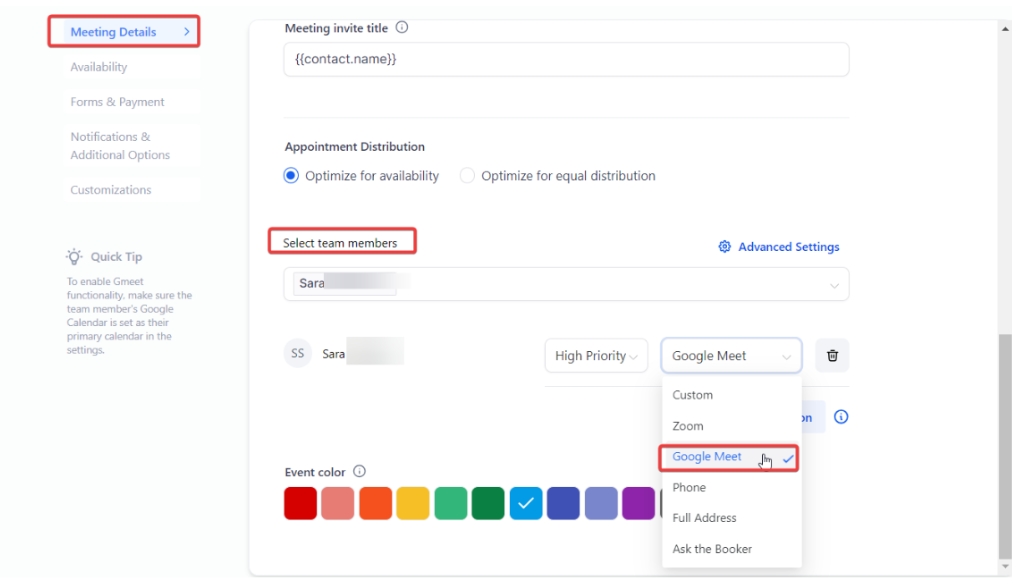
- Save the changes.
Test the Integration
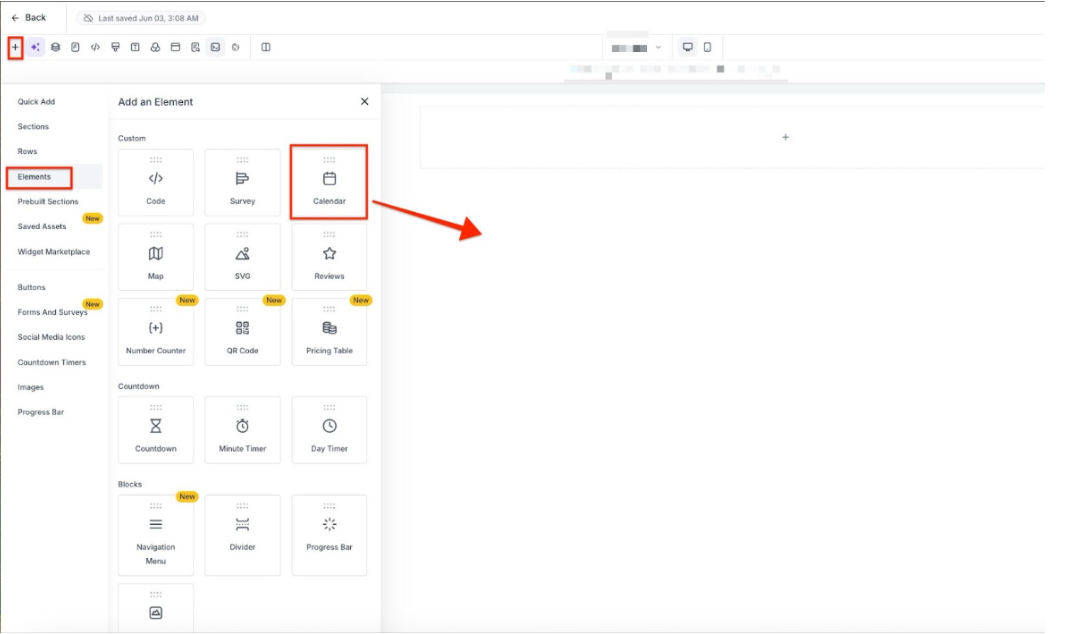
Let’s go ahead and test whether Google Meet has been properly integrated. For this example, we will add the calendar to our Funnel in Marketing & Sales > Funnels & Pages
1- Add a Calendar Element: If needed, add a calendar element to your scheduling page using a drag-and-drop interface.
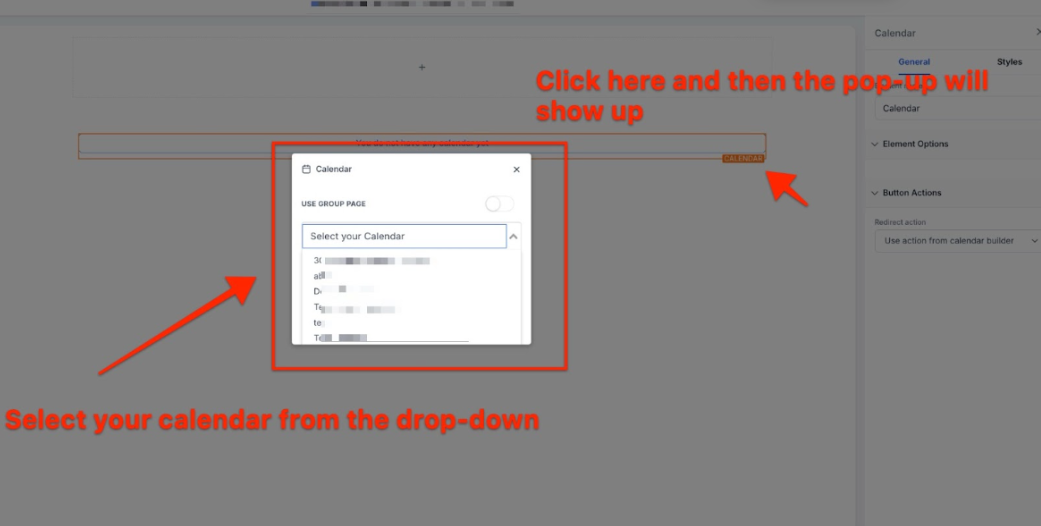
2- Choose the Calendar: After adding the calendar element, select the required calendar from the pop-up. After you are done editing, remember to save the changes.

- Click the Eye icon on the top right to preview and test your calendar
- Fill in the details in the specified window and click the “Schedule Meeting” button to test it.
- This should be what your client sees when they have scheduled the meeting with you.

Pro Tips
- Verify Access Levels: Ensure you have the appropriate access level for the calendar you want to connect. Writer's access is required to sync events to your linked calendar, while read-only access is sufficient for fetching events.
- Manage Sync Preferences: Adjust your Sync Preferences in the Advanced Settings to choose between one-way or two-way sync based on your needs. Two-way sync offers more comprehensive integration, including contact creation and workflow automation.
- Monitor Conflict Calendars: Regularly review your conflict calendars to ensure they are accurately reflecting your availability. Adding multiple calendars can help prevent double bookings by providing a more complete view of your schedule.
- Use Smart Sync Wisely: When using Smart Sync, be aware of how it handles new contacts. It blocks time slots if contacts are not found in the system but does not create new contacts or trigger workflows.
- Enable Google Meet: To streamline virtual meetings, set Google Meet as your preferred meeting location in User Availability settings. This ensures that every appointment scheduled will automatically include a Google Meet link.
FAQs
Question: What is the difference between one-way and two-way sync?
Answer: One-way sync updates your linked calendar with events from the system but does not create contacts or trigger workflows. Two-way sync synchronizes events in both directions, creates contacts and allows workflows to be triggered.
Question: How can I configure conflict calendars?
Answer: Go to Calendars > Calendar Settings > Connections, and select the calendars you want to use as conflict calendars. These calendars will be checked to block your availability for events marked as 'BUSY'.
Question: What does Smart Sync do?
Answer: Smart Sync blocks time slots for events in Google Calendar but only creates contacts and triggers workflows if the event’s associated contacts are already in the system.
Question: How can I ensure Google Meet links are included in my appointments?
Answer: Set Google Meet as the preferred meeting location in your User Availability settings. Navigate to Settings > Profile, choose Google Meet from the dropdown menu, and click 'Update Availability'.
Question: How do I connect my Google Calendar?
Answer: To connect your Google Calendar, navigate to either "Settings > My Profile > Calendar Settings" or "Calendars > Calendar Settings > Connections Tab." Once connected, Google Meet will be automatically enabled, and Google Meet links will be generated for your appointments, as long as a Google Calendar is linked.
Question: What happens if I don’t link a Google Calendar?
Answer: If no Google Calendar is linked, Google Meet links will not be generated for your appointments. Make sure to link a Google Calendar to enable automatic Google Meet link creation for your events.
How can I prevent double bookings?
Answer:
- Ensure your conflict calendars are correctly set up.
- Add multiple calendars if necessary to block overlapping time slots.
Question: When will an event on my conflict calendar actually block my availability?
Answer: Availability is only blocked if the event is marked as 'BUSY' in the third-party calendar. If an event is marked as 'FREE', the system will still fetch the event, but your availability will remain open for bookings.