Guide to Using Proposals and Estimates
In this article, you will learn how the Documents and Contracts feature works.
Step 1: Create your Documents or Contracts
- Click on the Payments tab
- Then, on the Documents & Contracts tab
- Click on New to add one and select if it's a Documents or a Contracts

Step 2: Editing your Document/Contract
- Add the needed elements you need, to customize your document/contract
- You will need to click on the “+” button to add the elements
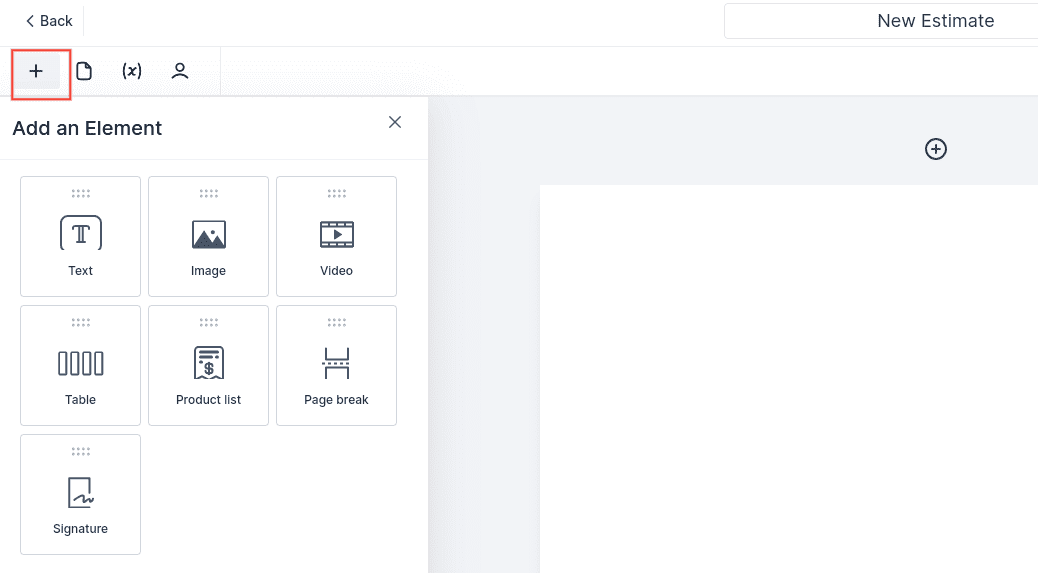
- To add an element, you need to click and drag the element to the position where you want it to be
- This is the list of elements you can use
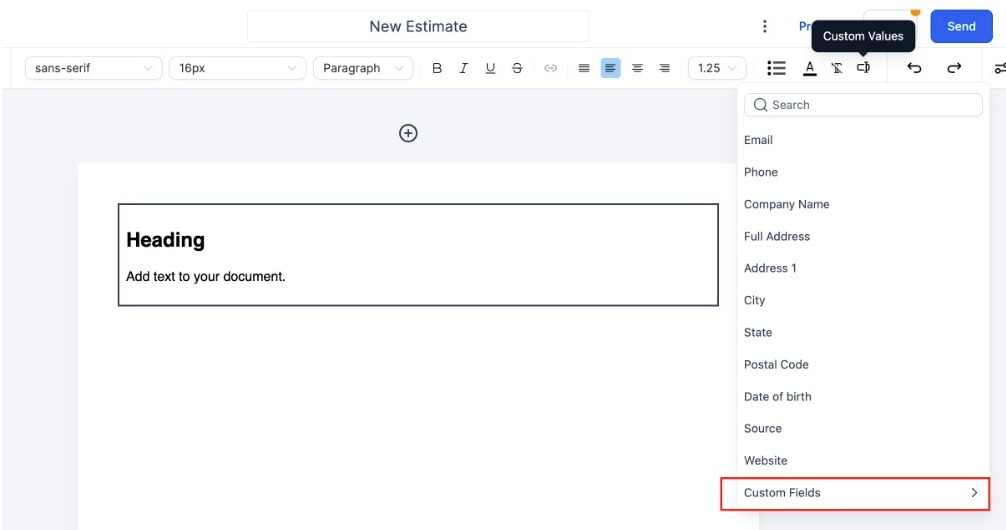
- Text: Edit the font, size, and style of your text. You can add custom fields to personalize your text more, and you can even use your build custom fields. This would allow businesses to auto-populate additional data stored as custom fields for contacts while sending a document/contract. The populated value will be visible on the preview link along with the download.
- Image: You can add the image URL or use one from the media library, edit the alignment, put it in color or black and white, add a color background, edit height, and width
- Video: You can add the video URL, add a background color, edit height, and width, and edit margins
- Table: You can add rows and columns, delete them, merge cells, split cells, toggle header, add color background to the border
- Product List: You can select from the products you have created already and also select the price. You can add more than one product if needed.
- Page Break: A page break is a marker in an electronic document that tells the document interpreter that the content that follows is part of a new page
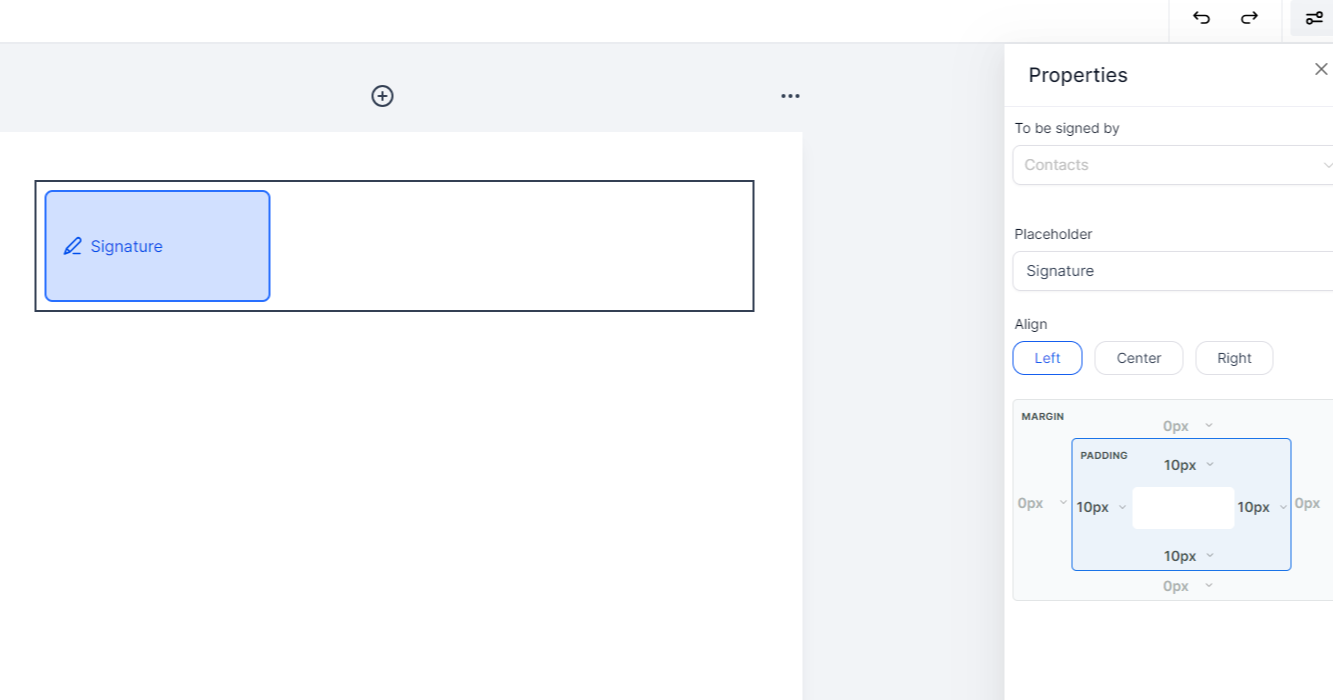
- Signature: You can select who needs to sign the document, edit the placeholder, and align and edit margins.
- Signer Designation: Specify who needs to sign the document.
- Signature Placement: Identify and mark the area intended for the signature.
- Signature Execution: Recipients can electronically sign, using drawn or typed methods. They can also customize the color or script style of their signature.
Note: Customers can accept and sign contracts on mobile browsers. This includes the support for signing documents on mobile, marking them as finished, and being able to download a PDF of the signed document
Step 3: Add your Document Variables. These placeholders can be placed within a document and replaced with actual values when the document is executed. They offer dynamic content control and are crucial for templating and automation. It's used to standardize information across multiple documents or instances.
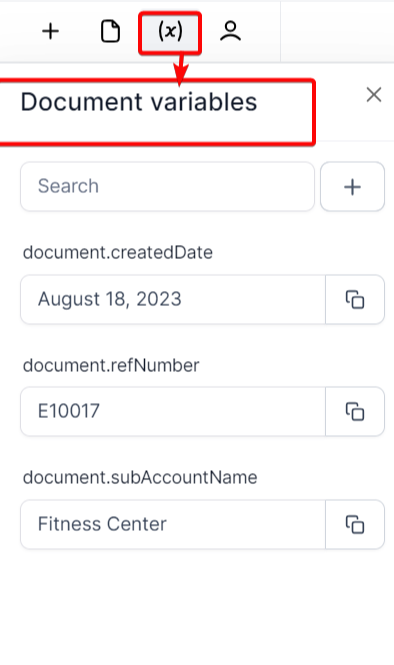
- You can search for an existing Variable or create a new one with the + button:

Note: To learn more about the Document Variables, please, check the article called, “Utilizing Document Variables in the Document Builder”.
Step 4: Add your recipients to your Documents/Contracts.
- Click on the recipient icon and add the contact's email address who will receive this. You can add more than one contact to receive the document.

- The first email will always be the primary contact and the one who needs to sign this. The other contacts you add will be CC’d in the email.
Step 5: Add a background
You can upload a background image for a page using Page Properties. This will allow your businesses to define a customized background for their documents/contracts and lay over any element on top of it
- Click on the 3 dots next to the page

- Click on page properties
- You can: add your image from the media library or a URL, define the image position (center/top/left), and size (Fill page/Fit to size), repeat (horizontally or vertically), and set an opacity percentage to the uploaded images
Step 6: Send
- You have the option to send via email or with a link.

If you select the link option, you will see a link for each recipient. You need to make sure you select the proper link with the lead.

Documents/Contracts Status
Once created, your document will have a state, depending on its status.
- Draft: The document/contract is being formulated.
- Waiting for Others: Awaiting recipient's acknowledgment.
- Completed: Completed, with no further modifications allowed.

Actions for a Document
These actions are typical functionalities that allow users to manage and control their documents/contracts.
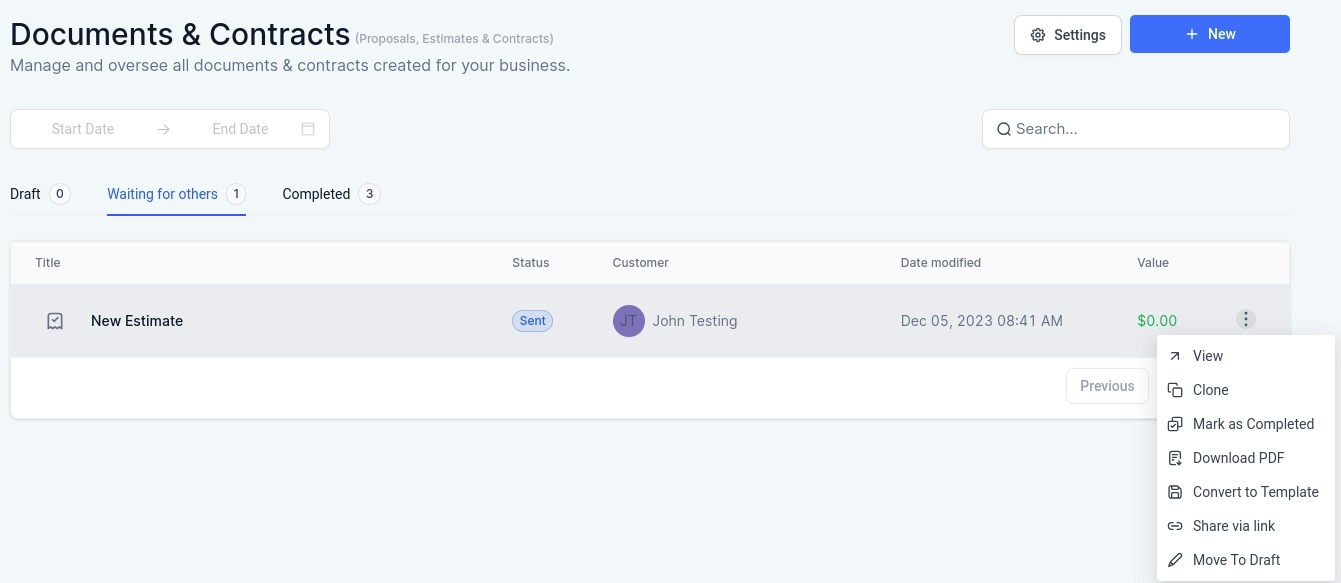
- View: click on this to open this document or contract
- Clone: Click here to clone this document or contract, edit it as needed, and send it to your lead
- Delete: This deletes this document/contract (only available on Draft status)
- Mark as Completed: This will put this on the completed status (available on Draft and on Waiting for Others status)
- Download PDF: Downloads the document in a PDF format
- Convert to Template: Click here to convert that document/contract to a template and be able to use it later
- Share via Link: Click here to get the link to share it with the recipient in the document (only available on the status Waiting for Others)
- Move to Draft: Move the document/contract to the Draft status to continue editing
- View Invoice: Businesses would be able to have an invoice created automatically after the potential lead accepts/signs the document/contract (only available on the Completed status)