Settings: Custom Values
Custom values are placeholders for storing and managing specific information in a system. They help organize and retrieve data efficiently. In the context of Mastermind, they store personalized details like contact info and preferences, allowing businesses to customize and personalize communications to better engage with customers.
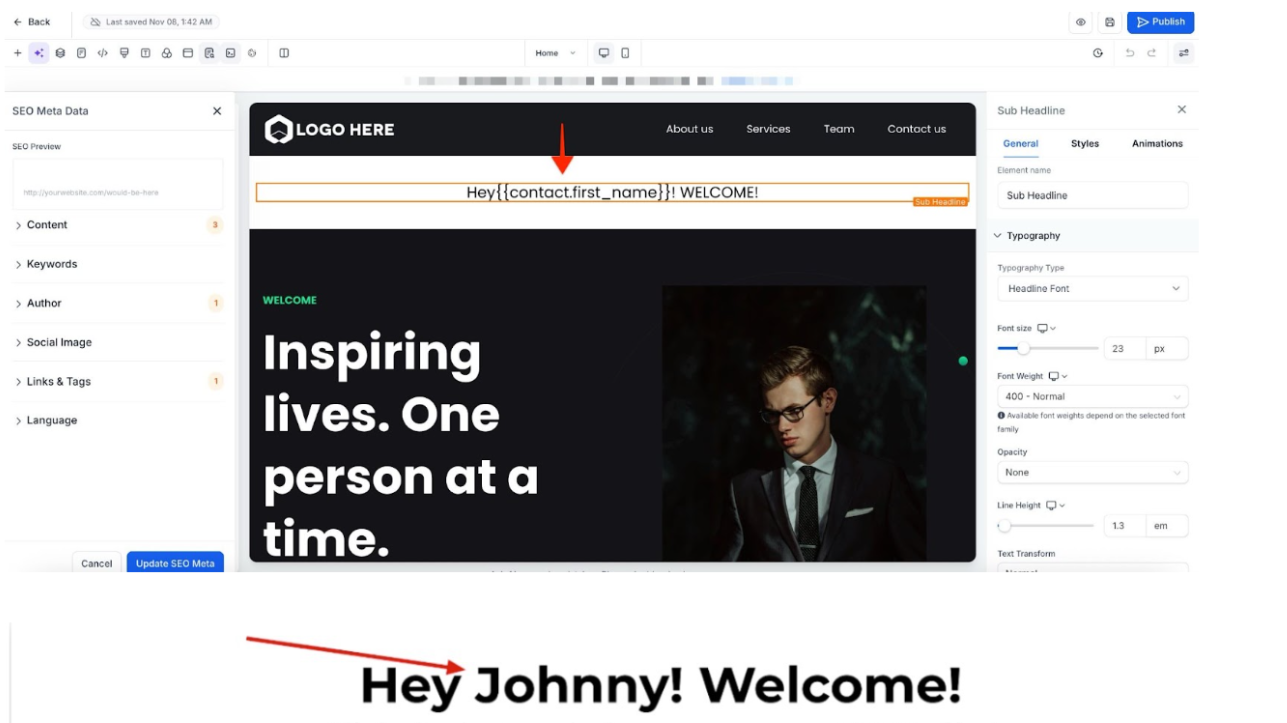
For example, an email template can say "Hey {{ contact.name }}" and Mastermind will auto-populate the name of the contact so you can send a personal email to a group of contacts or through an ongoing campaign that leads are consistently being added to.
Here are some common examples of custom values you may use in Mastermind:
- Contact > Full name: {{ contact.name }}
- Contact > First name: {{ contact.first_name }}
- Contact > Last name: {{ contact.last_name }}
- Contact > Email: {{ contact.email }}
- Contact > Phone: {{ contact.phone }}
- Contact > Company name: {{ contact.company_name }}
For a list of included custom values, check our article “List of Custom Values.” Remember, you can always create your custom values and add them to this list!
Step 1: Creating Custom Values
- You can create your custom values by navigating to Settings > Custom Values.
- Click +Add Custom Value to create a new one.
- You can click the trashcan icon to delete an existing one or the pencil icon to edit.

- These will be pre-set custom values with a defined value.
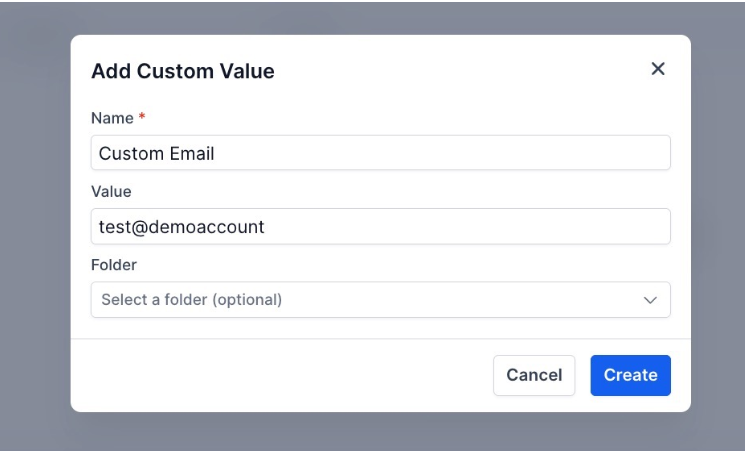
(In the example above, the "Custom Email" will always populate test@demoaccount, so you won't have to type it out every time.)
Step 2: Using Custom Values
Conversations /Inbox:
- Purpose: Utilize custom values while messaging prospects and customers through various communication channels such as SMS, email, and social media.
- Steps:
- Navigate to the Inbox section in your Mastermind sub-account.
- While composing messages, insert custom values where relevant to personalize the communication.

To learn more about the Inbox section in your Mastermind sub-account, check out our article “Conversations Overview”
Automations (Workflows)
- Purpose: Integrate custom values to personalize workflows, notifications, and messaging within your automation processes.
- Steps:
- Go to the Workflows section of your account.
- Custom values are added to different workflow components to tailor the automation based on the stored data.

Note: Please make sure to use custom values associated with the triggers in your workflows, otherwise, the values won't be populated. If you are using Membership-related custom values, be sure to include at least one Membership-related trigger in your workflow.

To learn more about Workflows, in the Automation section of your Mastermind sub-account, check out our article “How to Create and Use Workflows”
Websites & Funnels
- Purpose: Embed custom values into your website and funnel pages for a personalized visitor experience.
- Steps:
- Access the Funnels & Pages section of your sub-account.
- Insert custom values into website and funnel pages where data from forms or appointments is used.
- Utilize Trigger Links to include custom value data in the URL.
To learn more about Workflows, in the Automation section of your Mastermind sub-account, check out our article “How to Create and Use Workflows”
Websites & Funnels
- Purpose: Embed custom values into your website and funnel pages for a personalized visitor experience.
-
Steps:
- Access the Funnels & Pages section of your sub-account.
- Insert custom values into website and funnel pages where data from forms or appointments is used.
- Utilize Trigger Links to include custom value data in the URL.

To learn more about the Funnels & Pages section in your Mastermind sub-account, check out our articles on the Site Builder.
Email Campaigns & Templates
- Purpose: Enhance email personalization by incorporating custom values into various elements of your email campaigns.
- Steps:
- Navigate to the Email Campaigns section.
- Add custom values to email copy, subject lines, descriptions, and sender details to personalize each message.


To learn more about Email Campaigns and Templates in the Marketing section of your Mastermind sub-account, check out our article “How To Use the Email Builder”
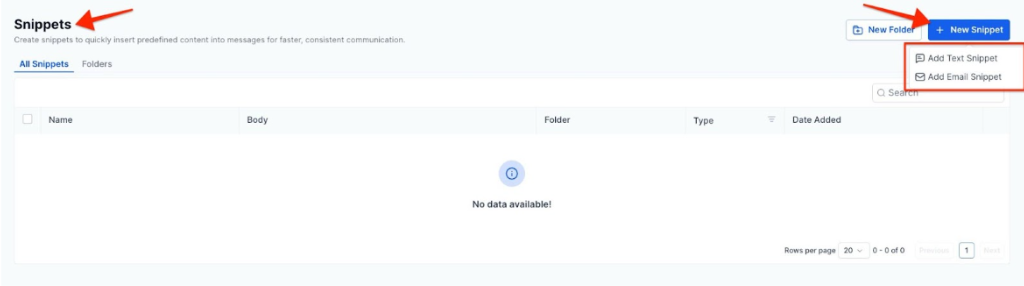
SMS Templates (Snippets)
- Purpose: Enable dynamic personalization by inserting specific details like names or order numbers into each message. This enhances engagement and relevance while automating repetitive content for efficiency and accuracy.
- Steps:
- Go to the Marketing section > Templates (Snippets) and click on +Add Template (Snippet)

Social Planner
- Purpose: Use custom values to streamline and personalize social media posts.
- Steps:
- Go to the Social Planner section.
- Insert custom values into social media posts to automatically customize content based on the data provided.

To learn more about the Social Planner in the Marketing section of your Mastermind sub-account, check out our articles on the Social Planner.
Pro Tips
- Consistency is Key: Ensure that custom values are consistently used across all platforms for a seamless user experience.
- Data Accuracy: Regularly update and verify your custom values to maintain accuracy and relevance in communications.
- Testing: Test custom values in different scenarios to ensure they populate correctly and enhance personalization effectively.
FAQ
Question: What are custom values?
Answer: Custom values are placeholders used to store and manage specific information, allowing for personalized interactions and content.
Question: How do I access custom values in the Conversations section?
Answer: Navigate to the Conversations section in your sub-account and insert custom values directly into your messages.
Question: Can I use custom values in email templates?
Answer: Yes, you can add custom values to various parts of your email templates, including the subject line, body, and sender details.
Question: How do custom values improve my website and funnel pages?
Answer: Custom values allow you to personalize the website and funnel content based on data from forms or appointments, enhancing user engagement.
Question: Are there any specific requirements for using custom values in automation workflows?
Answer: Ensure that the custom values you use in workflows are accurately defined and relevant to the automation process to achieve effective personalization.
Question: Can I test custom values before sending a campaign or activating a workflow?
Answer: Yes, testing messages and workflows is recommended to confirm that custom values populate correctly before going live.
Question: Why are my custom values not populating correctly in my automation workflows?
Answer: Custom values will only populate if they are associated with the specific triggers used in your workflow. For example, if you are using Membership-related custom values, your workflow must include at least one Membership-related trigger to pull that data successfully.