How to Create and Use Workflows-101
The workflow builder is an advanced visual tool for creating seamless automation. It integrates triggers' and campaigns' functionality with additional features for a comprehensive automation setup.
Step 1: Access the Workflows List
- To begin, navigate to Tools & Reporting >Automations section in the main menu. This leads you to the Workflows tab, which displays drafted and published workflows.
- Use the "+ Create Workflow" button in the upper right to initiate a new workflow.
- For existing workflows, use the “⋮” menu for editing, deleting, or duplicating next to that workflow name.
- Navigate through your workflows with the Previous and Next buttons, which are especially useful when managing numerous workflows.
- Use the “Create Folder” button to add a new folder to manage your workflows efficiently.
- Use the Filters section to choose between drafted, published, and paused workflows.

Step 2: Create a Workflow and Navigate through the Builder
- Click the + Create Workflow button in the top right of the screen.
- Choose to start from scratch or use pre-designed recipes/templates.

- To enter the builder, click the + Create New Workflow button at the top right of the screen again.
- Within the Workflow Builder:
- Rename your workflow with the pencil icon.
- Switch between the Builder, Settings, Enrollment History, and Execution Logs tabs to customize your workflow (each tab's functionality will be detailed in separate guides).
- Add Triggers and Actions to build your workflow.
- Test your workflow with the "Test Workflow" button, save changes, and switch from Draft to Publish to activate it.
- Add your Trigger(s) and Action(s) to create your workflow. (More details on how to set these up are listed below)
- You can click the “Test Workflow” button at the top right. Save any changes, then toggle the Workflow from Draft to Publish mode to activate it.

Step 3: Setting Up Your Workflow Triggers
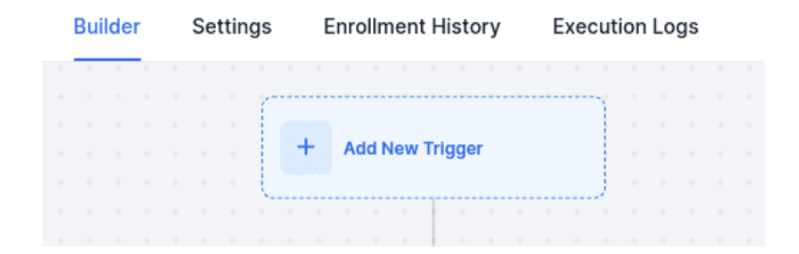
- Add a new trigger using the "Add New Workflow Trigger" option.
- Drag-and-Drop Entry: You can also intuitively add triggers by clicking and holding a trigger option in the sidebar and dragging it directly onto the canvas. As you move the item over the builder, valid placement markers will highlight to show you exactly where the trigger will land.
Note: Any element dragged onto the canvas must be configured and saved; if you exit the builder without saving, the newly placed trigger will not be retained.
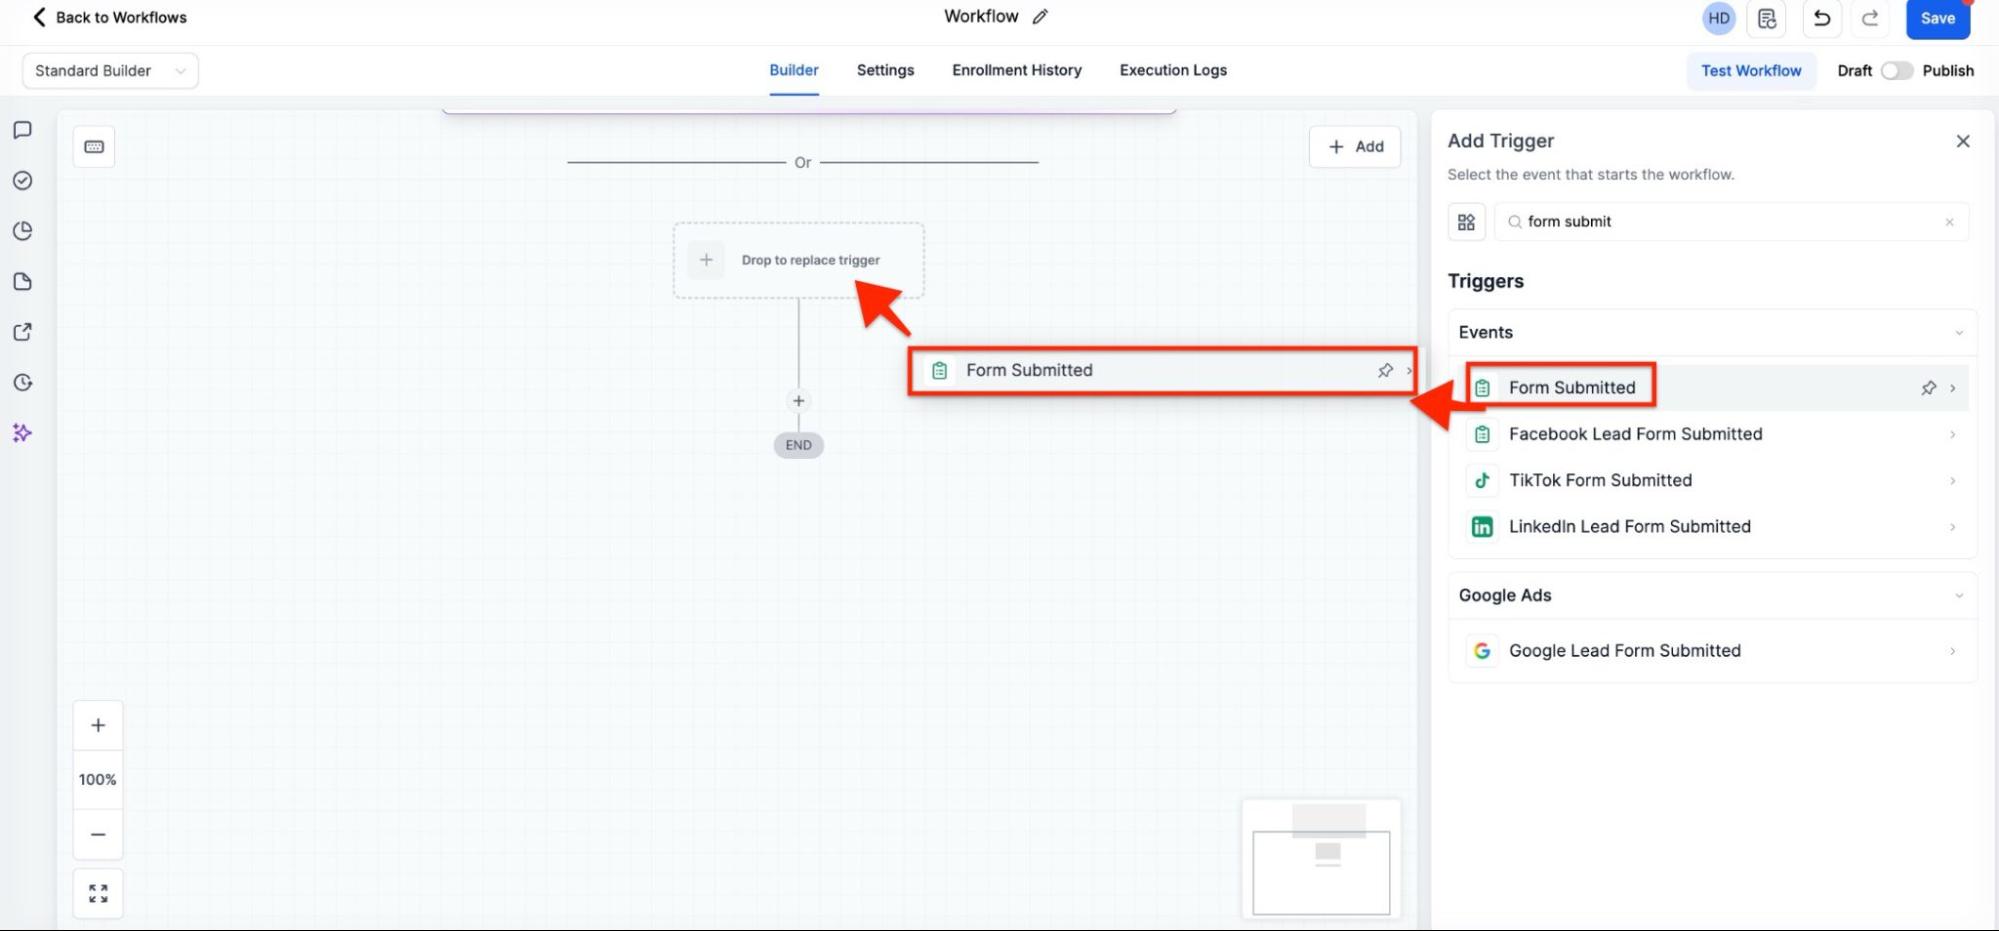

- Customize your trigger with specific filters to define activation conditions.

- For detailed setup guides, search for "Workflow" in the helpdesk.
- Save the trigger to include it in your workflow.
- Tip: Incorporate multiple triggers in a workflow to initiate diverse action sequences. Use the If/Else action for complex branching. For a detailed setup, refer to the “Workflow Action: If/Else” article.
- The workflow builder includes Undo, Redo, and Change History tools for safer and faster editing. These let you easily reverse or reapply steps and view a full list of recent changes.

Step 4: Setting Up Your Workflow Actions
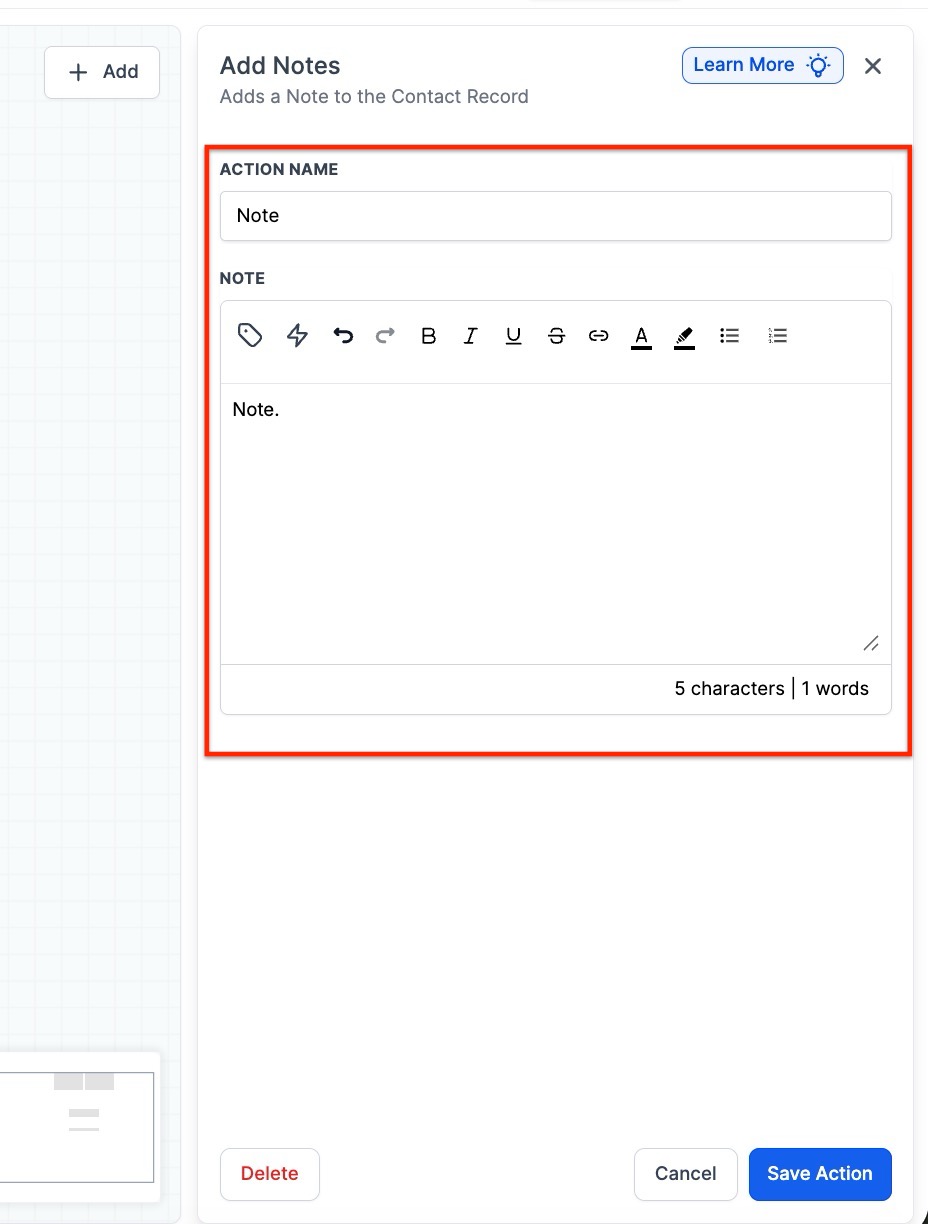
- Add new actions using the "+" icon.
- Customize each action based on your workflow requirements.
- For guidance on various actions and triggers, consult the helpdesk using the "Workflow" search term.
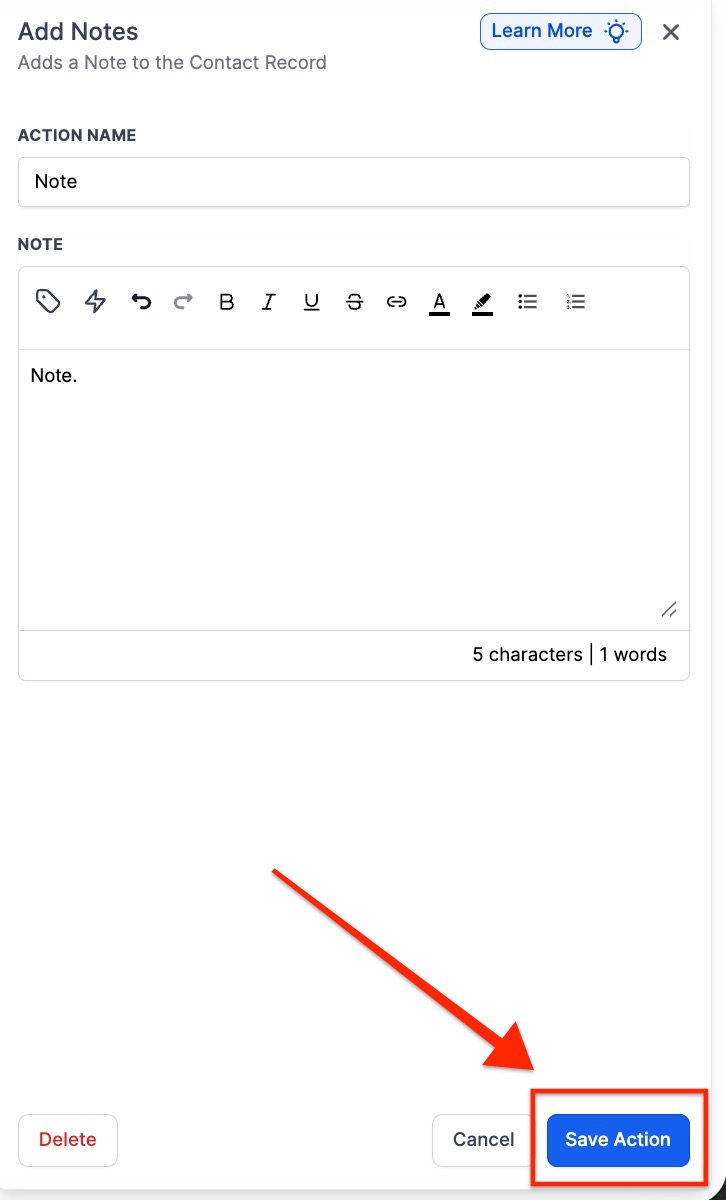
- Remember to save your actions and any changes made.
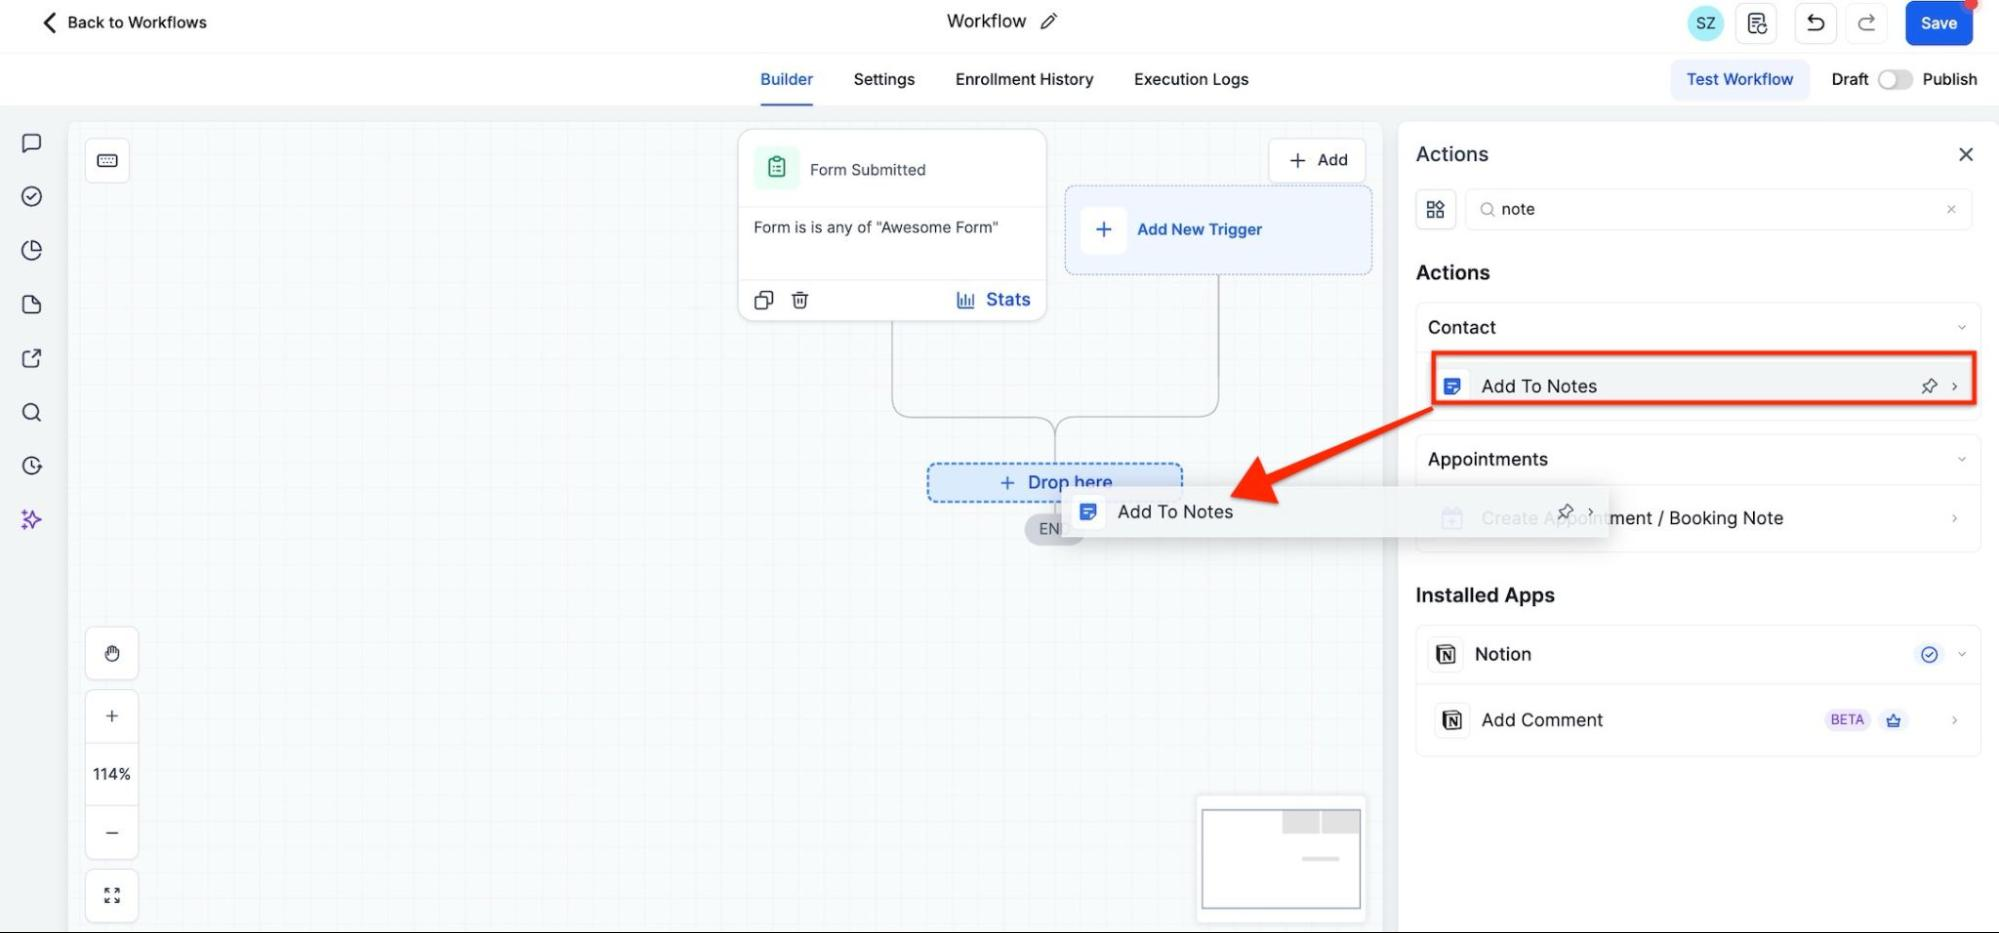
- Once you drop an action into a highlighted spot, the configuration panel will open. After saving the configuration, the action becomes a permanent part of your sequence.
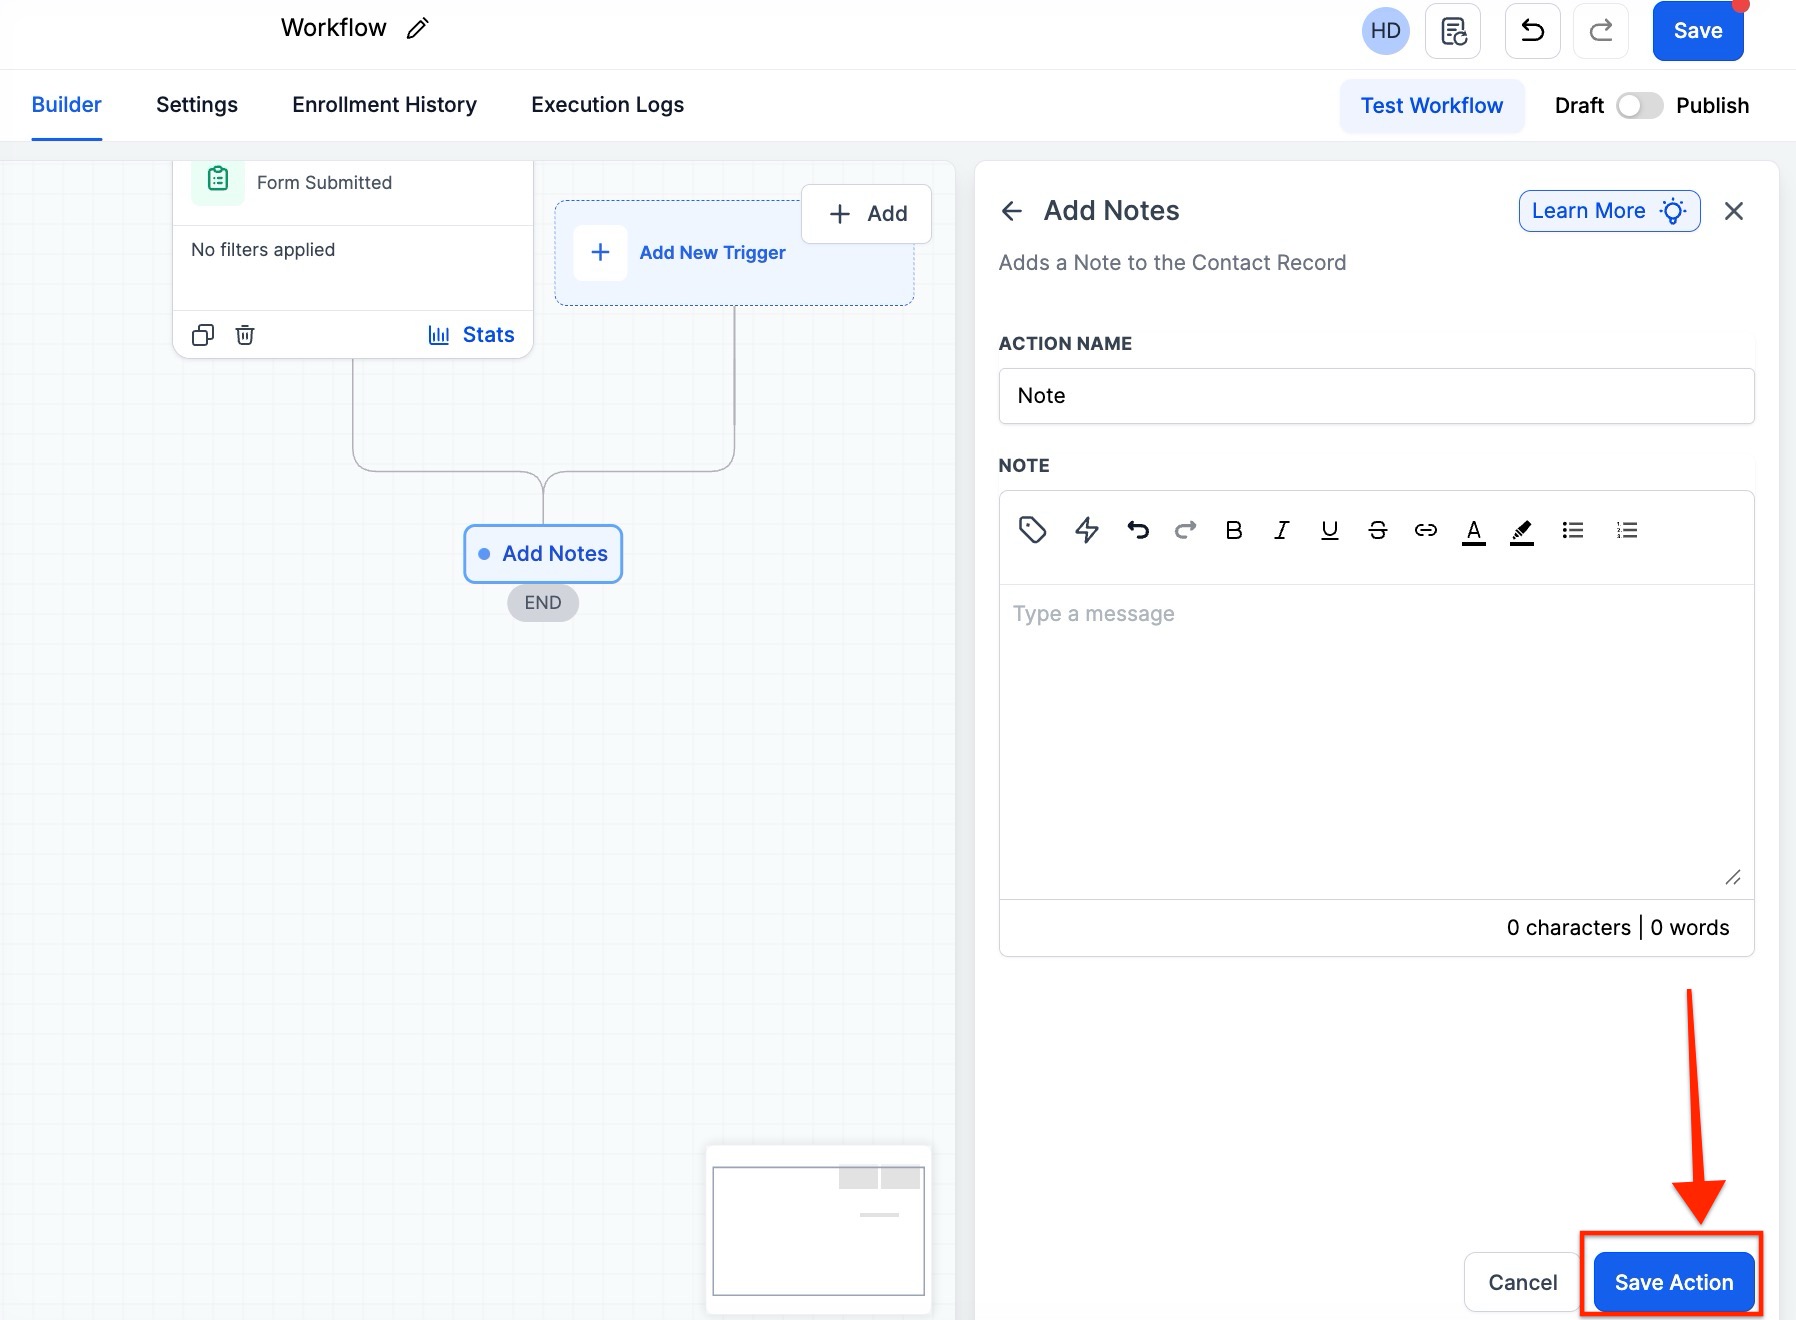
- Customize each action based on your workflow requirements.
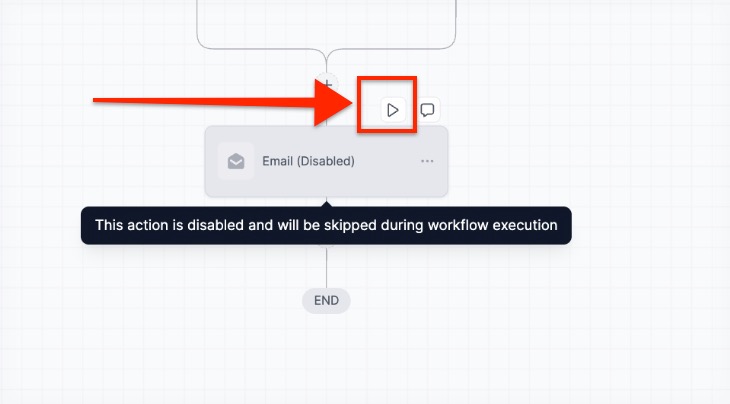
- You also have the option to toggle individual actions on or off without deleting them. By hovering over any specific node, you can use the Pause/Play switch to disable that step.

- When an action is disabled, it will appear dimmed and will be skipped during execution. If a paused node is the only path to subsequent steps, the system will bypass the paused action and continue to the next active node in the sequence.
- For guidance on various actions and triggers, consult the helpdesk using the "Workflow" search term.
- Remember to save your actions and any changes made.
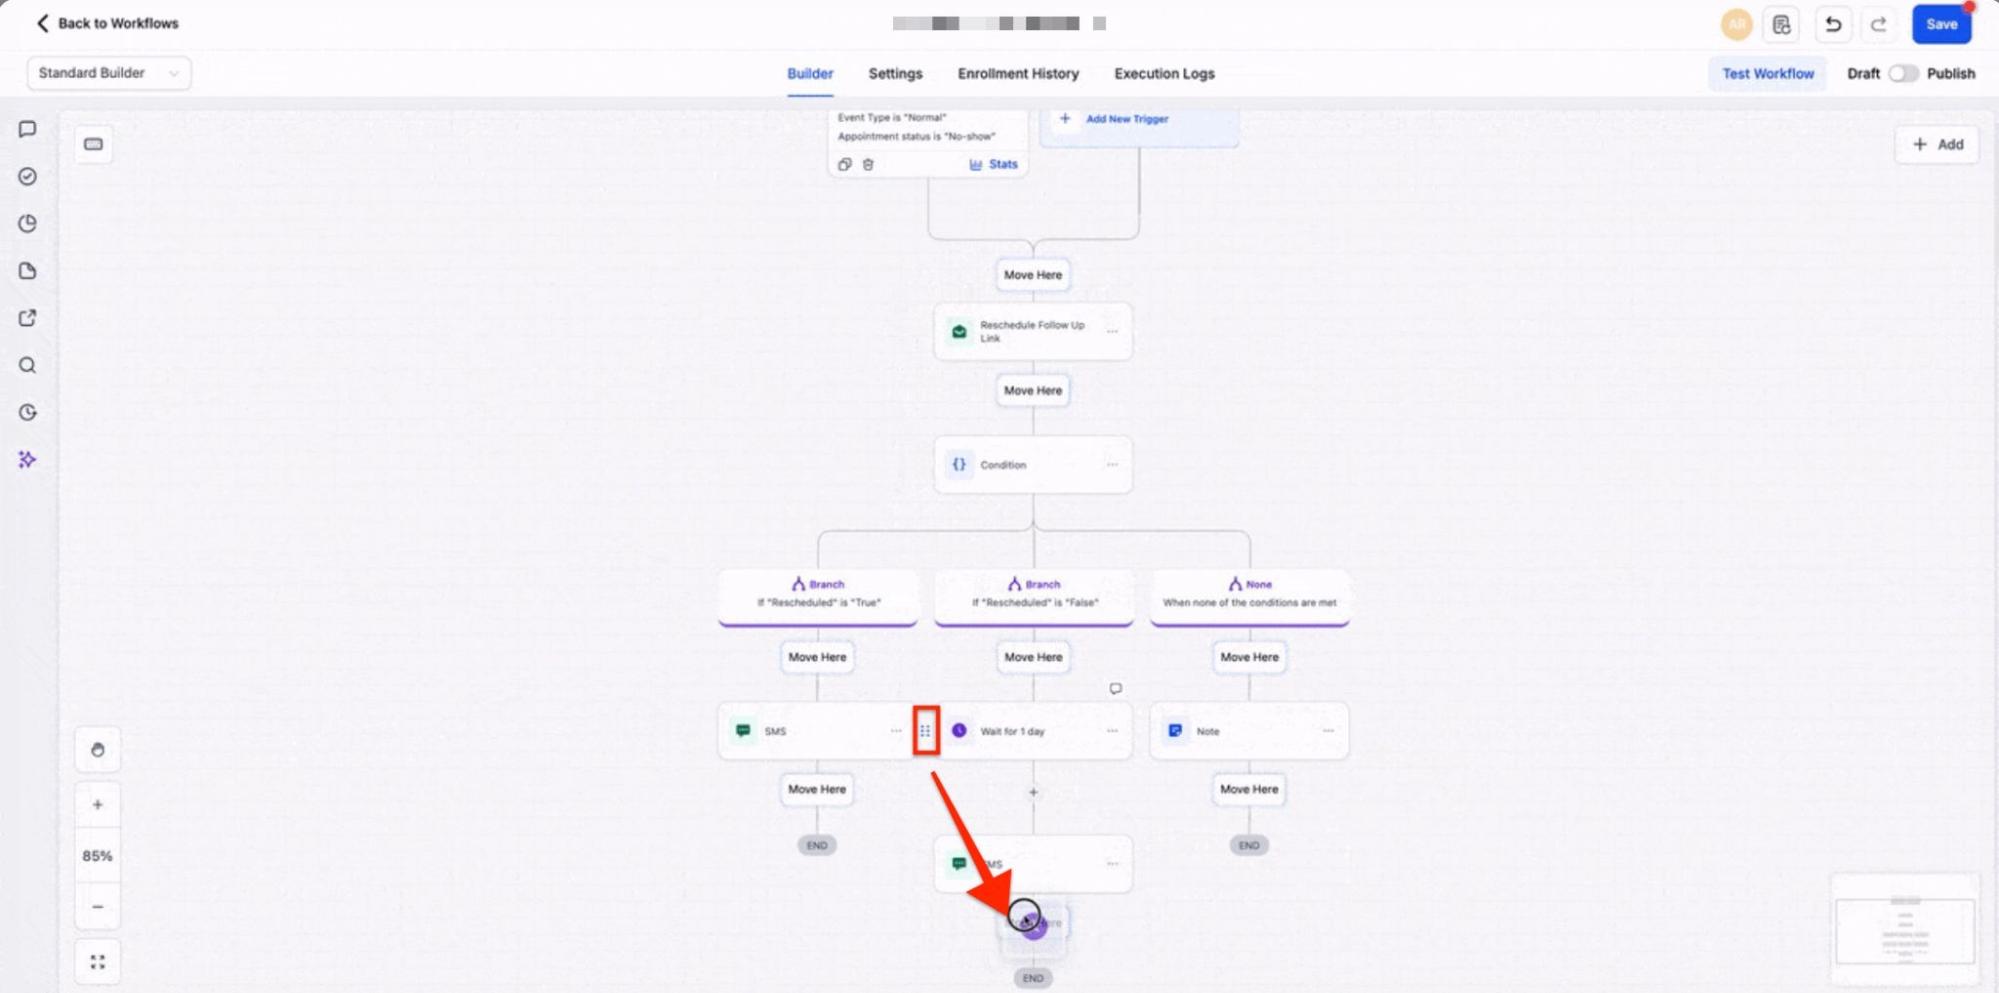
Note: You can directly drag and move nodes within the workflow canvas to reorganize actions and branches. This replaces the need to delete steps or use the right-click menu for individual node placement.
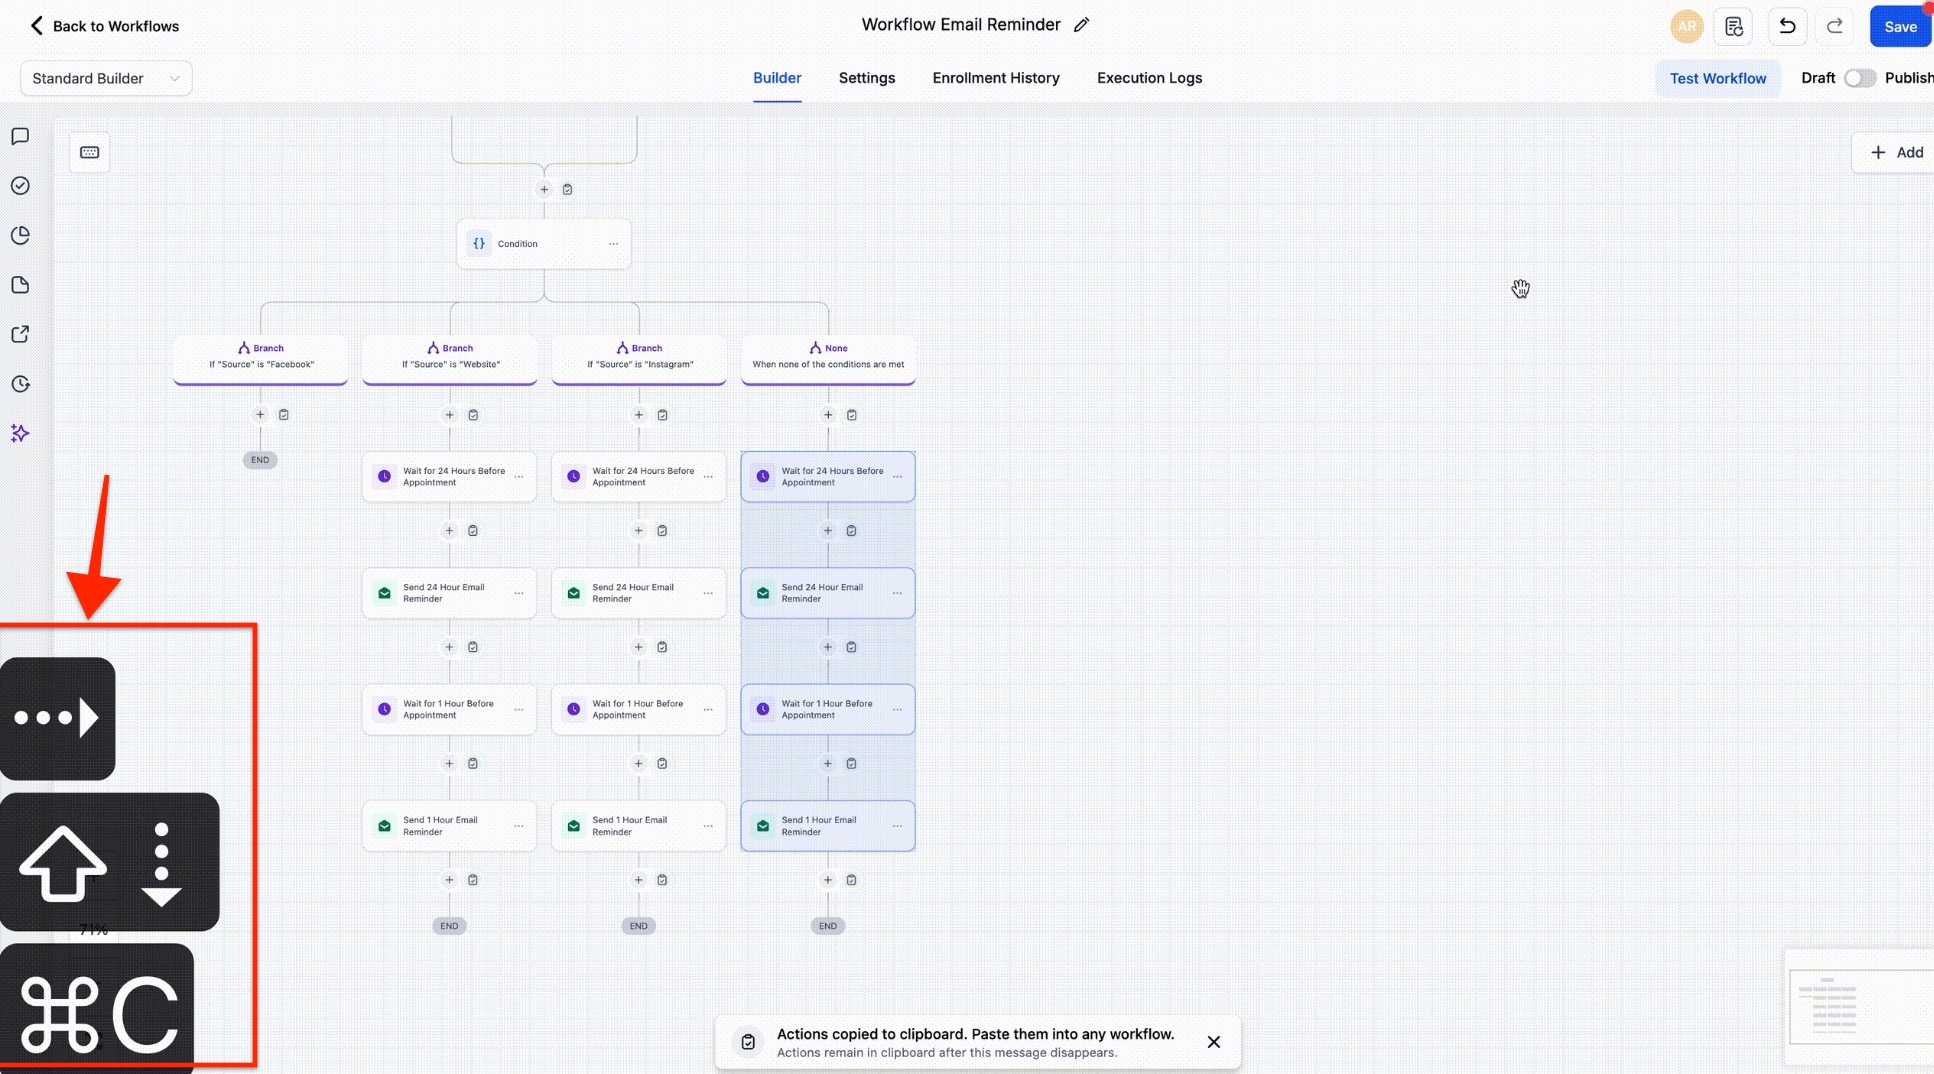
Keyboard Navigation & Shortcuts
Keyboard shortcuts have been added to the standard workflow builder, allowing you to create, edit, and navigate workflows more quickly using the keyboard. These shortcuts cover node movement, selection, copy and paste, delete actions, zoom controls, panel access, and saving.
List of keyboard shortcuts
Edit
- Move Selected Node(s) — ⌘ + X / Ctrl + X
- Copy Selected Node(s) — ⌘ + C / Ctrl + C
- Paste Node(s) — ⌘ + V / Ctrl + V
- Copy All Actions From Selected Node Onward — ⌘ + Shift + C / Ctrl + Shift + C
- Move All Actions From Selected Node Onward — ⌘ + Shift + X / Ctrl + Shift + X
View
- Zoom in — +
- Zoom out — -
- Zoom to 100% — 0
- Fit View — 1
Navigation
- Select All Nodes — ⌘ + A / Ctrl + A
- Select All Actions — ⌘ + Shift + A / Ctrl + Shift + A
- Select All Triggers — ⌘ + ⌥ + A / Ctrl + Alt + A
- Move to Next Node — ↓
- Move to Previous Node — ↑
- Move to Right Sibling Node — →
- Move to Left Sibling Node — ←
- Select Upstream Nodes — Shift + ↑
- Select Downstream Nodes — Shift + ↓
Tools
- Delete Selected Node(s) — Del
- Delete All Actions From Selected Node Onward — ⌘ + Del / Ctrl + Del
- Open Trigger Panel — Shift + Tab
- Open Action Panel — Tab
- Save Workflow — ⌘ + S / Ctrl + S
Step 5: Save, Test, and Publish Your Workflow
- Save your workflow with the blue Save button.
- Test the workflow with a safe contact (preferably a test contact).

- Check if the workflow functions as intended.
- Switch the workflow status to 'Publish' and save.
- Once saved and published, your automation is set and operational!
Workflow Switcher
- You can also smoothly switch between different workflows without going back to the workflows list.
- It will reduce clutter, keeping you focused. You can search, create, name, duplicate, or delete workflows directly in the switcher.
- This will help you manage multiple workflows without losing your place.
- In the builder, you can click the arrow button (shown in the screenshot).
- This will open up the switcher. You can also press Shift + W to open the switcher, or use the infinite scroll feature to browse your entire workflow list.

This will open up the switcher. You can also press Shift + W to open the switcher, or use the infinite scroll feature to browse your entire workflow list.
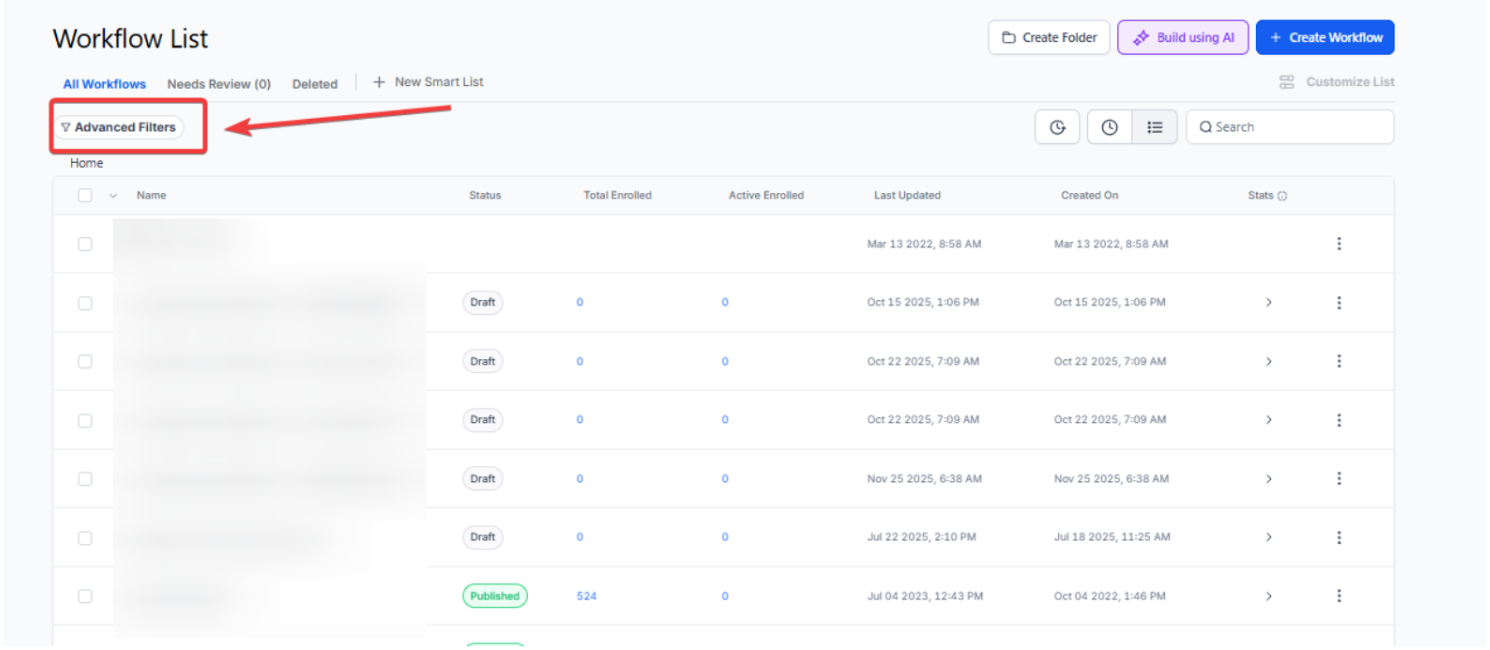
Advanced Filters and Smart List
Advanced Filters and Smart List features in workflows allow you to apply multiple criteria to filter workflows and save custom views for quick access.
Benefit: These tools help streamline your workflow management by enabling you to create and save tailored lists, improving efficiency in tracking specific actions or tags.
How to Use:
- Go to the Tools & Reporting > Automations tab
- Apply filters, and save your custom Smart Lists for future use.


FAQ
Question: How do I access the Workflows List?
Answer: Navigate to the Automation section in the main menu and select the Workflows tab. Here, you can view drafted and published workflows. Use the "+ Create Workflow" button to start a new workflow and the “⋮” menu to edit, delete, or duplicate existing ones.
Question: How can I create and set up a new workflow?
Click the "+ Create Workflow" button to start a new workflow. Choose to start from scratch or use a template. Enter the Workflow Builder, rename your workflow, add triggers and actions, test it using the "Test Workflow" button, save changes, and switch the status to Publish to activate it.
Question: How do I set up triggers and actions in a workflow?
Answer: To set up triggers, click "Add New Workflow Trigger," customize with filters, and save. For actions, click the "+" icon, customize as needed, and save your changes. Refer to helpdesk articles for detailed guidance on setting up triggers and actions.
Question: How do I test and publish my workflow?
Answer: After setting up your workflow, save it using the blue Save button. Test the workflow with a test contact to ensure it works as expected. Once verified, switch the workflow status to 'Publish' and save it to make it operational.
Question: Does a workflow stop if I switch it from "Publish" back to "Draft"?
Answer: Yes. When a workflow is in Draft mode, no new contacts can enter the sequence, and contacts currently "waiting" at a step will be paused until the workflow is republished.