Customizing Your Settings in Workflows
This tutorial will show you how to customize your Workflow Settings.
- Navigate to the Settings tab within the Workflow Builder.
- Here you'll see a list of customizable settings.
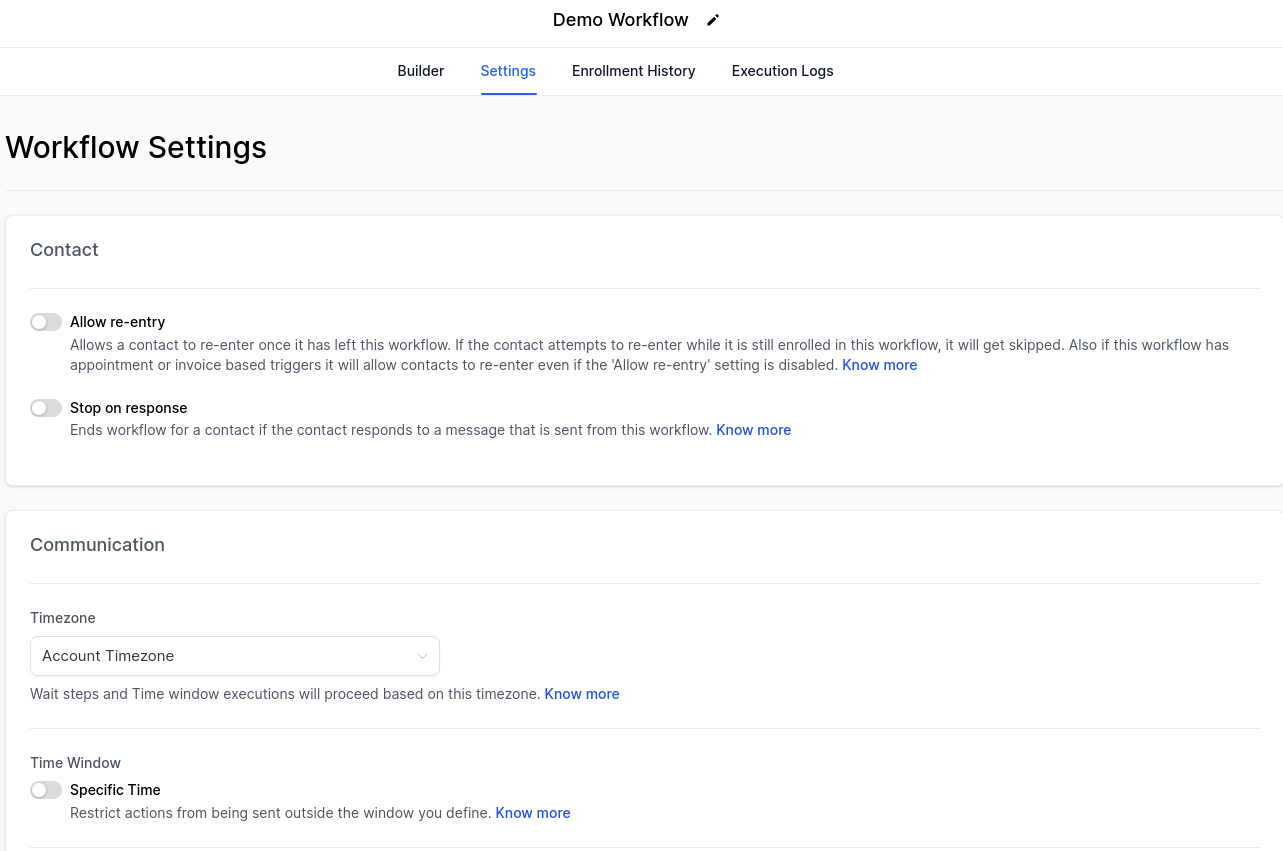
- Select the account timezone or the contact timezone
- Account Timezone: The wait steps and time windows will be based on the timezone set under Settings > Business Profile
- Contact Timezone: The wait steps and time windows will execute based on the timezone set under Contact Details
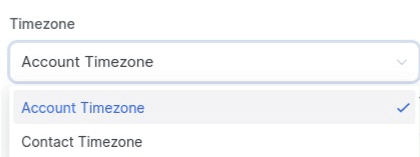
- Choose a sending window for a specific time.
- If you leave the toggle off, the workflow will occur anytime someone is added.
- If you select Specific Times, you can customize days and times.
- Sender Details allows you to choose a default “From” name and email.

- Allow Re-Entry can be toggled off or on.
- If toggled on, the same contact can enter the same workflow multiple times. However, the contact cannot enter the same workflow until the current execution is completed, meaning that at one time the contact will only be in the workflow once.

- Stop on Response can be toggled off or on.
- If toggled on, a specific response can trigger the workflow to end for the contact. For example, if you’re using a lead nurture workflow and someone books an appointment, you wouldn’t want to keep sending them communications to book an appointment. So when they reply to one of your messages sent from this workflow, the workflow execution will be halted.

- Mark as Read can be toggled off or on.
- If toggled on, conversations will show up in the All tab, marked as read, vs. being Unread.
