Workflow Action: Go To
The “Go To” action in workflows is a powerful tool that allows you to redirect a contact to a different point within a workflow. This feature is particularly useful for managing complex workflows where you need to dynamically direct contacts based on their interactions or other criteria. Follow the steps below to effectively implement and use the “Go To” action in your workflows.
What is the “Go To” Workflow Action?
The “Go To” action enables you to send a contact to any specified point within a workflow path. It can only be used at the end of a workflow path, allowing you to control the flow and direction of the contact’s journey through your automated processes.
NOTE: The action can only be used at the end of a Workflow path or under a branch in the if/else condition.
Step 1: Using the “Go To” Workflow Action
- Navigate to Tools & Reporting > Automations > Workflows.
- Click on the Workflow you wish to update.

- Add an action and choose “Go To” from the list.

- Click “Save”.
- All the actions will be highlighted, and you can click on the action where you want the contact to proceed.

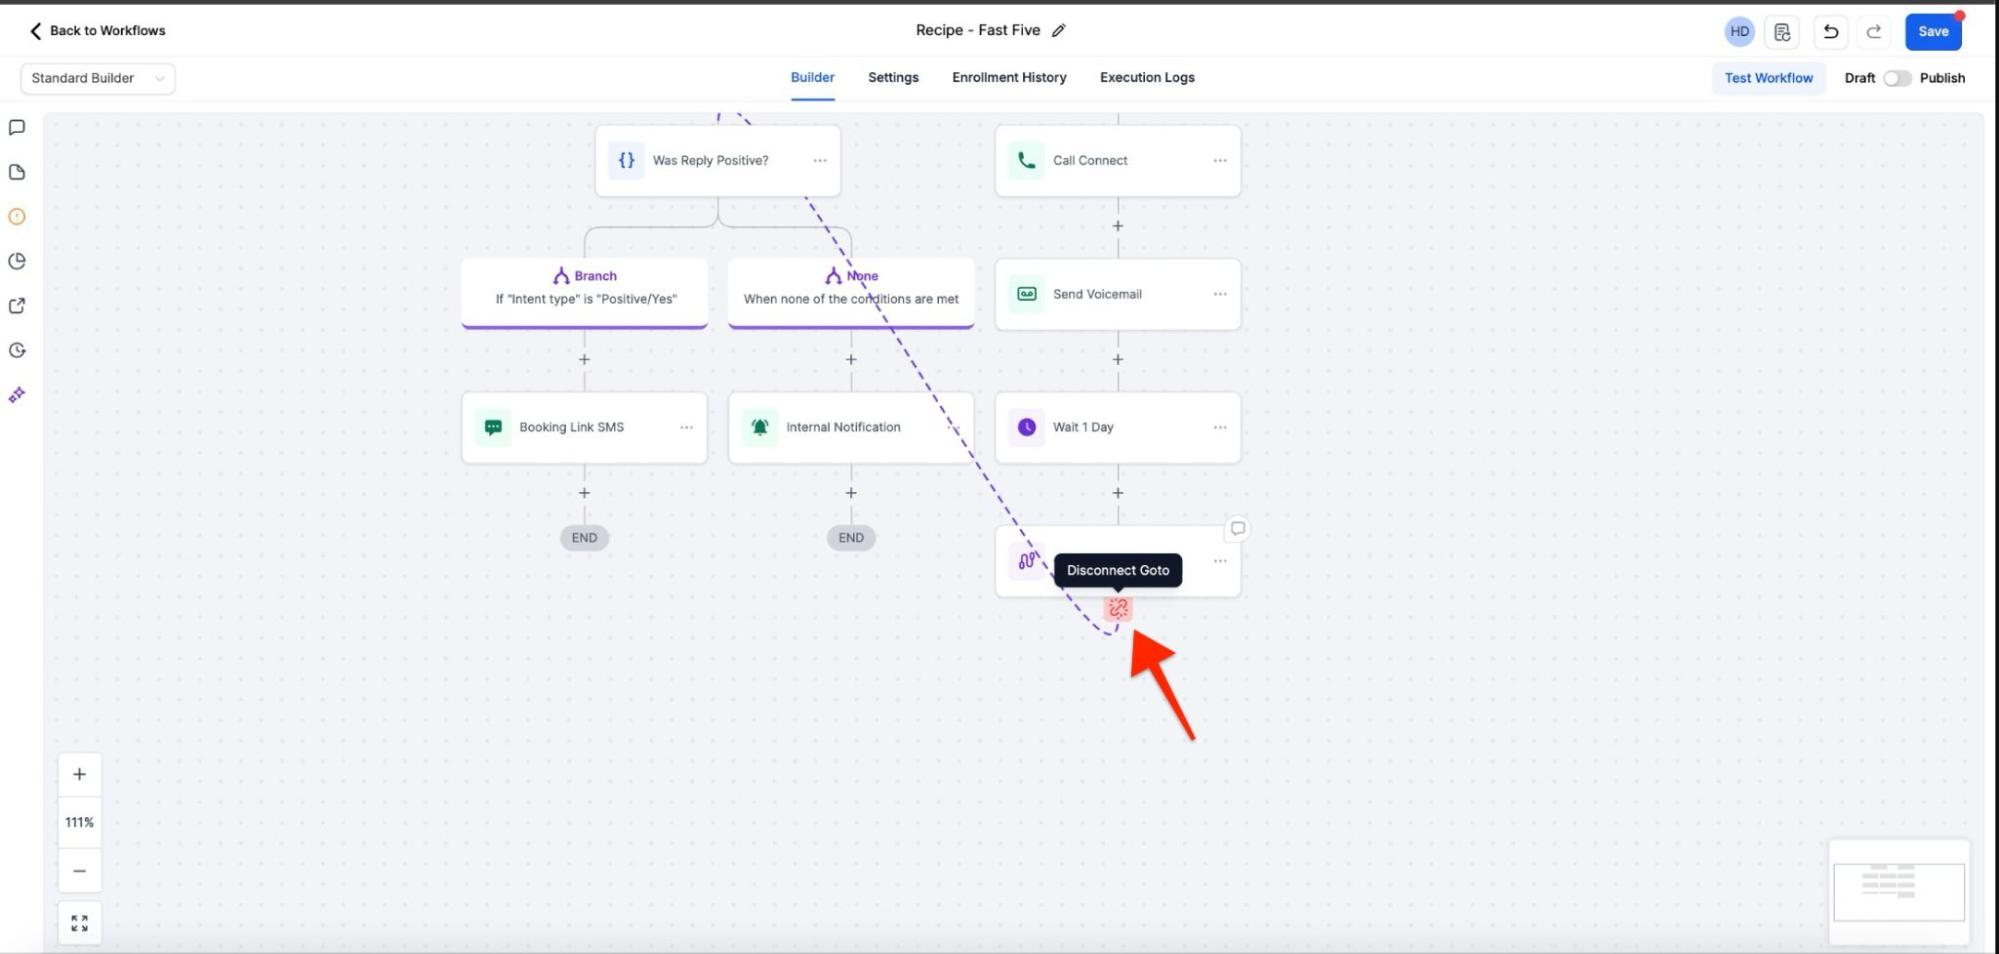
- You’ll then see this icon and the dotted icon, indicating the “Go To” action is set up in the path.

- Unlink - If you want to change the previously selected action, click on the "Disconnect GoTo" icon under the Go To action, and then choose a new action for the contact to proceed with.
Example
Sending Emails to Customers Who Haven't Purchased Items
Scenario: An online retailer wants to re-engage customers who abandoned their carts without purchasing, but does not want to send emails to customers who have already made a purchase.
Trigger Setup:
- Trigger: Abandoned Checkout
- Name: Abandoned Checkout
- Filters:
- Duration (minutes): 10 (trigger the workflow if the cart is abandoned for more than 10 minutes)
- Cart Value: Greater than 50 (trigger the workflow only if the cart value exceeds $50)
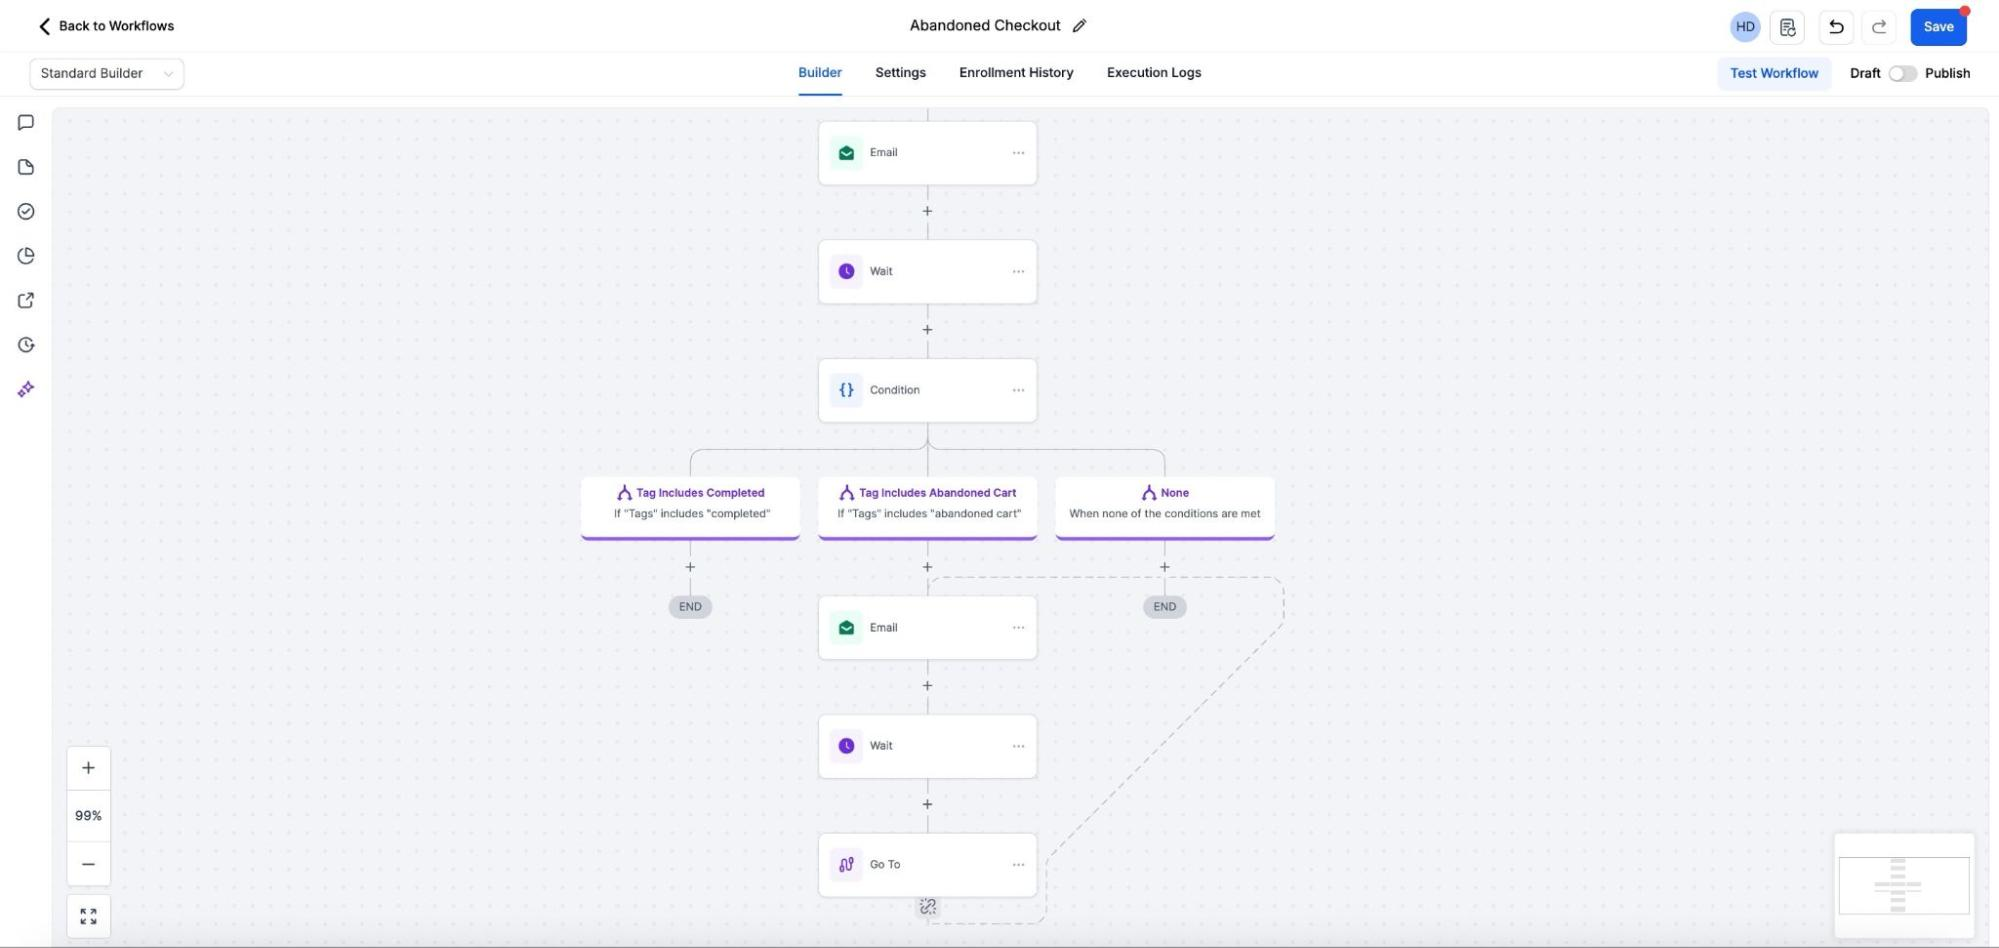
Workflow Actions:
- Email Notification: Send a personalized email to the customer, reminding them of the items left in their cart and offering an incentive (e.g., a discount).
- Wait: Wait for 1 day.
- If/Else: Add an If/Else condition to check for the "Purchased" tag. If the tag is present, the contact will proceed through the first branch; if not, they'll go through the second branch.
- Email (Branch 2): If the tag is not present, send a follow-up email reminding the customer of the abandoned cart.
- Wait (Branch 2): Add a wait step with a condition to check if the "Purchased" tag has been added.
- Go To (Branch 1): Add a Go To action that will move the contact directly to the wait step in the second branch if they have already made a purchase.
Outcome: This automation helps recover potentially lost sales by re-engaging customers who abandoned their carts, while ensuring that customers who have already purchased the items do not receive duplicate emails.
FAQs
Question: Where can I use the “Go To” action in a workflow?
Answer: The “Go To” action can only be used at the end of a workflow path. It directs the contact to a specific point within the workflow from that position.
Question: Can I use the “Go To” action in the middle of a workflow path?
Answer: No, the “Go To” action is restricted to the end of a workflow path. It is designed to redirect contacts at specific points in the workflow to other designated areas.
Question: How do I know if the “Go To” action is set up correctly?
Answer: You will see a green circle under the “Go To” action in the workflow builder. Additionally, a dotted line will appear, indicating the direction in which the workflow path is redirected.
Question: How can I change the action for a contact after it's been set?
Answer: If you need to modify the action that was previously selected, simply click on the "Disconnect GoTo" icon beneath the Go To action. This will allow you to select a different action for the contact to follow.
Question: What should I do if I want to point the "Go To" action to a different step than the one I originally chose?
Answer: You can use the "Unlink" or "Disconnect GoTo" feature. Simply click the "Disconnect GoTo" icon located under the action; this will remove the current connection and allow you to select a new target action for the contact to proceed to.
Question: In the cart abandonment example, how does the "Go To" action prevent duplicate emails?
Answer: It allows the workflow to skip follow-up emails for customers who have already purchased by jumping them directly to a different stage (like a Wait step or the end of the workflow) once the "Purchased" tag is detected.
Question: How do I select the target destination for a contact after adding the "Go To" action in the builder?
Answer: Once you add the "Go To" action and click "Save," all other actions in your workflow will become highlighted. You simply click on the specific action where you want the contact to proceed, and the system will automatically create the connection.