Workflow Trigger: Contact DND
The Contact DND Workflow Trigger can be used for any actions where a contact enables or disables Do-Not-Disturb (DND) for any communication channels. When a DND event occurs, the associated contact will be added to the workflow, allowing you to set up any number of follow-up actions. This article will outline setting up a Workflow with the Contact DND Workflow Trigger.
Step 1: Navigate to Tools & Reporting > Automations tab and Start a new workflow or edit an existing one

Step 2: Creating and Editing the Trigger
- Click “Add New Workflow Trigger”

- Select Contact DND in the Contact section of the Workflow Triggers Menu or use the search feature. Once selected, the Contact DND trigger setup menu will appear

- Select ‘DND Direction’: Either Inbound or Outbound.
- (Optional) Change the workflow trigger’s display name using the textbox under Workflow Trigger Name. Note that this will not affect the trigger itself, only the display name within the workflow builder
- Under Filters, you have several routes you can take
- Press + Add filters, and in the first drop-down that appears select DND Flag is and in the second drop-down select the applicable trigger event for this workflow.
- Enable DND for all channels and Disable DND for all channels will both trigger this workflow any time a contact enables or disables (respectively) DND for any of their communication channels.

- Enable DND for specific channels and Disable DND for specific channels will require an additional filter to select the specified channel.
- Press + Add filters again and in the first drop-down select DND Channel is and then in the second drop-down select your chosen channel for this workflow. This can be Call, Email, FB, GMB, SMS or WhatsApp

- With this setup, the workflow will trigger any time a contact enables or disables DND within the specified channel
- If you add no filters, this trigger will add a contact to this workflow any time they enable or disable DND for any communication channel.
- You can also filter by Custom Fields to only allow contacts that have a custom field that you have created to be added to this workflow
- Press Save Trigger in the bottom right corner of the Trigger setup menu
- Tag will only add contacts to this workflow that have a particular tag assigned to them
- Tag:Select specific tags to include or exclude contacts. You have access to advanced operators:
- Any of: Fires when any one of the selected tags is present.
- None of: Fires when none of the selected tags are present.
- Equals to / Not equals to: Supports selecting multiple tags simultaneously.
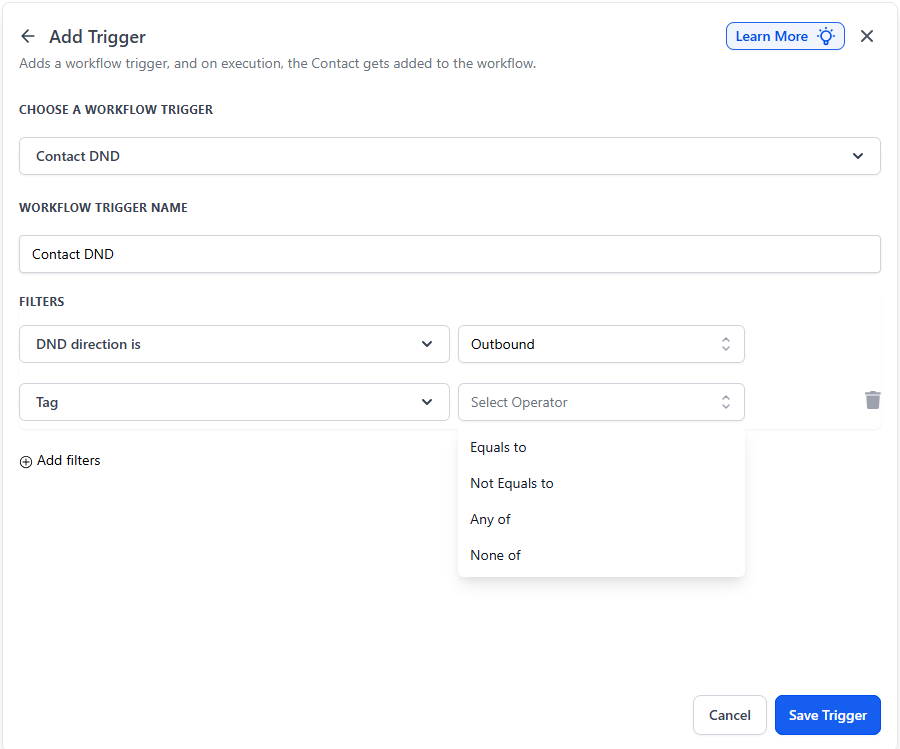
Multiple Tag Instances: You can add multiple "Tag" filter rows within one trigger. These use AND logic, allowing you to create precise exclusions (e.g., Tag Equals "Lead" AND Tag Not equals "Low Quality").

Step 3: Set up applicable Workflow Action(s). We have multiple articles available to explain the setup of each of the Workflow Actions. Feel free to review our articles for more information on setting these up.
Pro Tip: You can use any Workflow Actions to be triggered by the Contact DND trigger or you can leave this workflow without any actions.
Step 4: Press Save in the top right corner of your browser to save the workflow
- If your Workflow is ready to be enabled, make sure the toggle switch under Save is set to Publish
- Be sure to test your Workflow to make sure it is set up correctly using the Test Workflow button next to the Publish toggle switch.
- For an in-depth overview of Workflow Testing see our article, “Using the Testing Features in Workflows”

Now, your workflow is set up and ready to go with the Contact DND Workflow Trigger.
Re-enabling Communication for Opted-In Contacts
Scenario: A contact who previously opted out of all communications decides to opt back in. The business wants to automatically resume communication by removing any opt-out tags and notifying the appropriate teams.
Trigger Setup:
- Trigger: Contact DND
- Trigger Name: Re-enable Communication
Filters:
- DND Flag Is: Disabled DND for All Channels
Workflow Actions:
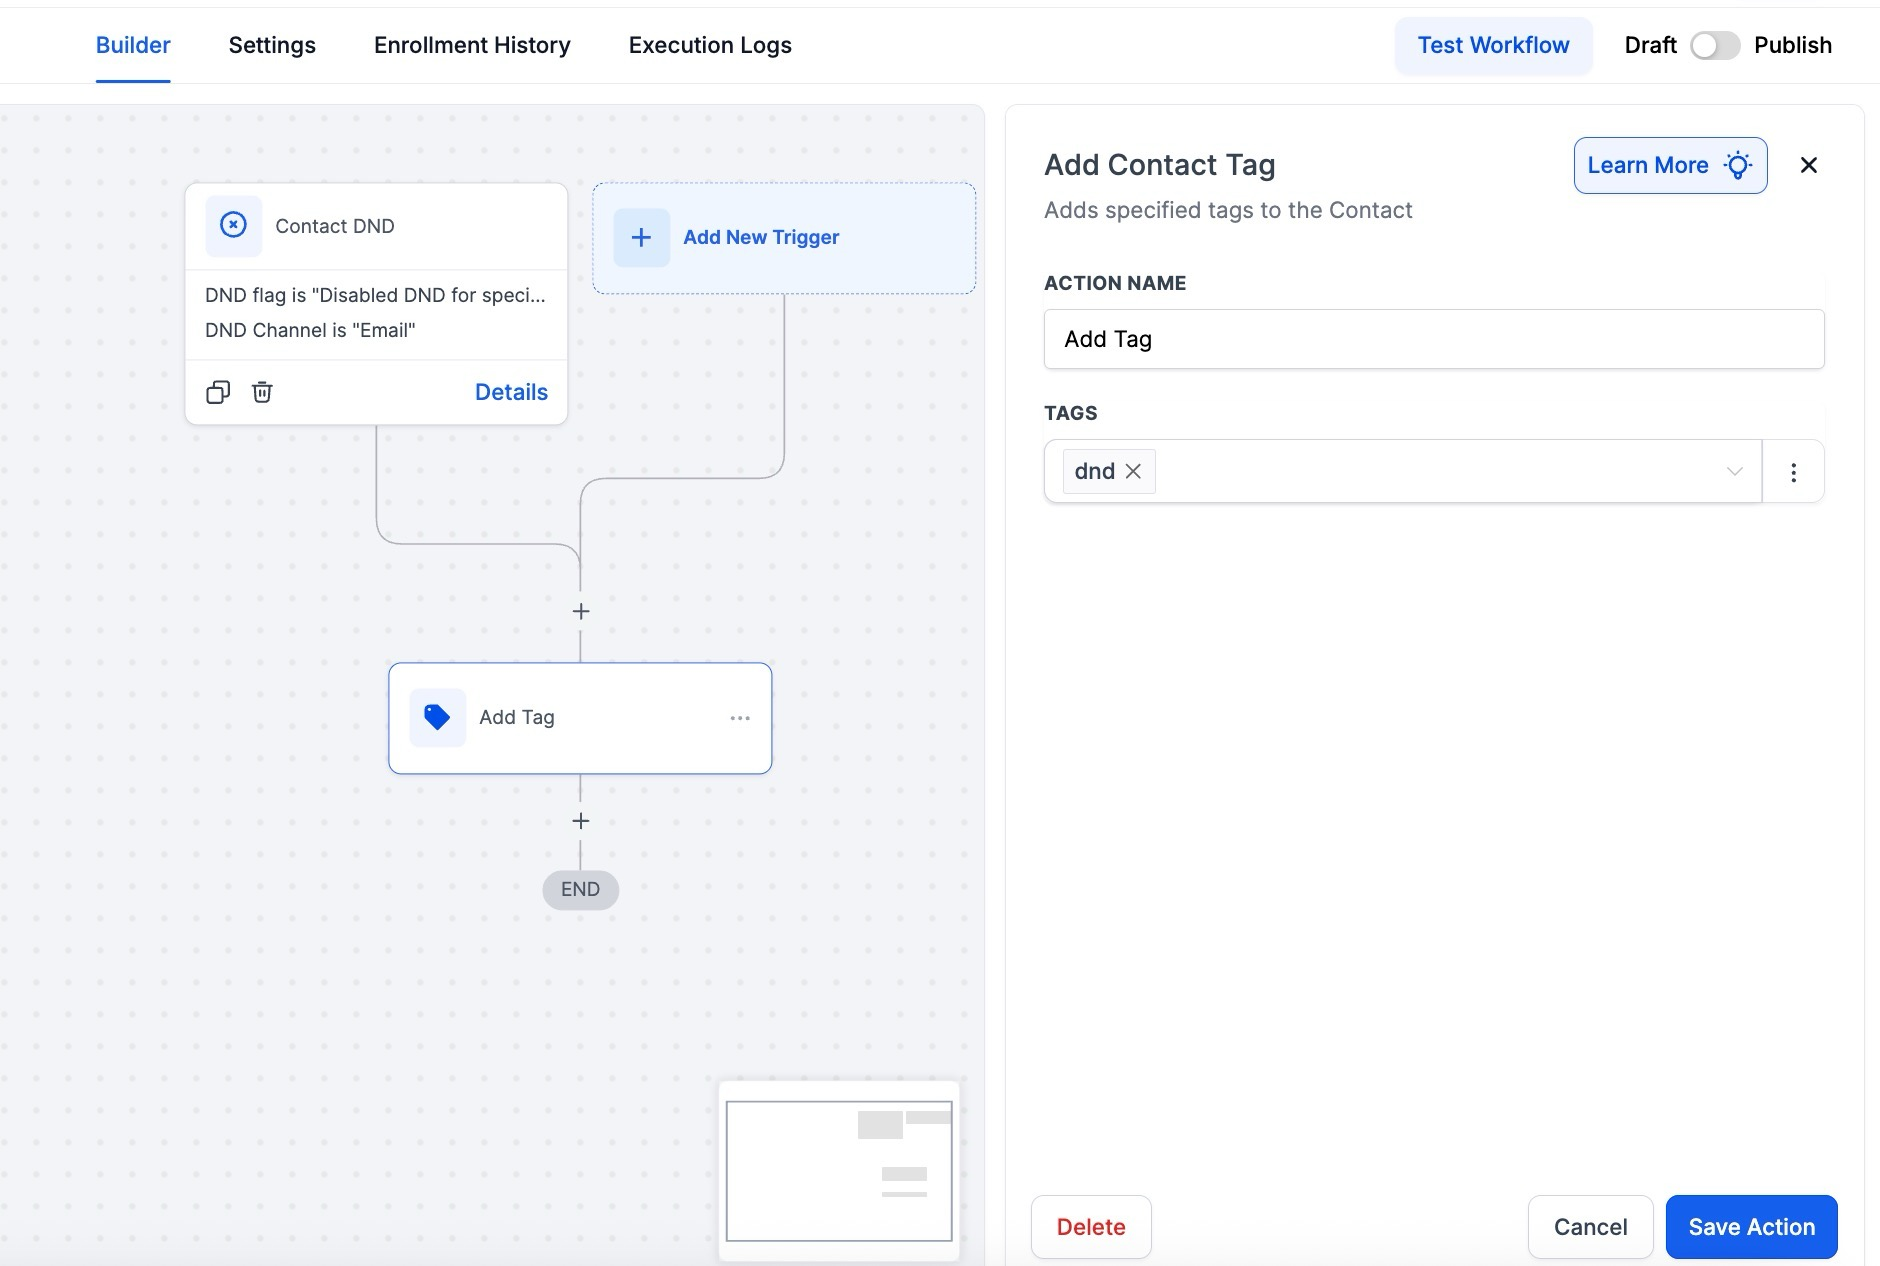
- Remove the "Do Not Contact" tag from the contact using the "Remove Contact Tag" action.
- Notify the sales team through the "Internal Notification" action.
- Add the contact back to relevant workflows with the "Add to Workflow" action.
Outcome: The contact is re-integrated into marketing and sales workflows, ensuring they begin receiving relevant communications immediately after opting back in.
FAQs for Contact DND Workflow Trigger
Question: How does the Contact DND trigger handle specific channels versus all channels?
Answer: The trigger allows you to apply DND for individual channels (such as SMS, email, or calls) or globally across all channels. This provides flexibility to respect contact preferences without halting communication entirely when only one channel is opted out.
Question: Can I use tags to manage DND preferences?
Answer: Yes, you can add tags like “DND SMS” or “DND Email” to contacts. These tags can be used in other workflows to exclude contacts from specific actions or campaigns.
Question: What happens if a contact is already in a workflow when their DND status changes?
Answer: The system will automatically skip any communication steps that conflict with the contact’s DND settings. For example, if a contact has DND for email, email actions will be skipped, but other actions like SMS or task creation will continue.
Question: Should I remove contacts from all workflows when they enable DND?
Answer: Not necessarily. Mastermind ensures compliance by skipping communication steps based on DND settings. However, if a contact opts out of all communication, you can remove them from all workflows using the "Remove from All Workflows" action.
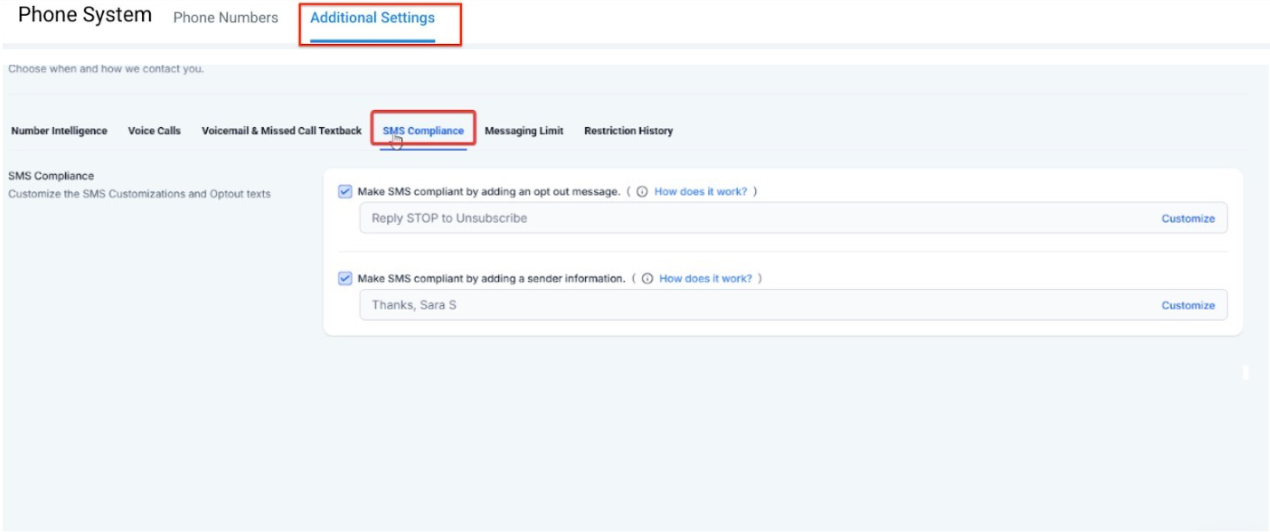
Question: How do I ensure compliance for SMS and email communications?
Answer: Enable automated compliance settings in Settings > Phone Numbers > Additional Settings. This will ensure opt-out messages and sender information are automatically added to SMS and emails to maintain compliance.
Question: Can I test the workflow before publishing?
Answer: Yes. Use the Test Workflow button to simulate the workflow and ensure the trigger and associated actions work correctly before going live.
Question: Can I trigger a workflow based on a specific custom field value?
Answer: Yes. In addition to DND status filters, you can use the Custom Fields filter. This allows you to restrict the workflow to only specific groups of contacts who have a particular custom field value, ensuring the automation doesn't run for every single person in your database.
Question: How can I use multiple tags to filter my trigger?
Answer: You can use the "Any of" operator to trigger for any one of several tags, or use multiple "Tag" filter instances to combine conditions with AND logic. For example, you can set the trigger to fire only if a contact has "Tag A" but does NOT have "Tag B."
Question: What are the tag operators available?
Answer: In addition to Equals to and Not equals to, you can use Any of (triggers if any selected tag is present) and None of (triggers only if none of the selected tags are present). All operators support multiselect, so you can choose multiple tags at the same time.
Question: If I enable DND for a contact manually, will this workflow still fire?
Answer: Yes, as long as the DND Direction in your trigger is set to Outbound (or left blank to include both). This is useful for notifying an account manager if a team member accidentally mutes a high-value lead.