Workflow Action: Remove Assigned User
The Remove Assigned User Workflow Action removes any assigned user from a contact that is added to the workflow, leaving the contact without any users assigned to it. This article will give an overview of how to build a workflow using the Remove Assigned User Workflow Action.
Key Benefits of Using This Workflow Action
- Reset Contact Assignment: Clears existing user assignments, allowing for the contact to be re-engaged or reassigned as needed.
- Automated Workflow Management: Automatically removes user assignments when predefined triggers (such as task completion or status updates) occur, reducing the need for manual adjustments.
- Improved User Availability: Frees up users by removing contacts that no longer require their direct involvement.
- Enhanced Workflow Flexibility: Enables contacts to transition between workflows smoothly, avoiding conflicts or outdated assignments.
Step 1: Start a new workflow or edit an existing one
- Navigate to Tools & Reporting > Automations on the left > Workflows at the top and create a new workflow or edit an existing one.

Step 2: Set up applicable Workflow Trigger(s). We have multiple articles available to explain the setup of each of the Workflow Triggers. Feel free to review our articles on these for more information on setting these up.
- Pro Tip: You can use any Workflow Triggers to trigger the Remove Assigned User Workflow Action or you can leave this workflow without any triggers.
Step 3: Setting up the Remove Assigned User Workflow Action
- Click on the “+” symbol below the trigger to add an action.

- Under Actions, select Remove Assigned User in the Actions section or use the search feature. Upon selection, the Action setup menu will appear

- (Optional) You can change the workflow builder display name of this action using the textbox below Action Name. Note that this will only affect the display name within the workflow builder and has no other impact on the content or functionality of this Workflow Action.
- Press Save in the bottom right corner of the Action setup menu

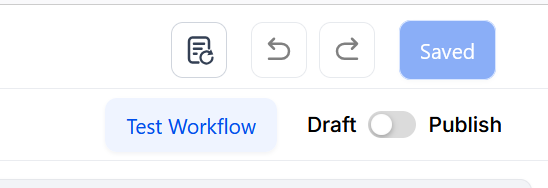
Step 4: Press Save in the top right corner of your browser to save the workflow
- If your Workflow is ready to be enabled, make sure the toggle switch under Save is set to Publish
- Be sure to test your Workflow to make sure it is set up correctly using the Test Workflow button next to the Publish toggle switch.
- For an in-depth overview of Workflow Testing see our article, “Using the Testing Features in Workflows”
Now your Workflow is set up and ready to go with the Remove Assigned User Workflow Action!
Use Cases
Sales Pipeline Cleanup
Scenario: When a contact's opportunity status changes to "Closed Won" or "Closed Lost," the sales team no longer needs to follow up, and the contact should be reset for other workflows.
Solution:
- Trigger: Opportunity Status Changed
- Action: Remove Assigned User
- Outcome: The contact is unassigned from the salesperson, allowing them to focus on new, active opportunities.
Task Completion in Customer Support
Scenario: After a support agent resolves a ticket related to a contact, the contact no longer needs to be directly assigned to the agent.
Solution:
- Trigger: Task Completed
- Action: Remove Assigned User
- Outcome: The agent is unassigned, enabling them to handle new support requests efficiently.
FAQs: Setting Up the Remove Assigned User Workflow Action
Question: What does the Remove Assigned User Workflow Action do?
Answer: The Remove Assigned User Workflow Action removes any assigned user from a contact. This leaves the contact without any users assigned to it, effectively disassociating the contact from any user within the system.
Question: How do I start building a workflow with the Remove Assigned User action?
Answer: Begin by starting a new workflow or editing an existing one in your Workflow builder. Follow the steps to set up applicable triggers if needed, and then proceed to configure the Remove Assigned User action.
Question: Can I use any Workflow Trigger with the Remove Assigned User action?
Answer: Yes, you can use any Workflow Trigger to activate the Remove Assigned User action. Alternatively, you can set up the action without any triggers if the workflow does not require specific triggering conditions.
Question: How do I add the Remove Assigned User action to my workflow?
Answer: Click the “+” symbol below the trigger in your Workflow builder. From the Actions Menu, select “Remove Assigned User” in the Actions section or use the search feature to locate it. The Action Setup menu will appear for configuration.
Question: Can I rename the Remove Assigned User action for better clarity?
Answer: Yes, you can change the display name of the action within the workflow builder by using the textbox below “Action Name.” This change only affects how the action is displayed in the workflow builder and does not impact its functionality.
Question: How does this action improve workflow management?
Answer: It automates unassigning contacts, reducing manual effort, freeing up users for other tasks, and ensuring contacts can smoothly transition between workflows.
To help your users understand when and how to "unassign" contacts, here are some additional FAQs written in simple, clear language.
Question: If I remove an assigned user, will the contact be deleted?
Answer: Not at all. The contact’s profile, phone number, and history stay exactly where they are. This action only removes the "owner" or "assigned agent" label from that contact so that nobody is officially responsible for them at the moment.