Workflow Action: Remove Opportunity
In this article, you will learn how to set up the Workflow Action: Remove Opportunity, and how it functions.
The Remove Opportunity Workflow Action will allow you to create a workflow that will automatically remove the opportunity that triggered the workflow or an opportunity found in a prior step, in addition to removing all opportunities in a pipeline. This article will give an overview of how to create a workflow using the Remove Opportunity Workflow Action.
How to add this Action to a workflow?
Step 1: Start a new workflow or edit an existing one
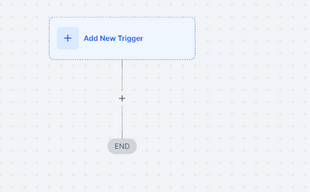
- Navigate to Tools & Reporting > Automations > Workflows and start a new workflow or edit an existing one.

Step 2: Set up applicable Workflow Trigger(s). We have multiple articles available to explain the setup of each of the Workflow Triggers. Feel free to review our articles on these for more information on setting these up.
Pro Tip: You can use any Workflow Triggers to trigger the Remove Opportunity Workflow Action or you can leave this workflow without any triggers.
Step 3: Setting up the Remove Opportunity Workflow Action
- Click on the “+” symbol below the trigger to add an action.
- Under Actions, select Remove Opportunity or use the search feature. Upon selection, the Action setup menu will appear

- (Optional) You can change the workflow builder display name of this action using the textbox below Action Name. Note that this will only affect the display name within the workflow builder and has no other impact on the content or functionality of this Workflow Action.
- You can choose to either:
1. Remove all contact opportunities in the selected pipeline.
2. Remove the opportunity that triggered this workflow.

- Press Save in the bottom right corner of the Action setup menu

Step 4: Press Save in the top right corner of your browser to save the workflow
- If your Workflow is ready to be enabled, make sure the toggle switch under Save is set to Publish
- Be sure to test your Workflow to make sure it is set up correctly using the Test Workflow button next to the Publish toggle switch.
- For an in-depth overview of Workflow Testing see our article, “Using the Testing Features in Workflows”

Now your Workflow is set up and ready to go with the Remove Opportunity Workflow Action!
FAQs
Question: What does the Remove Opportunity Workflow Action do?
Answer: The Remove Opportunity Workflow Action automatically removes the opportunity that triggered the workflow or an opportunity from a prior step. Additionally, it can remove all opportunities in a specific pipeline.
Question: Can I set up triggers for this Workflow Action?
Answer: Yes, you can use any Workflow Trigger to initiate the Remove Opportunity Workflow Action, or you can leave the workflow without any triggers if you prefer.
Question: How can I customize the name of the Remove Opportunity Action in my workflow?
Answer: You can change the display name of the action within the workflow builder by editing the textbox under the Action Name field. This change will only affect how the action is labeled in the builder and will not impact its functionality.
Question: Can I remove multiple opportunities at once?
Answer: Yes, you can choose to remove all contact opportunities in the selected pipeline, or you can remove only the opportunity that triggered the workflow.
Question: How can I test if my workflow is set up correctly?
Answer: You can test your workflow using the Test Workflow button next to the Publish toggle switch to ensure it works as expected.
Question: Can this action remove opportunities across multiple pipelines?
Answer: No, the action removes opportunities only within the pipeline you select during setup.
Question: Does removing an opportunity also delete the contact from my system?
Answer: No. Removing an opportunity only deletes the "deal" or "card" from your sales pipeline. The contact's name, email, and history will stay safe in your Contacts list.
Question: Does changing the "Action Name" in the builder change how the removal is logged?
Answer: No. Changing the display name in the textbox is strictly for your own organization within the workflow builder. It helps you identify the step's purpose at a glance but has no impact on the underlying functionality or system logs.
Question: If I accidentally remove an opportunity via a workflow, can I "Undo" it?
Answer: Once an opportunity is removed by a workflow, it is deleted from that pipeline. There is no "Undo" button to restore the card with its previous notes and history. We highly recommend using the "Test Workflow" feature on a dummy contact before publishing to ensure your filters are exactly right.