How to Set Up Trigger Links in Workflows
Trigger links can be built into the system so that when a lead/customer clicks on a particular link, a specified action happens. There are multiple ways to use trigger links, most commonly in campaigns, emails, funnels, and websites.
Key Features
Automated Action Triggers
- Trigger links initiate specific actions when a contact clicks a link, automating follow-ups, tagging, or workflow entries.
Seamless Integration Across Multiple Channels
- Can be used in emails, SMS, funnels, websites, and campaigns, ensuring engagement tracking across all platforms.
Customizable Workflows Based on Clicks
- Users can create workflows triggered by link clicks, enabling personalized automation sequences such as email follow-ups or lead scoring.
Dynamic Link Tracking & Reporting
- Provides real-time tracking of clicks, helping businesses measure engagement and campaign effectiveness.
Smart Filtering & Audience Segmentation
- Contacts who click a trigger link can be tagged or segmented into specific workflows, allowing for targeted messaging.
Easy Implementation in Emails & Bulk Campaigns
- Can be embedded into one-off emails, bulk-action emails, and automated workflows with just a few clicks.
Workflow Personalization with Triggered Actions
- Define custom actions such as sending an email, adding a tag, assigning a user, or triggering a campaign based on clicks.
Step 1: Creating Trigger Links
- Start by accessing the trigger links section in your system.
- Navigate to “Marketing & Sales” > “Email and Social Media” > “Trigger Links”
- Click the "Add Link" option.
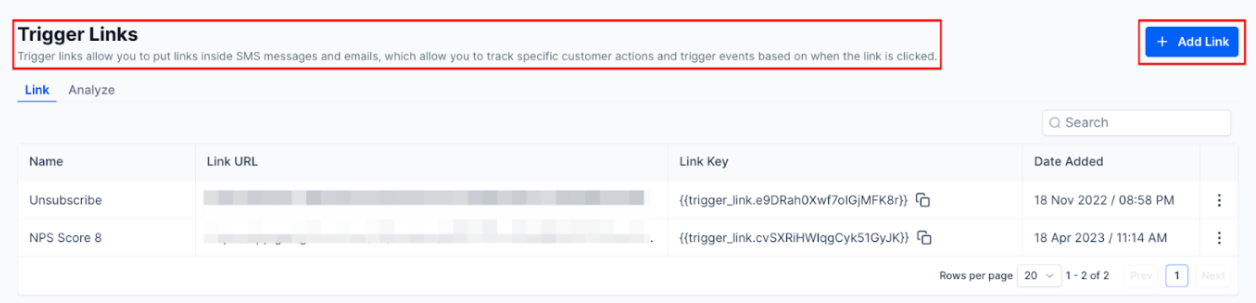
- Fill Out Link Details: A pop-up will appear, prompting you to provide essential details for your trigger link. Name your link, and specify the URL to which users will be directed upon clicking.

- Save
Step 2: Create Your Workflow using Trigger Links
- Go to “Tools & Reporting” > “Automations” > “Workflows”
- Create a new workflow.

- Select the trigger to "Trigger Link Clicked".
- Define Filters: In the filters section, specify the trigger link for which you want this action to apply

- Add the desired actions for your workflow.
Note: To add a new tag, write the tag and click on the + sign next to it to add it. If it's an existing tag, just select it from the drop-down menu.
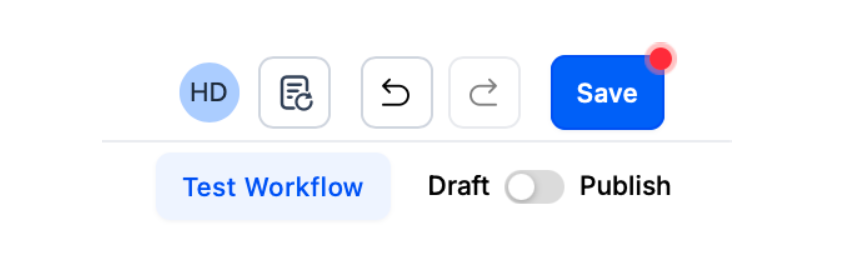
- Publish your workflow, and save.
Step 3: Using Trigger Links.
- Navigate to your workflow, or email builder where you want to add the trigger link into.
- Identify the text where you want to insert the trigger link within your email editor.
- Highlight the text and click the link icon. Select the trigger link from your “Link List” from the popup window. Click OK.


- Save to confirm your changes.
- You can repeat this process within a one-off or bulk-action email as well.
FAQs
Question: How do I access the trigger links section?
Answer: Navigate to Marketing > Trigger Links and then select Links.
Question: What details are required when creating a trigger link?
Answer: You need to provide a name and the URL for the trigger link.
Question: How do I apply a trigger link in a workflow?
Answer: Create a new workflow, set the trigger to "Trigger Link Clicked", define the specific link in the filters, add your actions, and then publish and save.
Question: How do I insert a trigger link into an email?
Answer: Highlight the desired text in your email editor, click the link icon, select the trigger link from your "Link List", and then click OK.
Question: Can trigger links be used in bulk-action emails?
Answer: Yes, trigger links can be added to both one-off and bulk-action emails.
Question: Do Trigger Links work in SMS messages?
Answer: Yes! Trigger Links are highly effective in SMS. When you insert a Trigger Link into an SMS draft, the system automatically shortens the URL to save character space while still maintaining the tracking ability.