The Funnel Builder: Overview
This article will give you an overview of the funnel section, as well as the funnel builder where you can customize your funnel steps/pages.
Step 1: How to Navigate To and Utilize the Funnel Section
- Start by navigating to the Marketing & Sales > Funnels and Pages > Funnels section. You can view a list of your existing funnels here, or, click the blue button to create a new funnel.

- Once you create a new funnel, you have to add a step. Each step is an actual page. (As an option, you can import pages from ClickFunnels as well.)
Note:
- Use the different tabs to set up your funnel
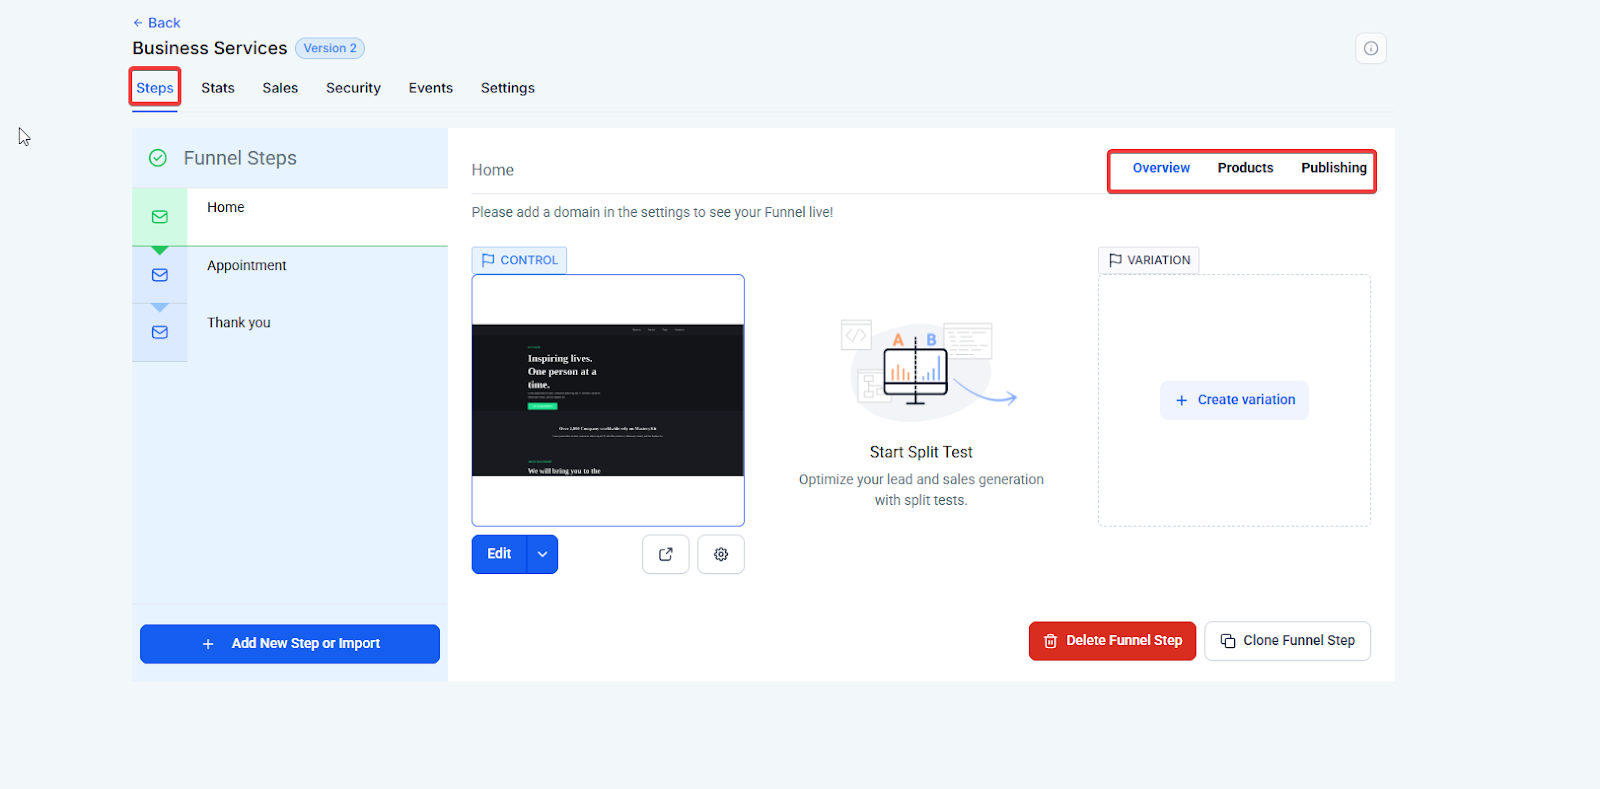
- STEPS: Here you can view all your funnel steps or pages.
- OVERVIEW: Edit or Preview your funnel step.
- PRODUCTS: View the products associated with the funnel page
- PUBLISHING: Here you can update the step name and path also known as the slug
- STEPS: Here you can view all your funnel steps or pages.
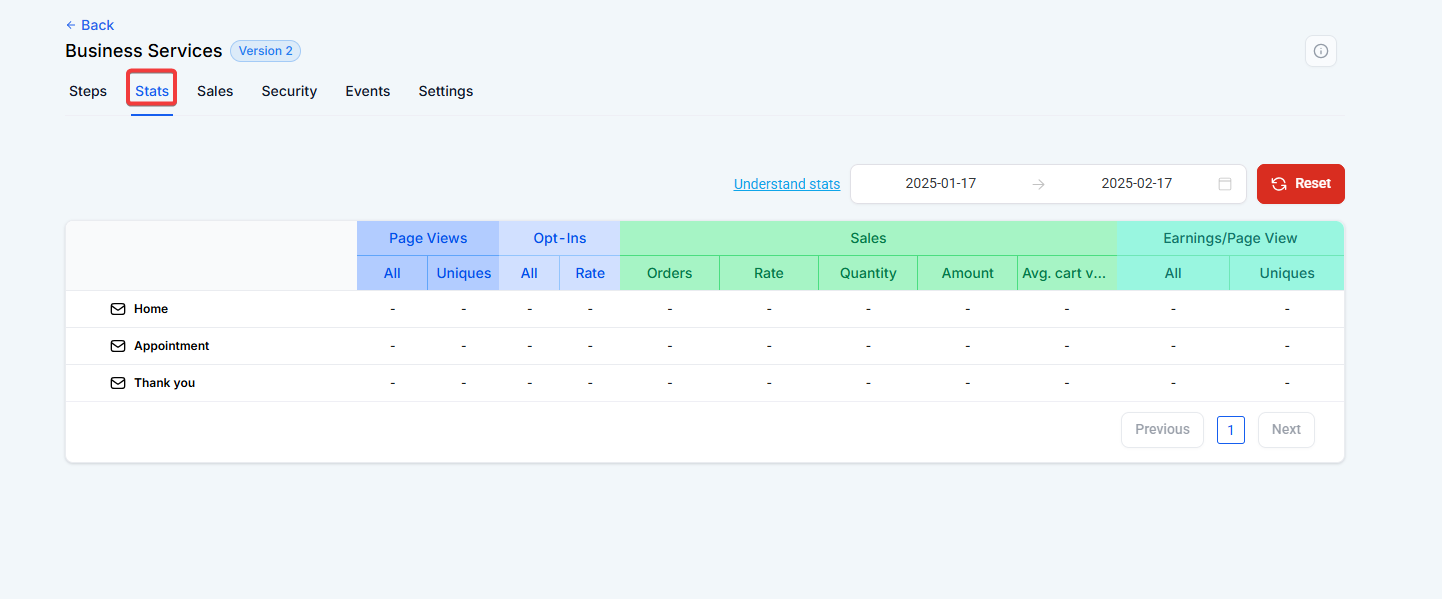
- STATS: The Stats tab provides an overview of your funnel’s performance, displaying metrics such as total and unique page views, opt-ins, opt-in rate, sales, order quantities, sales rates, total amount, average cart value, and earnings per page view. These statistics help track traffic, engagement, and revenue to optimize funnel performance.
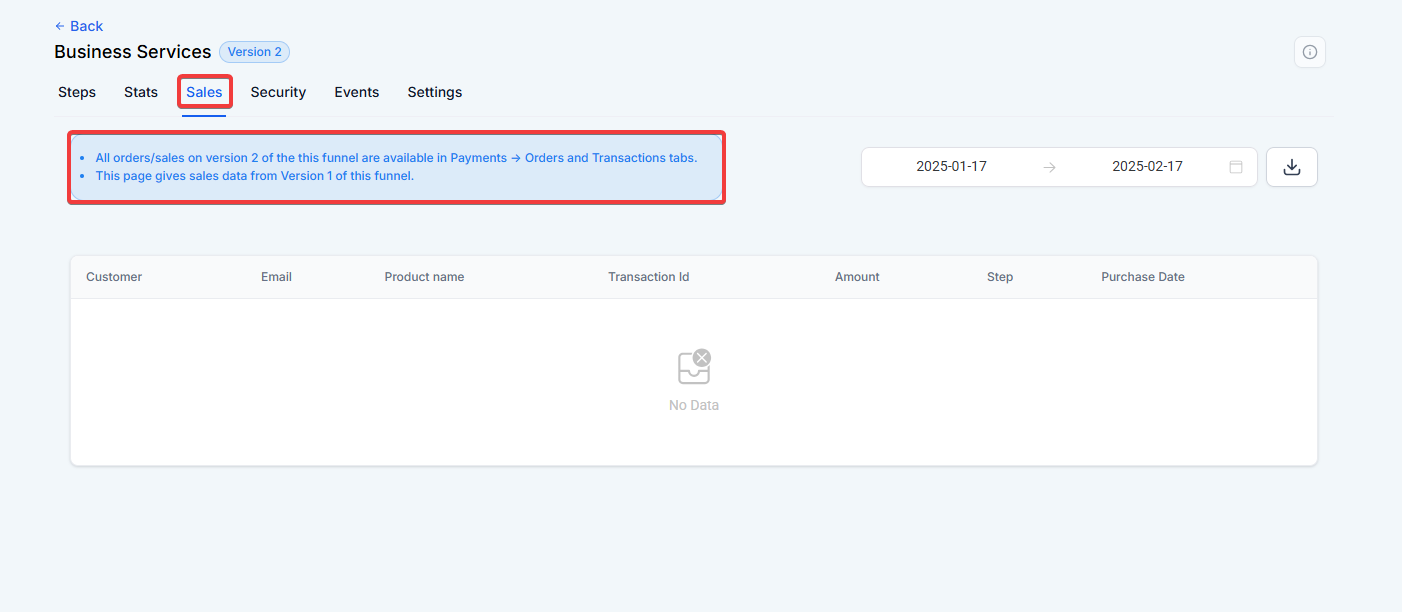
- SALES: This is depreciated, all transactions can be found in the Payments > Orders and Transactions tabs.
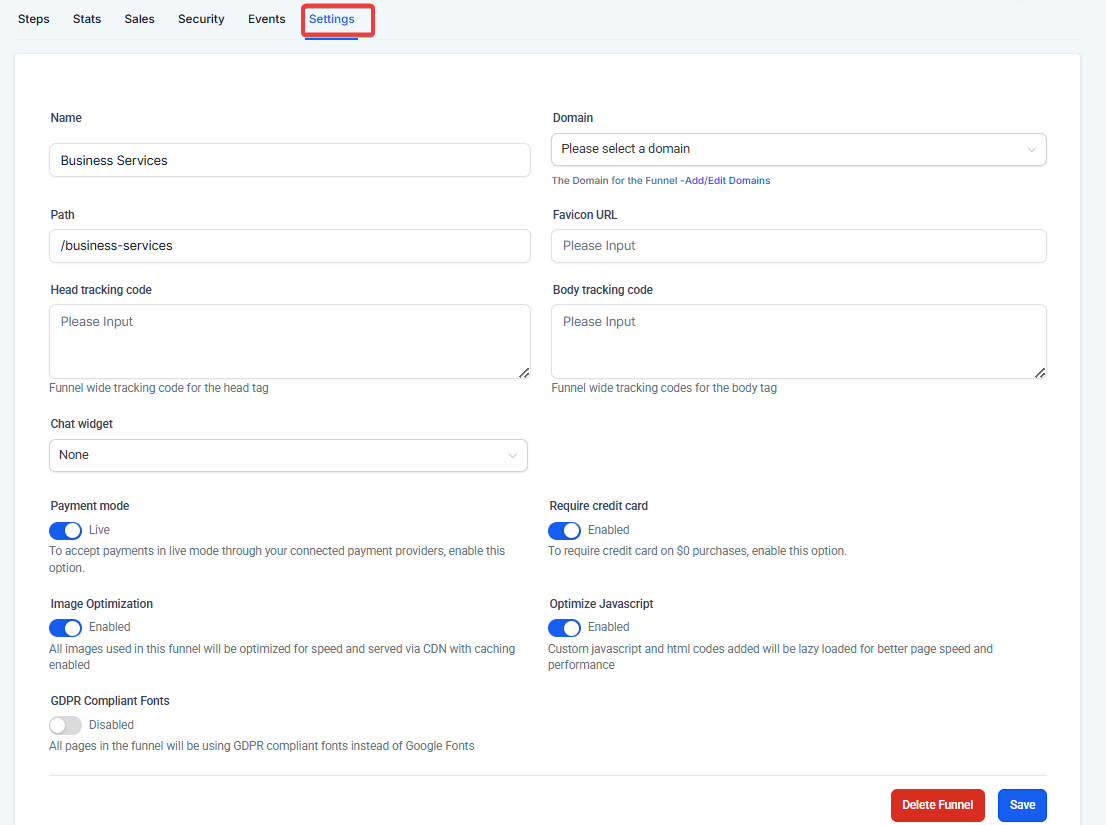
- SETTINGS: The Settings tab allows users to configure key details for their funnel, including naming the funnel, selecting a domain, setting the URL path, adding favicon URL( the small icon that shows up in the web browser tab) and head and body tracking codes(These are scripts that run on each funnel step, like analytics or other features), optimizing images and JavaScript for better performance, enabling live payment modes, and toggling GDPR-compliant fonts for enhanced data privacy compliance. Additionally, users can select or customize the chat widget to enhance customer interaction on their funnel pages.
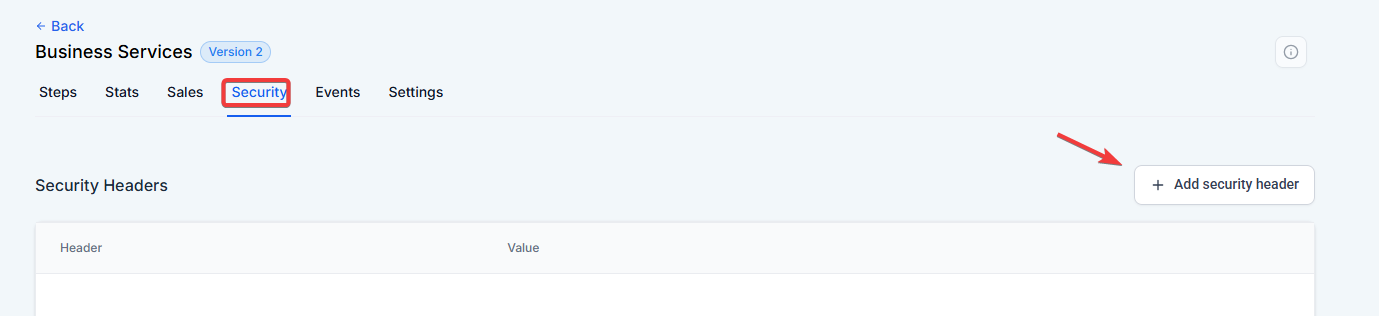
- SECURITY: The Security tab in the funnels detail page allows users to add custom security headers, such as Content-Security-Policy, to enhance protection against vulnerabilities by defining which content sources are trusted and allowed on your site.
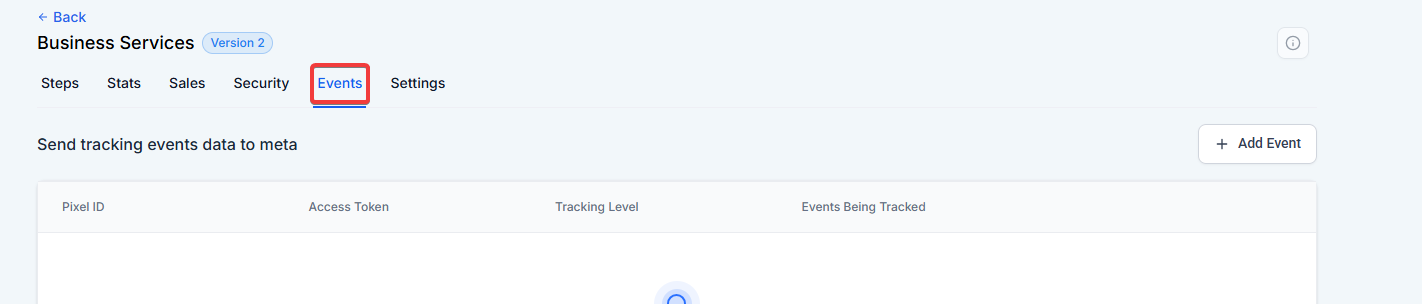
- EVENTS: The Events tab enables users to track events using both Pixel ID and Conversion API, allowing for precise event data capture, such as page views, with options to configure the Pixel ID, and Access Token, and specify the level of data sent via Meta Conversion API.
Step 2: Using the Funnel Builder To Create and Edit a Page
- Within the funnel builder, you can completely customize each step. From adding a calendar or map to choosing fonts and colors, creating pop-ups, and more, you can choose exactly what your funnel steps look like.
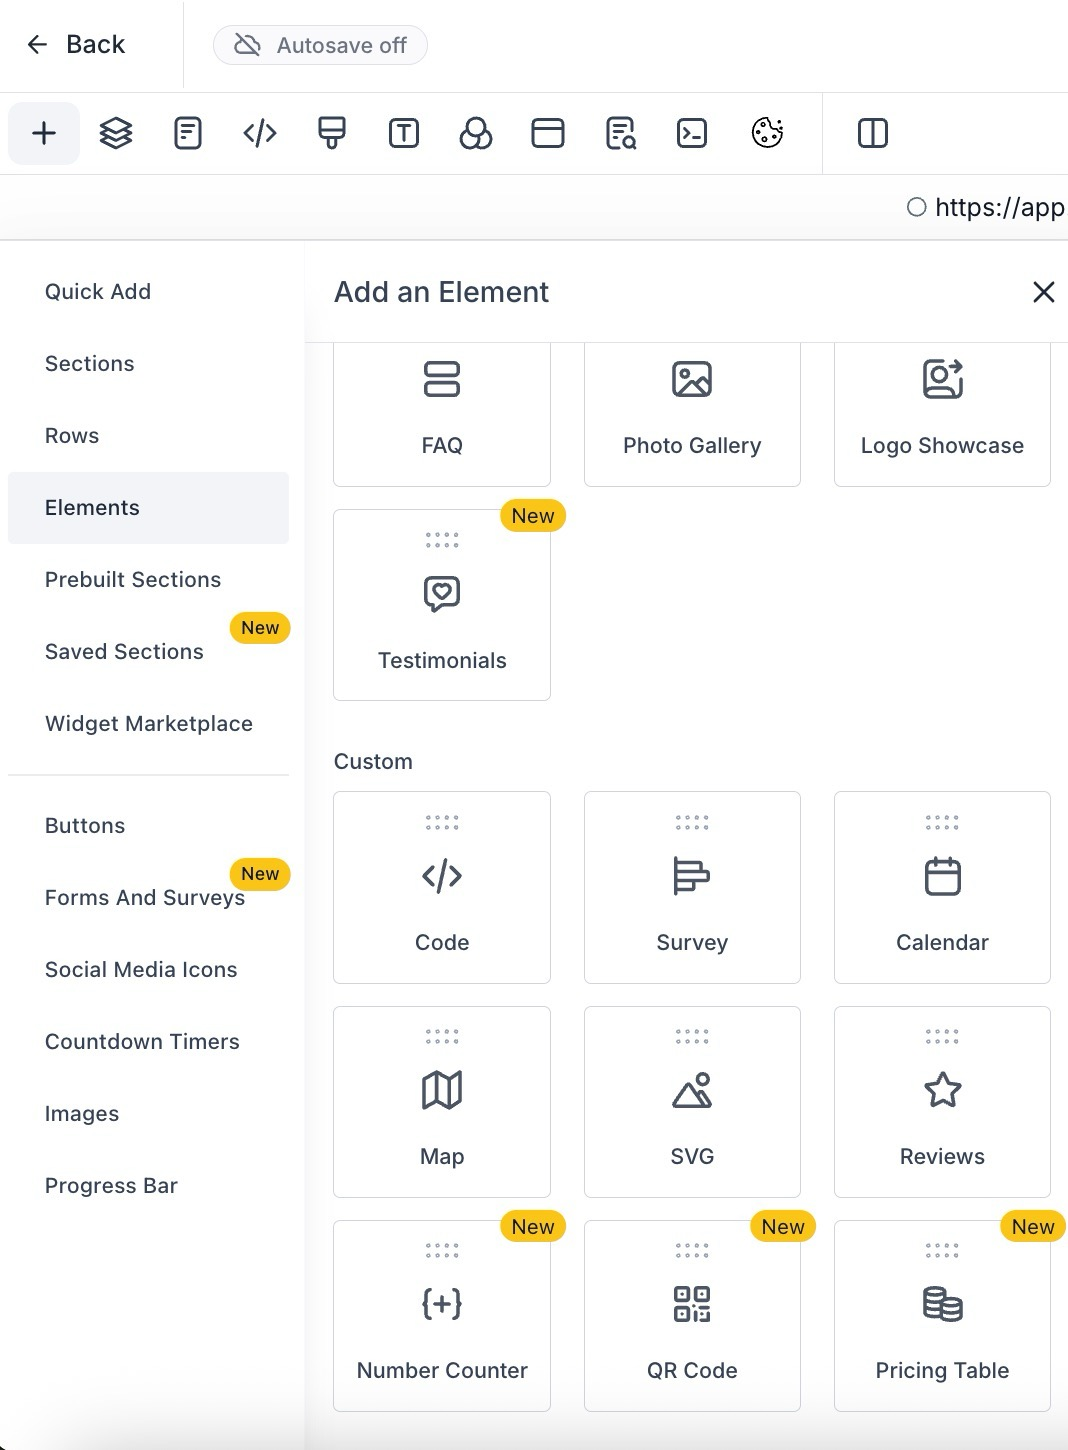
- Each page is made up of the following pieces: Sections, Rows, Columns, and Elements. They need to be created in that order. Sections can house multiple rows, rows can house multiple columns and columns can house multiple elements.
- Pre-Built Section Templates: Easily add ready-made sections like welcome, about, team, and testimonials to your project by navigating to the funnel builder, clicking the plus icon for Add Elements, and selecting from the pre-built sections.

- Use the drag-and-drop features to add sections, rows, columns, and elements to the builder, and use the edit menu on the right-hand side for each specific piece to customize it as you wish.

- To regulate font-weight for various components like text, buttons, and navigation menus in your funnels, navigate to the font-weight settings within the builder. Select either the desktop or mobile view, and choose from options like light, medium, or bold to customize the appearance of your text. Ensure any pre-marked bold text is deselected to apply the desired font weight changes.

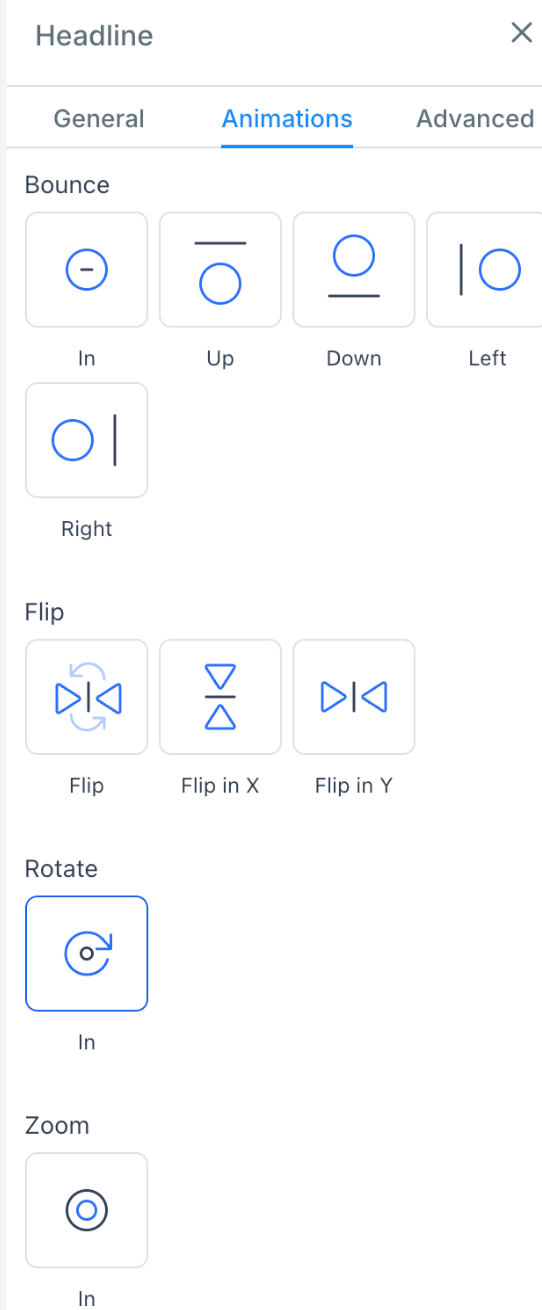
- Add dynamic animations to headings, sub-headings, paragraphs, and bullet lists, making your online content more engaging. Preview the effect directly on the builder page before saving and publishing your changes.
- Custom Field and Value Picker in Funnel Page Builder: The Custom Data Option Picker allows easy access and insertion of custom fields and values directly within the funnel page builder. This can be done either through the toolbar or by typing "{" in the text editor, making custom data tasks more efficient.


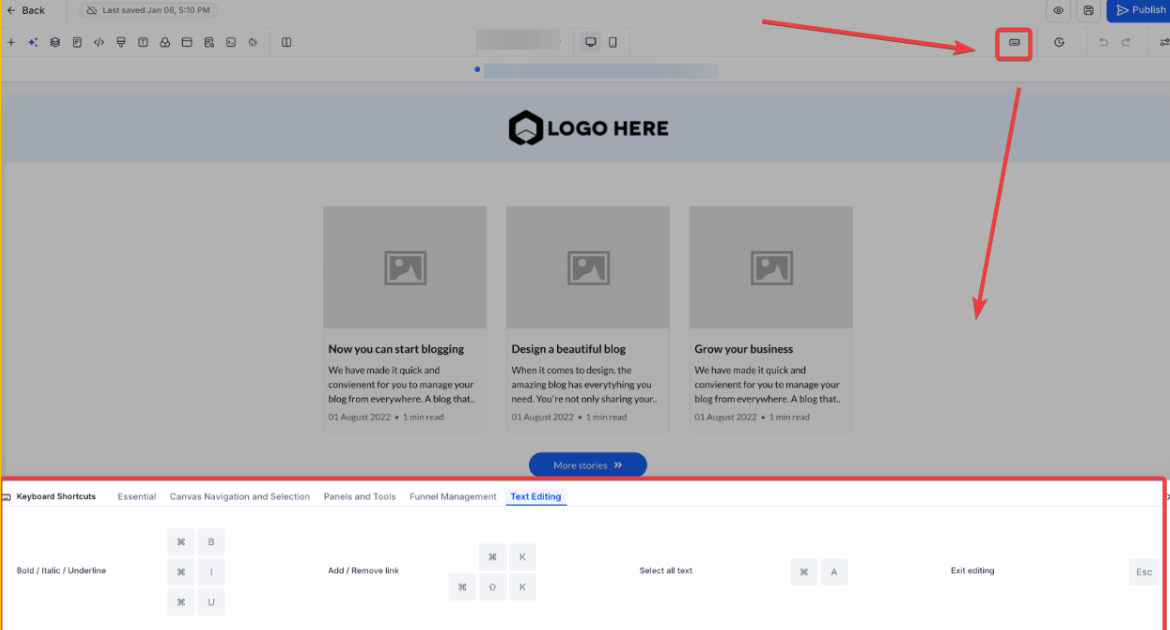
- Keyboard Shortcuts: By utilizing standardized key combinations, users can execute complex layout changes and administrative tasks with greater precision and speed. To access the full directory of commands, simply press Shift + / while inside the builder interface. Familiar commands can be used for text formatting (such as bolding or hyperlinking), while specific shortcuts allow you to save, undo, or preview your progress instantly.
Notes:
- Changes are automatically saved as you work, eliminating the need to manually click "Save" and reducing the risk of losing progress. For those who prefer manual control, the option to save manually is still available.
- A new version is saved every 10 minutes if changes are made.
- Up to 50 versions (both auto-saved and manual) can be stored per item.
- Version History allows you to view and restore previous versions of your content, providing flexibility in case you need to undo changes.
- The "Version 2" tag has been removed from funnels, as all newly created funnels now default to version 2. Only funnels still on Version 1 will display the "V1" tag.
FAQs
Question: How do I navigate to and utilize the funnel section?
Answer: To navigate to the funnel section, go to Marketing & Sales > Funnels & Pages. Here, you can view a list of your existing funnels or create a new funnel by clicking the blue button. Once you've created a funnel, you can add steps to it, which represent actual pages in your funnel.
Question: What are the key tabs available in the funnel builder, and what do they do?
Answer: The key tabs in the funnel builder include:
- STEPS: View and manage the funnel steps or pages.
- OVERVIEW: Edit or preview your funnel step.
- PRODUCTS: View the products associated with the funnel page.
- PUBLISHING: Update the step name and path (slug).
- STATS: View performance metrics, such as page views, opt-ins, sales, and earnings.
- SETTINGS: Configure funnel details like domain, URL path, favicon, tracking codes, and chat widget.
- SECURITY: Add custom security headers for enhanced site protection.
- EVENTS: Track events using Pixel ID and Meta Conversion API.
Question: How can I add and customize pre-built section templates in the funnel builder?
Answer: In the funnel builder, click on the plus icon for Add Elements and select from the pre-built sections like welcome, about, team, and testimonials. You can easily drag and drop these sections into your funnel and then customize them according to your needs.
Question: How do I regulate font weight and customize text appearance in my funnel?
Answer: In the funnel builder, navigate to the font-weight settings and select either desktop or mobile view. From there, choose from options like light, medium, or bold to customize the font weight. Ensure any pre-marked bold text is deselected to apply your desired font weight changes.
Question: What is the Custom Data Option Picker, and how can I use it in the funnel builder?
Answer: The Custom Data Option Picker allows you to easily insert custom fields and values directly within the funnel page builder. You can access it via the toolbar or by typing "{" in the text editor, streamlining the process of adding custom data to your funnel pages.
Question: Can we use QR Codes as an Element in the Funnel Builder?
Answer: Yes, we can add QR codes directly to the Funnel Builder. This feature allows us to connect visitors to any URL simply by scanning a code with their phone. The QR Code element includes tools to manage the codes without leaving the builder.
Question: Does the funnel builder save my progress automatically?
Answer: Yes, changes are automatically saved as you work, which reduces the risk of losing your progress. A new version is saved every 10 minutes if changes are made, and the system can store up to 50 versions (including both auto-saved and manual entries) per item.
Question: How do I restore a version of my funnel from two days ago?
Answer: Navigate to the Version History icon (usually a clock or list icon) in the builder’s top menu. You can view a timestamped list of up to 50 previous versions. Select the version you want to view, and if it looks correct, click Restore to make it the live version again.
Question: How do I connect my own domain to a specific funnel?
Answer: Navigate to the Settings tab within your funnel. Under the "Domain" dropdown, select the domain you have previously connected to your account. This ensures that when someone visits yourdomain.com/special-offer, they are directed specifically to the first step of that funnel.