How To Use an Image Element in the Funnel Builder
When creating funnels, using images is a crucial part of making a funnel stand out. In this article, we will cover how to utilize images and set them up correctly.
Step 1: Adding your Image Element
- Go to your funnel or website where you want to add the image.
- Inside the page editor, click on the + sign on the left to see the elements
- Search for the image element, click on it, and drag and drop it

Step 2: Editing the Image Element
- Within the funnel builder, once you’ve added an image, you’ll see “Image Settings” on the right side of the screen. There are 3 tabs - General, Themes, and Advanced. Toggle between the three sections of settings to customize the image as you wish.

- General Settings; You can name the element, edit spacing options, add background color, opacity, and alignment, select the image, edit height, width, and select an action if you need one. You can either select the image that you want to upload from the media storage or upload the URL of the image.

- Styles Settings: You can set opacity, alignment, and edit margins and paddings in the Styles Settings.
- Themes: Adding themes to images applies preset design features such as borders, drop shadows, and rounded corners. This is a quick way to customize the image element if you do not need to tweak any other settings of the theme.

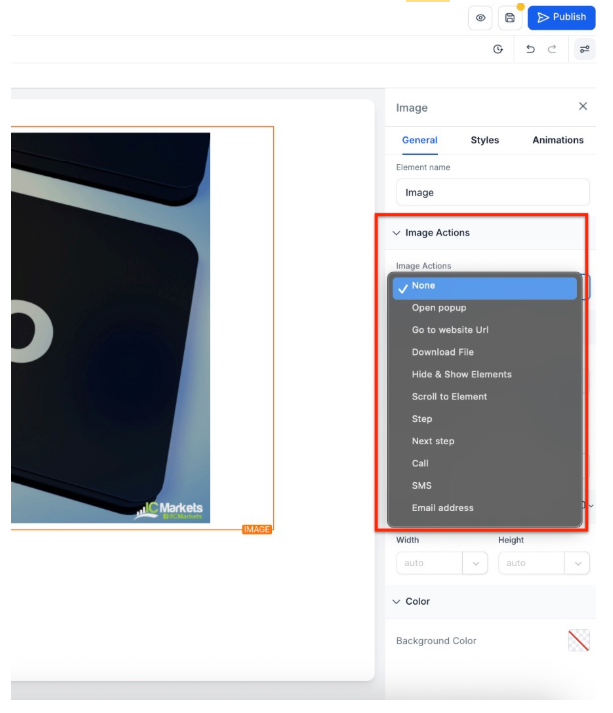
Image Actions
Simply click on an image within your funnel or website, and the image action options will appear in the image settings panel. These allow you to interact with your images in dynamic way
- Styles Settings: Here you can edit, shadow, visibility, and custom class
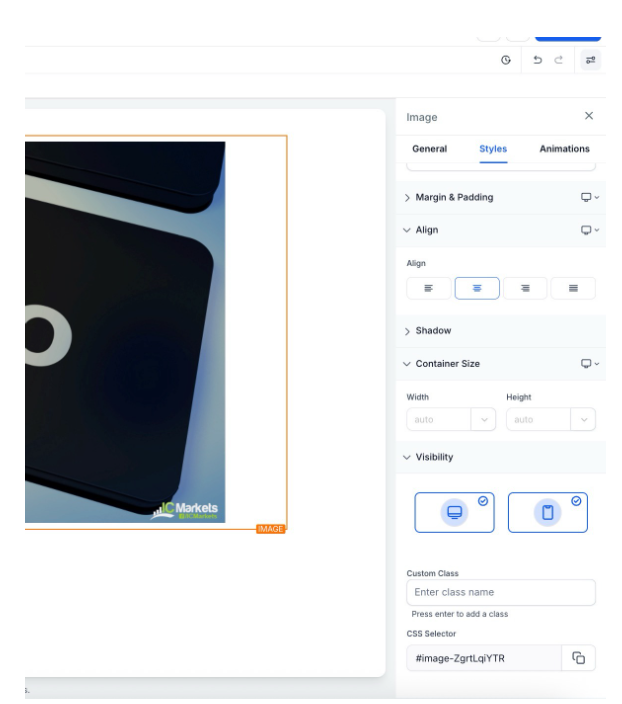
Image Editing Support for Mobile View
This enhances image editing for mobile views within your websites and funnels, allowing precise control over image dimensions for optimal responsiveness. You can adjust height and width for mobile screens, using units like pixels, rem, em, or percentage, ensuring your visuals look sharp across all devices.
To use this feature
- Switch to the mobile view in your builder,
- Select an image,
- Adjust its dimensions as needed.
FAQ
Question: How do I add an image element to my funnel or website?
Answer: To add an image element:
- Go to the funnel or website where you want to add the image.
- In the page editor, click the + sign on the left to view available elements.
- Search for the image element, then click, drag, and drop it onto your page.
Question: How do I edit an image element once it’s added?
Answer: Add Image: In the page editor, click the + sign, drag and drop the image element.
Edit Image: Use the Image Settings panel with 3 tabs:
- General: Name the element, set the background, size, and action.
- Styles: Adjust opacity, alignment, margins, and shadows.
- Themes: Apply quick design features like borders and rounded corners.
Image Actions: Click the image to add interactive actions.
Mobile Editing: Adjust image size for mobile screens using units like pixels or percentages.
Question: What options are available under General Settings for images?
Answer: Under General Settings, you can:
- Name the image element
-
Add a background color
Align the image
- Select and adjust the image’s height and width
- Set an action for the image if required
Question: Can I assign actions to images?
Answer: Yes. You can link images to external pages, trigger popups, or perform other interactive actions using the Action setting in General Settings.
Question: How can I ensure my images look correct on mobile devices?
Answer: You can use the "Image Editing Support for Mobile View" feature. Switch to the mobile view in the builder, select your image, and adjust the height and width using units like pixels, rem, em, or percentages to ensure the visual is responsive and sharp.
Question: What is the best file format to use for my funnel images?
Answer: For photos, JPG is generally best for small file sizes. For graphics with transparency (like logos), use PNG. If you want the absolute best performance, use WebP, which offers high quality at much smaller file sizes than JPG, helping your pages load faster.
Question: What are the three specific tabs available in the Image Settings panel?
Answer: When you select an image element, the right-hand panel organizes settings into three distinct areas: General, Themes, and Advanced. You can toggle between these to find specific customization options.
Question: Can I use an image to open a popup or a specific website?
Answer: Yes. In the General Settings tab under "Image Actions," you can choose what happens when a visitor clicks the image. Options include opening a URL, scrolling to a specific section on the page, opening the Popup, or even initiating a phone call.