How To Setup Drip Content for Categories & Subcategories in Products
This article will walk you through the steps to set up drip content for subcategories in the Products area of your system.
Step 1: Navigate to Your Products > Courses > From the dropdown select Products
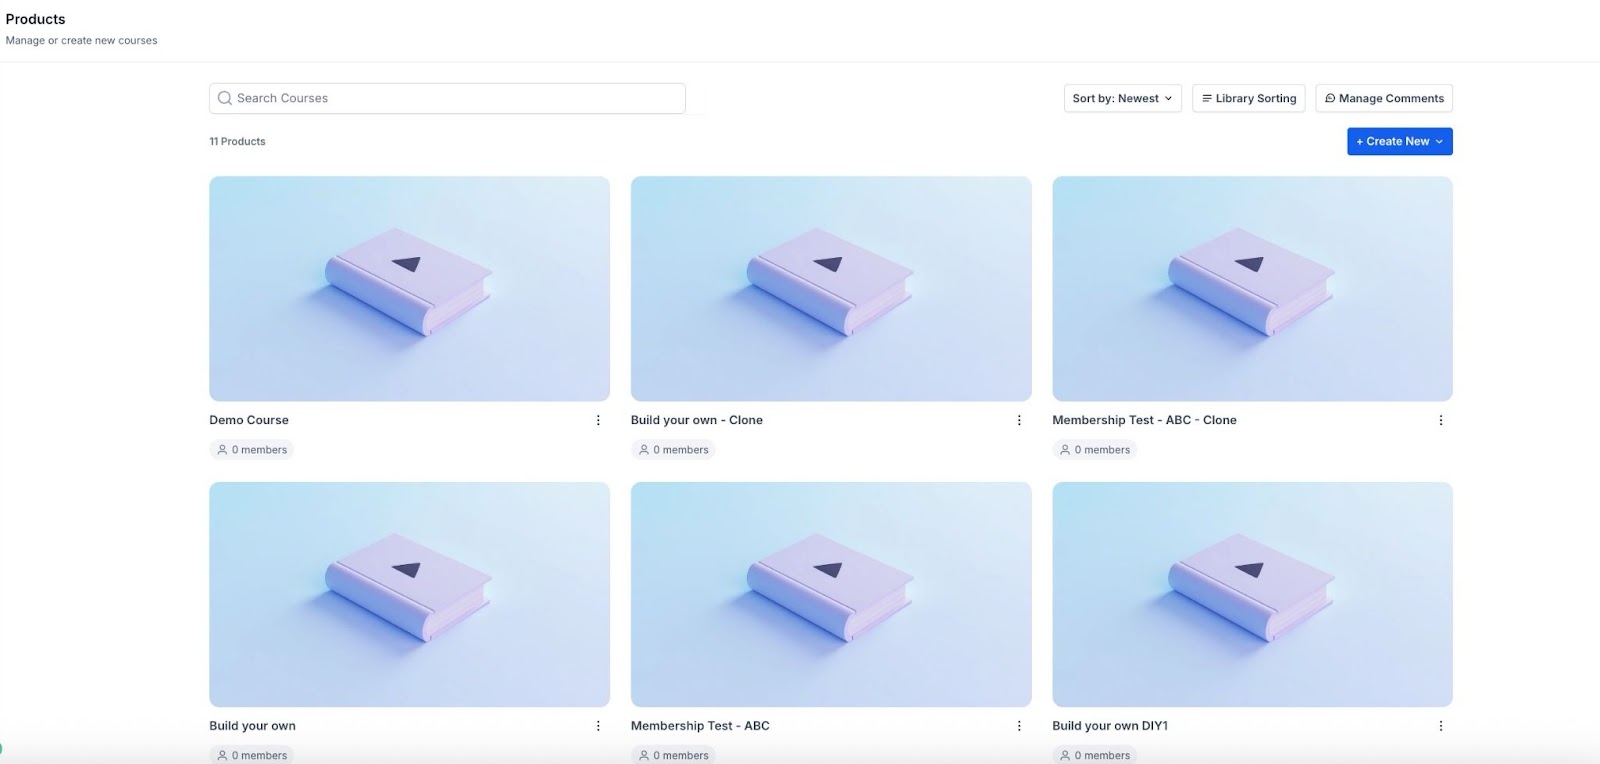
Step 2: Click on a particular product.
Step 3: Click the + Add Content to the category, and choose "Add Sub-Module" from the dropdown menu.
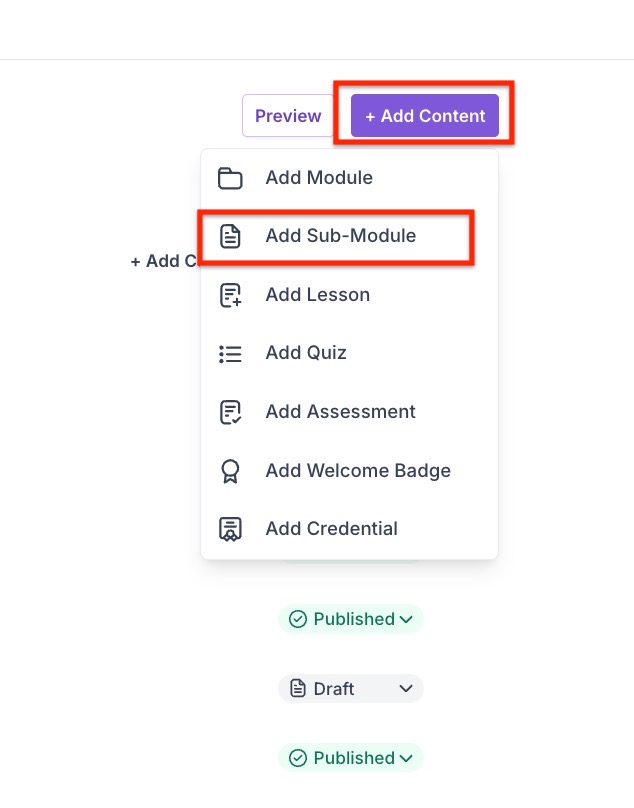
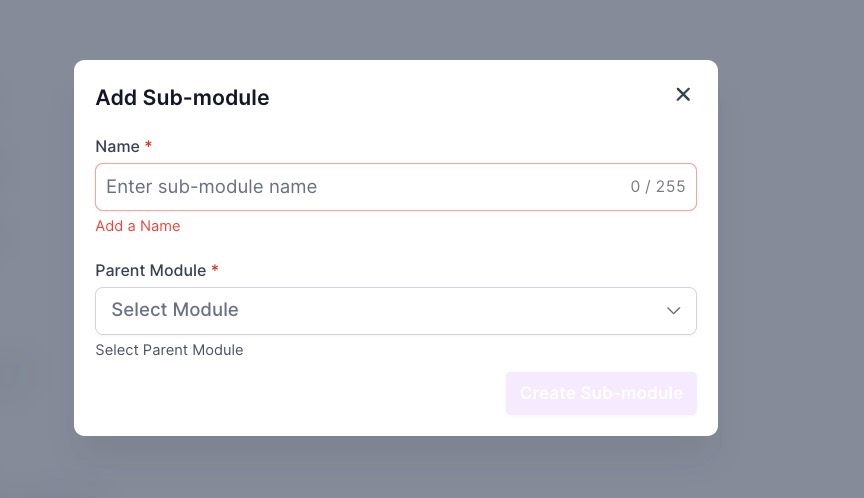
Step 4: Click and drag the posts/videos to move them between the sub-categories
Step 5: Click the folder icon on the right of a post/video to configure the drip feature.
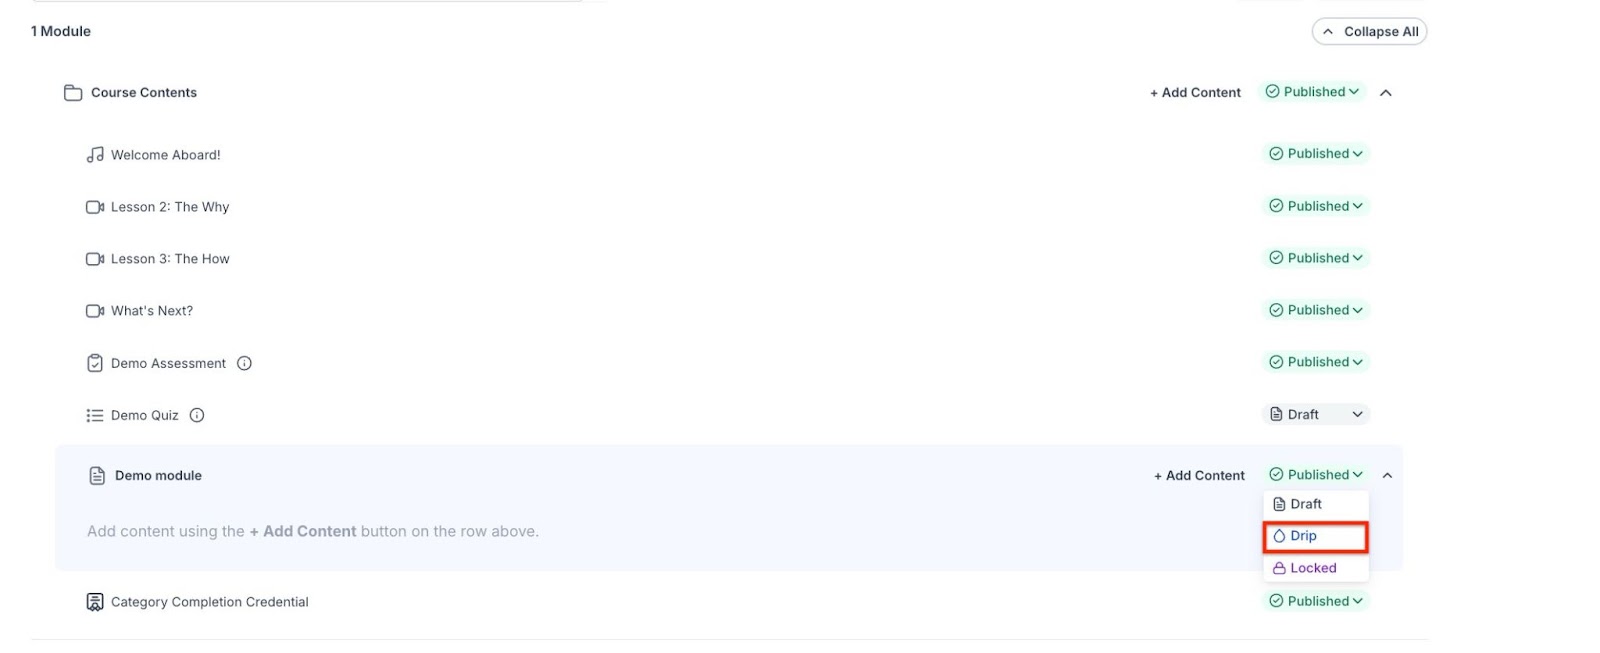
Step 6: Enter the number of days in the "Configure Drip Settings" window that pops up. (For example, if you want weekly drips, set each subcategory for 7, 14, 21, etc. days.)
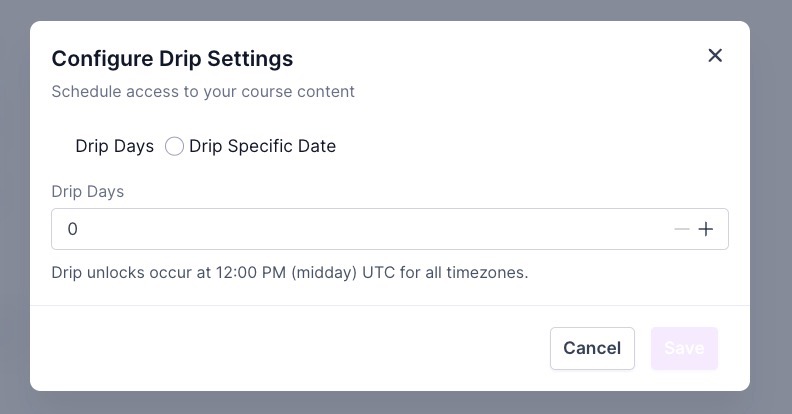
Drip Dates & Library Sorting for Courses
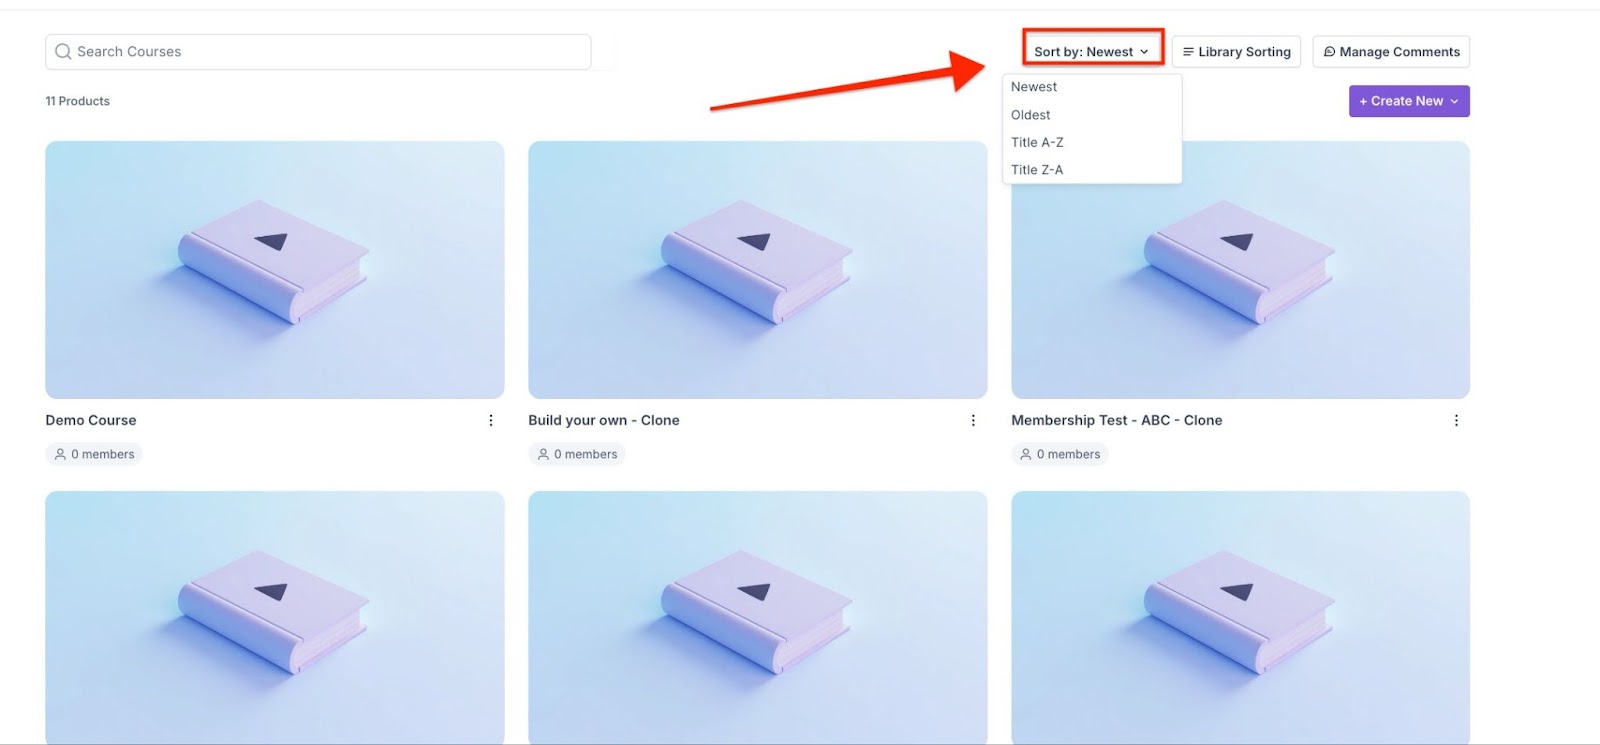
Course creators can schedule lessons to be released on fixed dates, ensuring a synchronized learning experience for all students. Additionally, the course library includes sorting options, making it easier to find and manage courses efficiently.
How to Use:
- Drip Dates: Set exact release dates within course settings for timely content availability.
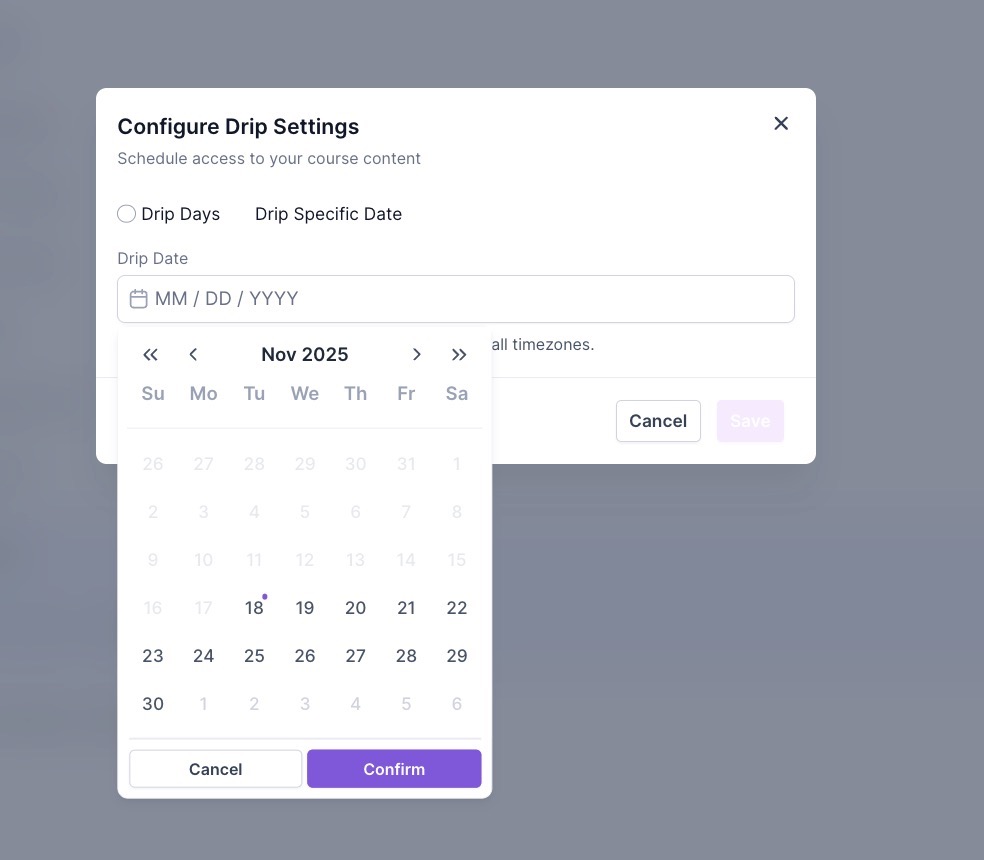

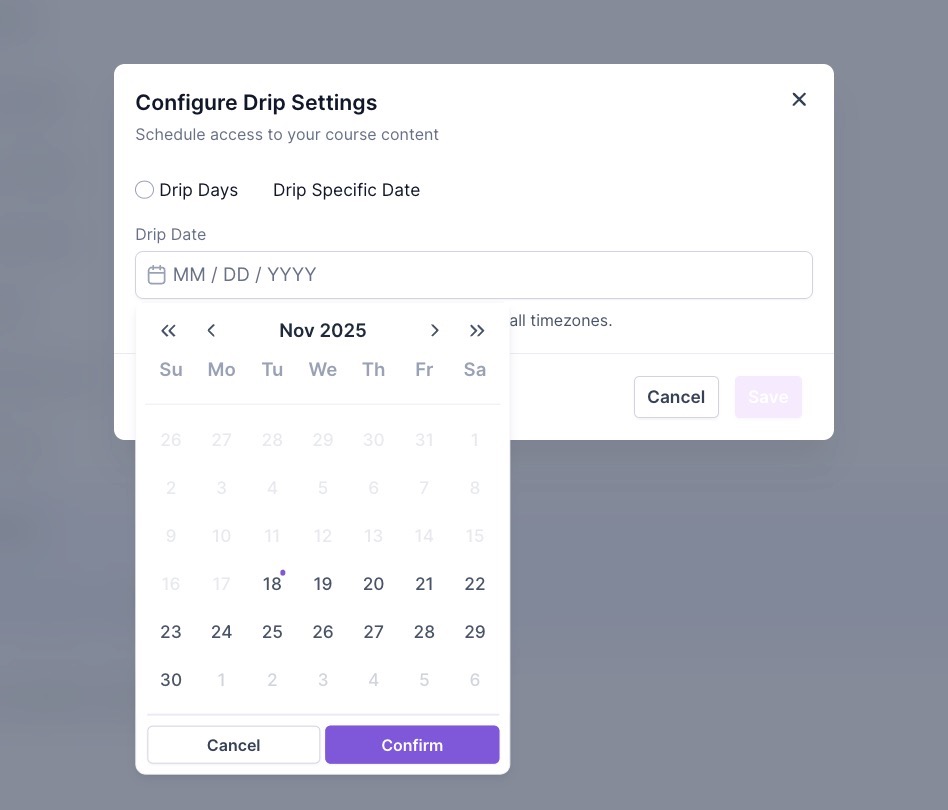
- Library Sorting: Use the sorting feature to filter and organize courses quickly.
FAQ
Question: What is drip content, and why should I use it?
Answer: Drip content is a method of releasing content gradually over time. By setting up drip content for subcategories, you can control when users gain access to specific posts or videos, helping to keep them engaged and ensuring a steady flow of information.
Question: How do I access the area to set up drip content?
Answer: To set up drip content for subcategories:
- Navigate to Membership > Courses > Products.
- Select the specific product where you want to set up the drip content.
Question: How do I assign posts or videos to subcategories?
Answer: You can click and drag posts or videos between subcategories to organize your content efficiently.
Question: How do I configure the drip settings for a post or video?
Answer: To configure the drip settings for a post or video, click the folder icon next to the post/video in the subcategory. In the "Configure Drip Settings" window that pops up, enter the number of days for the drip. For example, to set weekly drips, input 7, 14, 21, etc., to specify when the content will be released.
Question: Can I move existing lessons into different subcategories?
Answer: Yes. You can easily organize your course by clicking and dragging posts or videos to move them between different categories or the newly created sub-modules.
