How to Create a Private Community in the Business Hub
Follow these steps to set up a private space for your members:
- Log in to your Mastermind.com account.
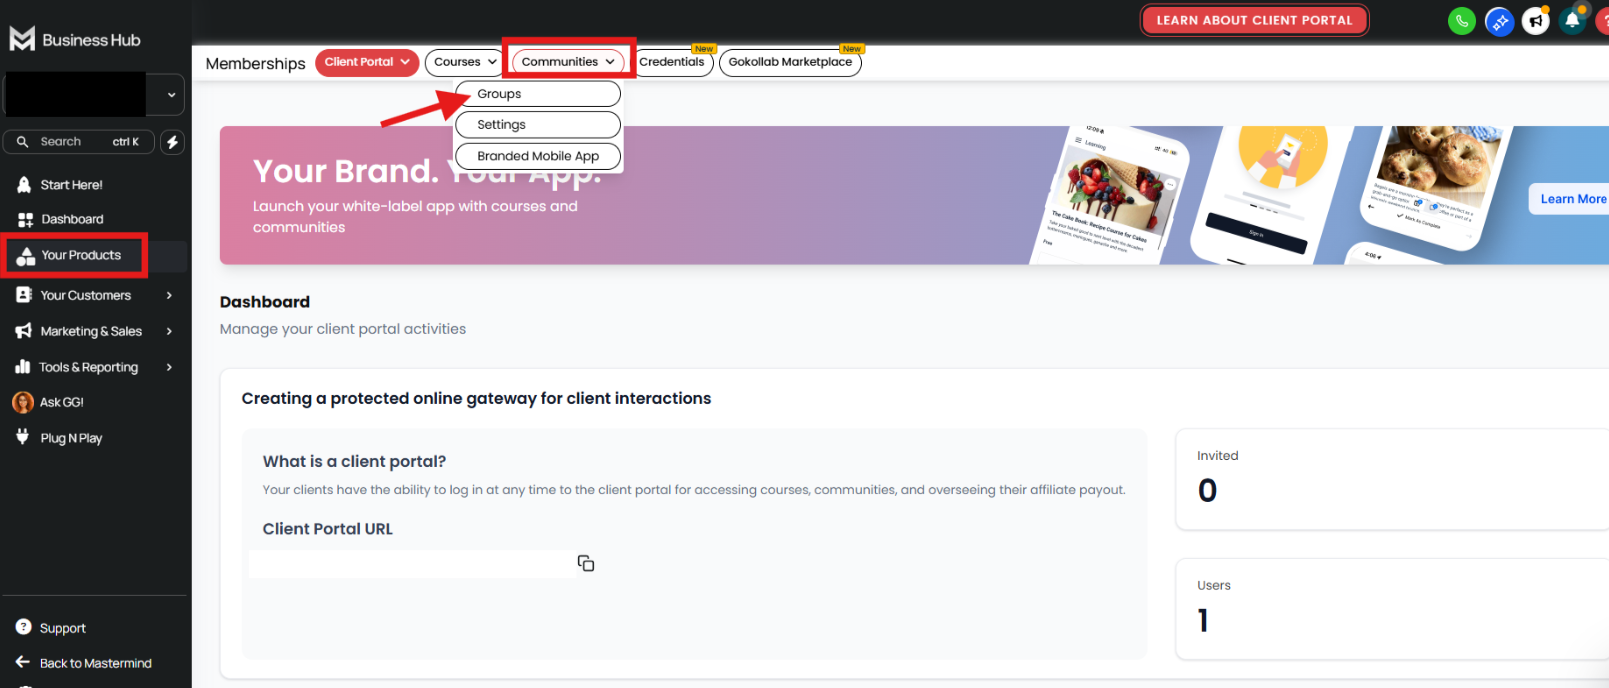
- Navigate to the Business Hub tab.
- In the left side navigation menu, click Your Products.
-
At the top toolbar, hover over Communities and select Groups.

-
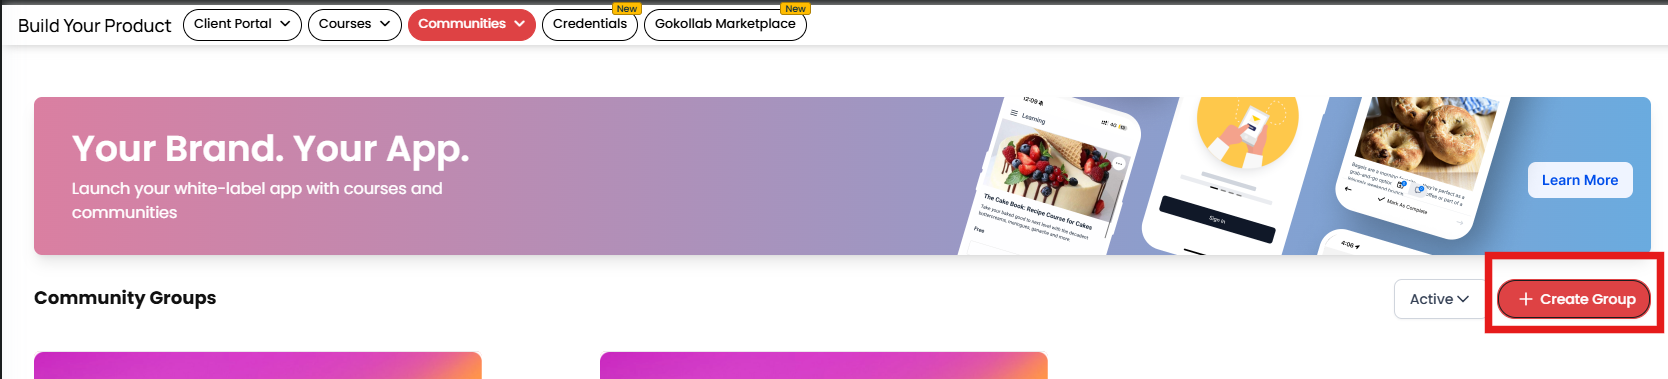
Click the + Create Group button in the top right corner.
-
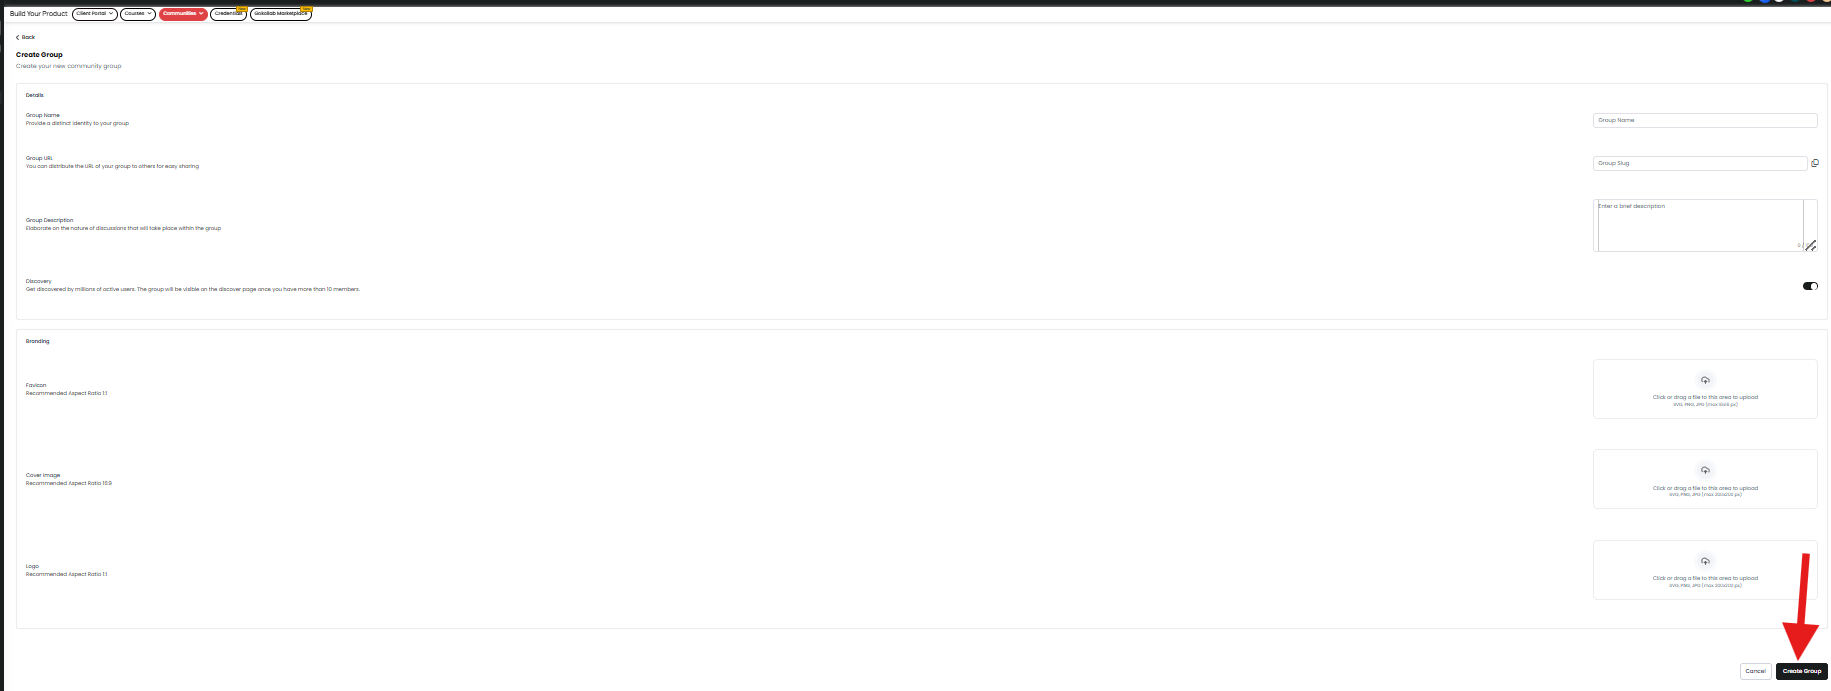
Fill out and review all the required fields for your new group. Once ready, click Create Group at the bottom right.
- You will be brought directly to your newly created group.
-
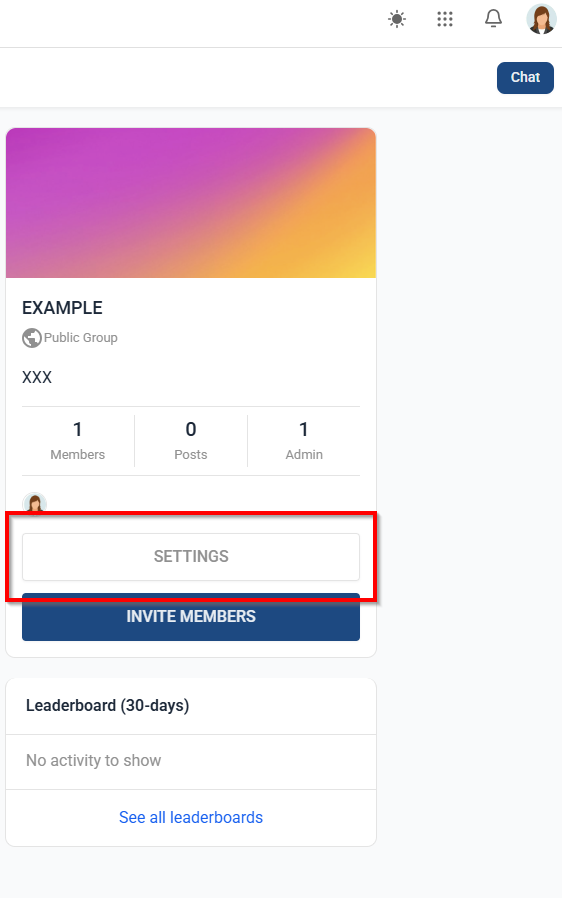
Inside the group, click the SETTINGS button on the right side panel.


-
In the Details tab, choose whether the group will be Public or Private.
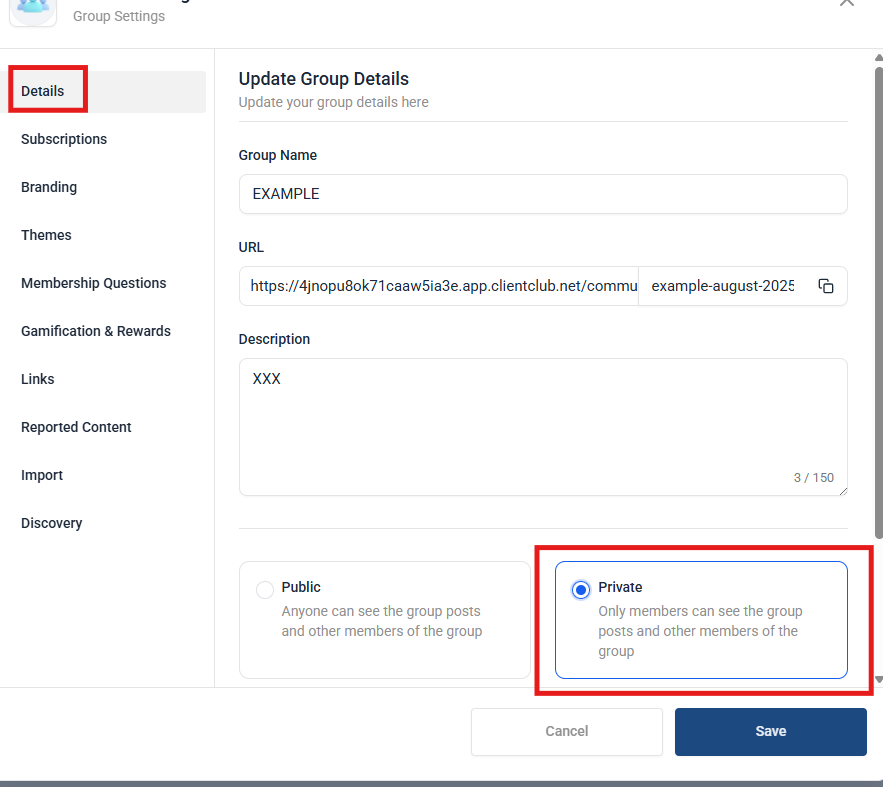
- Click Save to finalize your settings.

FAQ:
- Why should I create a private community for my audience?
- Build deeper relationships with your audience.
- Share exclusive content without competing for attention in an algorithm-driven feed.
- Foster trust and brand loyalty.
- Gather direct feedback to improve your offers.
-
Create a safe, distraction-free space where members feel comfortable participating.
- What’s the difference between a private community and a social media group?
- Has no ads.
- Gives you full member contact info.
- Offers better customization (branding, structure, resources).
- Integrates with your website, courses, or events.
- How do I keep people engaged in a private community?
- Post consistent, valuable content.
- Run Q&A sessions or live calls.
- Create themed discussion days.
- Highlight and celebrate member wins.
- Offer exclusive perks (downloads, templates, discounts).
- Encourage peer-to-peer sharing, not just top-down content.
- Should my community be free or paid?
This is completely up to you and your personal preference.
- Free communities are easier to grow quickly but may have lower engagement.
- Paid communities attract people who are invested and committed to participating.
- You can also create multiple community groups, or create private channels within community groups.
- How do I protect my content in a private community?
There are several options for protecting your contend within your community:
- Set your community to private within the Group Settings as shown above.
- Have clear terms of use prohibiting content sharing outside the community.
- Watermark downloadable content if necessary.
- While you can’t prevent all leaks, a well-structured community with a culture of respect greatly reduces the risk.
- How do I promote my private community to my audience?
Promoting your community is a fun way to share its value and attract the right members.
- Showcase the benefits, not just the features (“Learn directly from me,” “Get behind-the-scenes updates,” “Connect with like-minded entrepreneurs”).
- Use scarcity or exclusivity (“Only 50 spots this month”).
- Offer a free trial or short-term open enrollment.
- Share testimonials from members about how the community helped them.
- What’s the best way to share a private space, webpages or events with my members?
The easiest and most secure way to share private content is to create a private community for your members. Here’s how it works:
- Set up a private community group inside of the Hub following the steps above. Only members you add can access it.
- Add your private links (webpages, resources, videos, documents, or dashboards) directly into a community post. This way, everything is centralized and easy to find.
-
Create events in your community calendar that only your members can see. You can include:
- Zoom or other livestream links
- Event descriptions and agendas